

3D Nail Art Secrets That Will Turn Your Manicure Into A Tiny Sculpture
The first time a client asked me to recreate a fully sculpted 3D flower on her ring finger, I remember standing there for a second just staring at the reference photo, trying to figure out how on earth that tiny raised petal was actually attached to the nail. That was years ago now, and since then 3D nail art has become one of the most requested and honestly one of the most enjoyable parts of my job. There is something genuinely satisfying about building something with actual height and texture on a surface as small as a fingernail.
I want to be upfront about something before we get into the details. A lot of what gets written about 3D nail art online barely scratches the surface, usually a vague list of design ideas with no real explanation of how any of it is actually done. I looked through a good chunk of what currently ranks for this topic while putting this guide together, and most of it reads like filler, generic design names with no technique, no honest talk about what is actually hard to do, and almost nothing about what happens when things go wrong. That is exactly the gap I want to fill here.
This guide covers everything I genuinely think matters if you want to understand 3D nail art properly, whether you are a nail artist wanting to add this skill to your service menu or someone who simply wants to try it at home for the first time. We will go through materials, techniques, specific design styles, nail shape considerations, aftercare, removal, common mistakes and a lot more, all based on real work I have done in the chair rather than recycled generic advice.
Also Read : Gel Nail Art Mastery: The Ultimate Guide To Flawless, Long Lasting Designs That Actually Hold Up
What 3D Nail Art Actually Is And Why It Looks So Different From Regular Nail Art
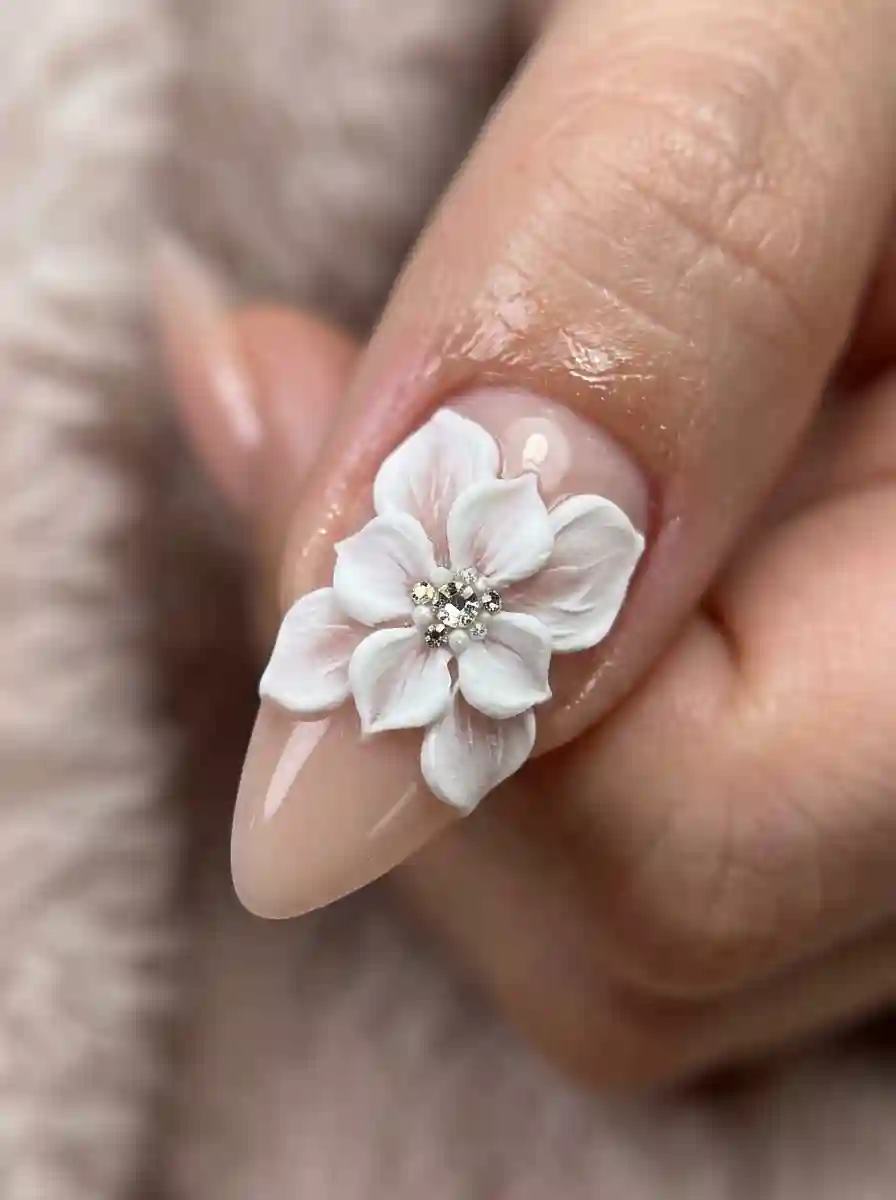
Regular nail art, no matter how detailed, stays flat against the surface of the nail. You can paint an incredibly realistic rose using thin layers of polish, but it will always read as a flat image rather than something with actual physical depth. 3D nail art is different because the design genuinely sits above the nail surface, with real height, shadow and texture that you can feel with your fingertip, not just see.
This is the part that trips people up the most when they first try 3D nail art. It is not simply about painting something that looks three dimensional through shading and highlights, though that technique, often called 3D illusion art, does exist and overlaps with this category. True 3D nail art involves sculpting, building and attaching physical material onto the nail itself, using products specifically designed to hold their shape once cured or dried.
The reason 3D nail art photographs and reads so differently in person compared to flat nail art comes down to how light interacts with the raised surface. A sculpted petal catches light on its curved edge and casts a tiny shadow beneath it, creating genuine depth that a photograph of a flat painted flower simply cannot replicate, no matter how skilled the artist is at shading.
My Personal Journey Learning 3D Nail Art Behind The Chair
Learning 3D nail art was honestly one of the more humbling parts of building up my skill set as a nail technician. My early attempts at sculpted flowers looked lumpy and uneven, nothing like the clean, delicate petals I was trying to copy from reference photos. It took a lot of practice on nail tips before I felt comfortable attempting anything directly on a client’s actual nail.
What eventually clicked for me was understanding that 3D nail art is really more sculpture than painting, even though most nail technicians come from a painting and polish background first. The mindset shift matters. You are not applying color, you are building a tiny physical structure, layer by layer, and that structure needs to be strong enough to survive someone using their hands all day without snapping off at the base.
Over the years, 3D nail art has become one of my signature offerings, something clients specifically travel to my studio for rather than picking whatever nail salon happens to be closest. That reputation did not come overnight. It came from a lot of failed petals, cracked acrylic cubes and gel sculptures that slid right off the nail before they had a chance to cure properly.
The Core Materials Used In 3D Nail Art
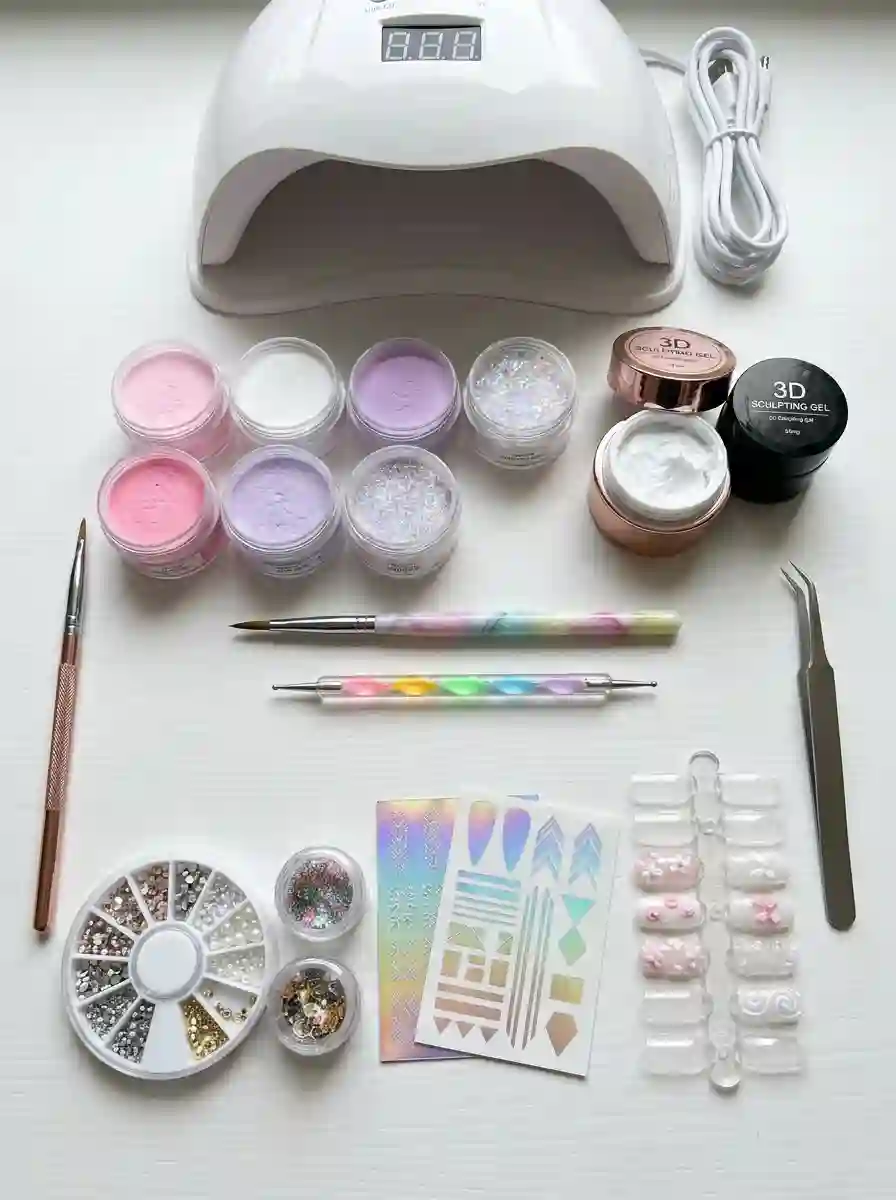
Understanding the materials is really the foundation of learning 3D nail art properly, since different products behave completely differently once you start trying to sculpt or build with them. Most of the generic articles floating around online mention acrylic and gel in passing without really explaining what makes each one suitable for different kinds of 3D work.
Acrylic powder and liquid monomer remain one of the most traditional ways to create 3D nail art, particularly for designs that need real structural strength, like raised flowers, bows or geometric shapes. Acrylic hardens through a chemical reaction rather than needing a UV or LED lamp, which gives you a bit more working time to shape the material before it sets, though it also means you need to work relatively quickly once the mixture reaches the right consistency.
Sculpting gel, sometimes called 3D gel or builder gel with a thicker consistency, has become increasingly popular for 3D nail art because it offers a bit more control for beginners. Since it only hardens once cured under a lamp, you have significantly more time to shape, smooth and perfect your design before committing to the final cure. This makes sculpting gel particularly forgiving for anyone newer to this type of work.
Must Read : Tropical Nail Art: 20 Ideas, Step-by-Step Tutorials and Pro Tips for a Vacation Manicure
Acrylic Versus Gel For 3D Nail Art
Acrylic tends to dry harder and holds extremely fine detail well, which makes it ideal for delicate elements like thin flower petals or sharp geometric edges. Gel offers more working time and a slightly softer, more flexible final texture, which some nail artists prefer for larger, bolder 3D elements that need a bit of give rather than complete rigidity.
Beyond acrylic and gel, a full 3D nail art toolkit typically includes a few other essential items. Nail vinyls and stencils help create precise, repeatable shapes for anyone who struggles with freehand symmetry. Rhinestones, pearls, metal studs and caviar beads add dimension without requiring any actual sculpting skill, simply by attaching pre made embellishments to the nail using strong nail glue or gel. A good quality detail brush and a dual ended dotting tool round out the essentials, letting you shape small details and add precise dots or lines wherever needed.
Step By Step: How 3D Nail Art Is Actually Created
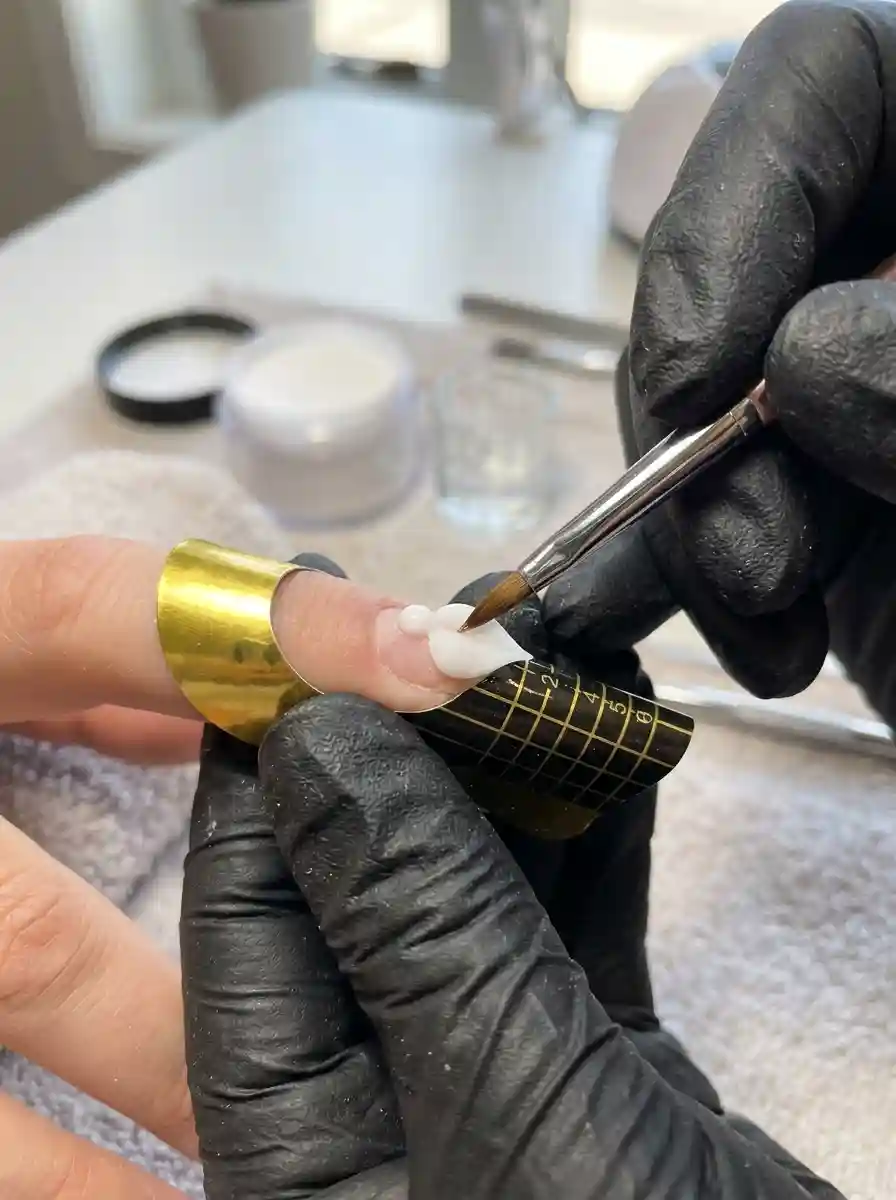
One thing almost none of the articles I looked at actually explain properly is the real process behind creating 3D nail art, beyond vague instructions like apply the gel and shape it. Here is how this actually works in my chair, broken down into the stages that matter.
Everything starts with proper nail preparation, exactly the same way any manicure should begin. The natural nail gets cleaned, shaped and lightly buffed to remove shine, since any 3D elements you build need a properly prepped surface to actually bond to. Skipping this step is one of the fastest ways to end up with 3D nail art that pops off within a day or two of wear.
Next comes the base, which is usually a standard gel or acrylic color application, giving you the backdrop your 3D element will eventually sit on top of. Once that base is fully cured or dried, that is when the actual sculpting begins. For acrylic 3D work, you dip your brush into liquid monomer, then into acrylic powder, forming a small bead of product at the brush tip that you then shape directly onto the nail before it hardens. For gel based 3D work, you apply an uncured bead of sculpting gel onto the nail, then use a brush or sculpting tool to shape it into your desired form before curing it under a lamp.
Building Layers For Added Depth
For more elaborate 3D nail art, a single layer of product often is not enough to achieve real depth. I frequently build designs in multiple stages, curing or drying each layer before adding the next, which allows for things like overlapping flower petals or raised geometric shapes that genuinely stand apart from the nail surface rather than just sitting slightly above it.
Once the sculpted element reaches the shape and size you want, additional detail work usually follows, whether that means hand painting fine lines onto a petal, adding a tiny rhinestone center or applying a bit of shimmer powder to catch the light. A final sealing topcoat locks everything in place and protects the raised design from catching on fabric or everyday wear.
Popular 3D Nail Art Designs Worth Trying
Most generic articles about 3D nail art simply list a handful of design names without any real explanation of what makes each style distinct or why someone might choose one over another. I want to go deeper here, based on what I have actually created in my own studio.
3D Floral Nail Art
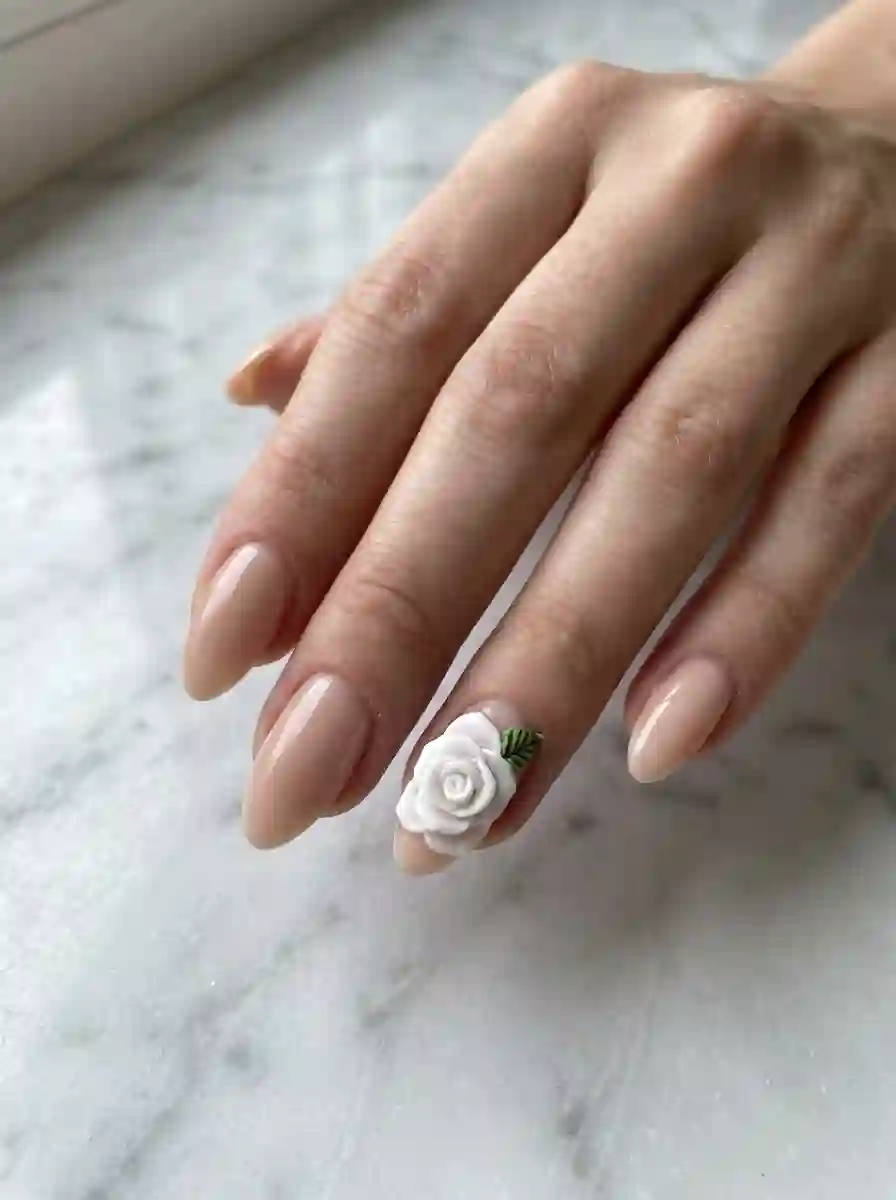
Floral designs remain the single most requested category within 3D nail art, and honestly I understand why. Flowers translate beautifully into a sculpted format, since real petals already have natural curves and layered structure that works perfectly with acrylic or gel sculpting. A classic 3D rose involves building a small central bud first, then adding progressively larger petals around it, slightly overlapping each one to mimic how a real flower opens.
Smaller, simpler flowers, like a basic five petal daisy shape, work beautifully for beginners, since each petal can be shaped individually without needing the layered buildup a full rose requires. I often suggest clients start here if they are curious about trying 3D nail art for the first time, since the forgiving shape allows for a bit of imperfection without looking obviously off.
Read Must : String Nail Art: The Delicate Lace Effect Technique Every Nail Lover Needs To Try
Geometric 3D Nail Art
Geometric designs offer a completely different aesthetic within 3D nail art, leaning into clean lines, sharp angles and a more modern, architectural feel compared to the softness of floral work. Raised cubes, triangles and linear patterns all fall into this category, often created using acrylic for its ability to hold a crisp, defined edge once hardened.
I personally love geometric 3D nail art for clients who want something bold and eye catching without necessarily wanting a literal picture like a flower or an animal on their nails. The visual trickery of a raised cube design, which plays with light and shadow to create an almost optical illusion effect, consistently gets attention whenever I post these sets.
3D Bow Nail Art
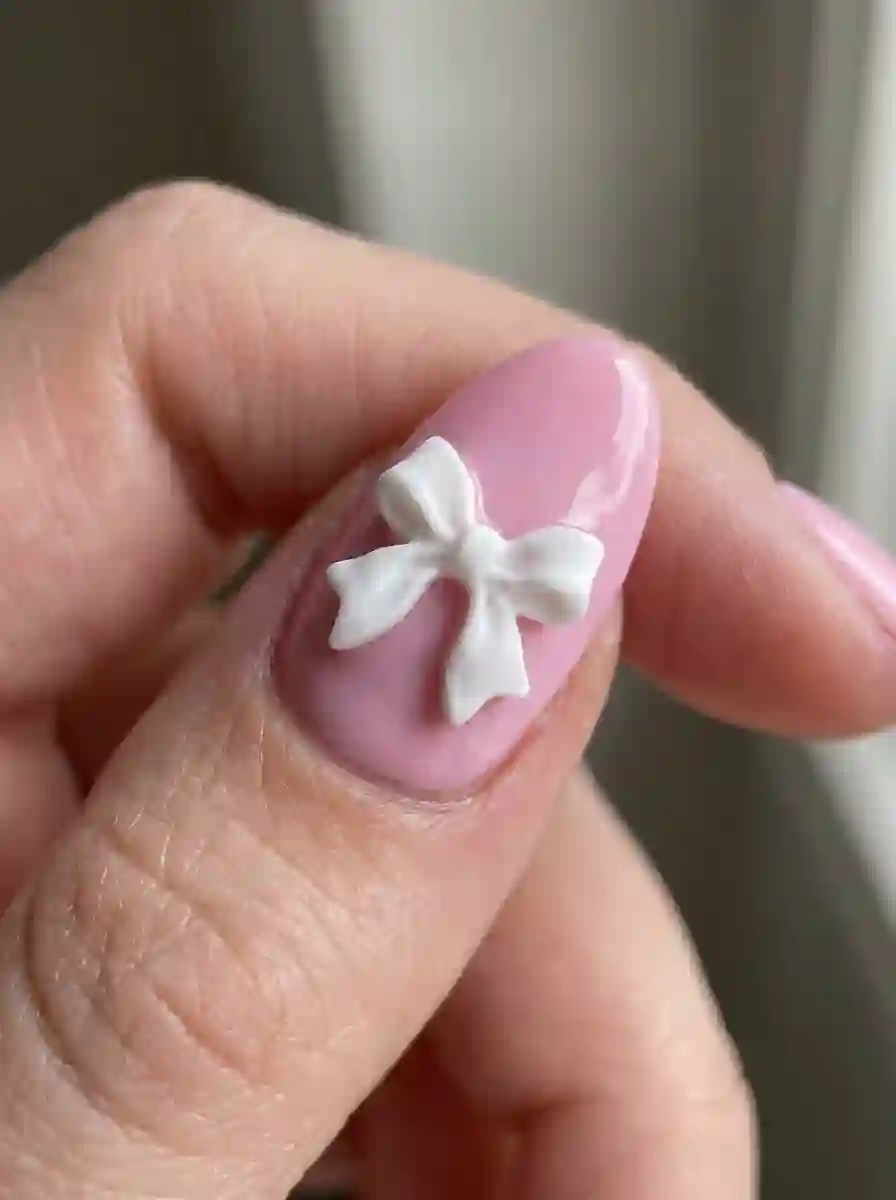
Bows have become a genuinely popular request within 3D nail art, particularly among clients drawn to a softer, more feminine aesthetic. Sculpting a convincing bow requires shaping two symmetrical loops along with a small center knot piece, which then gets attached once each individual component has set up properly.
This particular design tends to be trickier than it looks, mostly because achieving symmetry between the two loops takes practice. I usually recommend practicing bow shapes on a nail tip or practice form before attempting one directly on a client’s nail, since the structure needs to look balanced from multiple angles.
Celestial And Abstract 3D Nail Art
Celestial themes, including raised moons, stars and swirling cosmic patterns, have grown significantly in popularity within 3D nail art over recent years. These designs often combine sculpted elements with shimmer powders, chrome pigments or holographic glitter to create a genuinely otherworldly effect that photographs beautifully under different lighting.
Abstract 3D nail art gives the most creative freedom of any style, since there is no specific shape you are trying to replicate accurately. I often use this category to experiment with new techniques, combining raised swirls, dots and irregular shapes in ways that would look strange on a literal design like a flower but work beautifully within an abstract composition.
Embellished 3D Nail Art With Rhinestones And Gems
Not every form of 3D nail art requires hand sculpting. Embellished designs, built using rhinestones, pearls, metal studs or caviar beads, achieve genuine dimension and texture simply through strategic placement of pre made materials. This approach tends to be far more accessible for beginners, since it relies on careful placement and strong adhesive rather than freehand sculpting skill.
I often combine embellishments with hand sculpted elements within the same design, using rhinestones as the center of a sculpted flower or scattering caviar beads around the base of a geometric shape for added texture and visual interest.
3D Animal And Character Nail Art
For clients wanting something more playful, sculpted animal designs, from tiny raised paw prints to more detailed character faces, offer a fun, whimsical take on 3D nail art. These designs typically require the most advanced sculpting skill of any category, since animal and character features need precise proportions to actually read correctly at such a small scale.
I usually reserve detailed animal or character 3D nail art for a single accent nail rather than a full set, both because of the time involved and because the detail tends to get lost if repeated across every single nail.
3D Nail Art For Short Nails

A common misconception is that 3D nail art only works on long, dramatic nail extensions, but that is simply not true. Shorter nails absolutely can handle 3D elements, you just need to scale everything down significantly and place details thoughtfully rather than attempting an elaborate, oversized design.
For shorter nails, I usually recommend small, simple elements like tiny dots, miniature flowers or a single small rhinestone cluster placed near the cuticle rather than spreading across the entire nail surface. Overly large or heavy 3D elements on a short nail bed tend to look disproportionate and can also catch on things more easily during everyday activities, simply because there is less flat surface area surrounding the raised design.
Read Must : Best Simple Nail Art Ideas That Look Salon Fancy
3D Nail Art For Long And Extended Nails
Longer nails, whether natural or extended with acrylic or gel, offer significantly more surface area to work with, which opens up possibilities for more elaborate 3D nail art. I love using the extra length for layered floral designs, larger geometric shapes or even small sculpted scenes that incorporate multiple elements working together across one or two accent nails.
Almond and coffin shaped extensions in particular tend to showcase 3D nail art beautifully, since the elongated surface gives raised elements room to breathe without feeling cramped or crowded against the edges of the nail.
How Long 3D Nail Art Actually Lasts
This is one of the most common questions I get asked, and the honest answer depends heavily on the specific technique and materials used. Acrylic based 3D nail art tends to be the most durable, often lasting as long as a standard acrylic fill, typically two to three weeks, provided the sculpted elements were built with a solid enough base to withstand daily wear.
Gel based 3D nail art generally holds up similarly well, though particularly delicate or thin sculpted elements, like fine flower petals, can sometimes be more prone to snapping if they catch on something during normal daily activities. Embellished designs using rhinestones or gems tend to last as long as the adhesive holding them in place remains strong, which is why using a proper nail glue or gel bonding product rather than regular craft glue makes such a significant difference in longevity.
How To Make 3D Nail Art Last Longer
A few specific habits genuinely extend how long your 3D nail art stays intact. Avoiding activities that put direct pressure on raised elements, like certain types of manual labor or vigorous typing, helps prevent accidental snapping, especially for more delicate sculpted designs like thin petals.
Sealing the entire design with a strong topcoat, and reapplying that topcoat every few days, adds an extra layer of protection against everyday wear and tear. I also always recommend being mindful when putting on gloves, washing dishes or doing anything that involves significant friction against the raised surface, since 3D elements are inherently more vulnerable to catching compared to a completely flat manicure.
How To Remove 3D Nail Art Safely
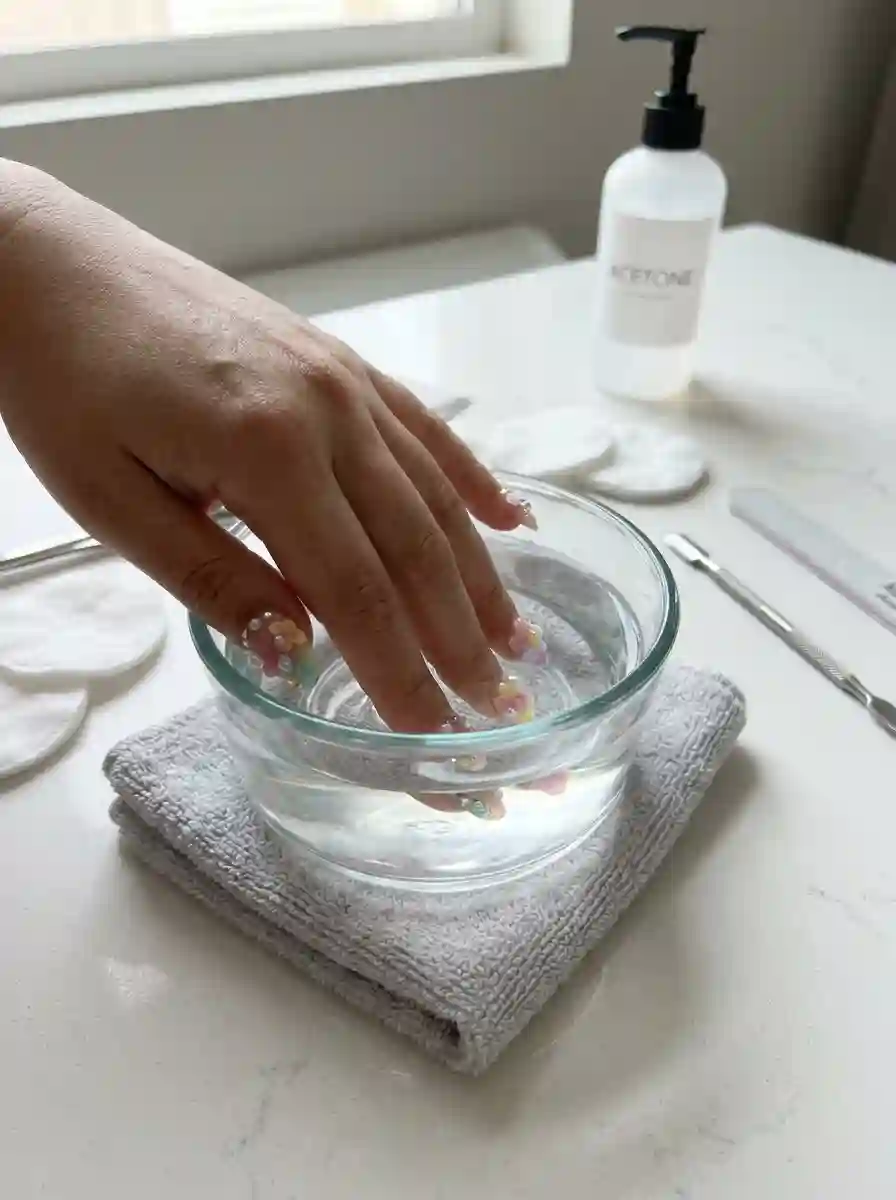
Removing 3D nail art generally follows the same process as removing any acrylic or gel manicure, though the raised elements sometimes require a bit of extra care during the initial stages of soak off. Soaking the nails in pure acetone for an extended period, typically fifteen to twenty minutes depending on the thickness of the sculpted design, softens the product enough to gently remove it without damaging the natural nail underneath.
I always recommend against forcefully picking or prying off 3D nail art, since the raised elements can sometimes pull away layers of the natural nail if removed incorrectly. Patience during the soaking process genuinely matters here, and visiting a professional for removal remains the safest option if you are at all unsure about doing it yourself.
Common Mistakes People Make With 3D Nail Art
After years of both creating 3D nail art and occasionally fixing other people’s attempts that went wrong, I have noticed a handful of recurring mistakes. Applying product too thick without allowing proper curing or drying time between layers remains one of the most frequent issues, often resulting in a design that looks lumpy or takes significantly longer to fully set than expected.
Skipping proper nail preparation is another common mistake, particularly skipping the light buffing step that helps the base product actually bond to the natural nail surface. Without this step, even a beautifully sculpted 3D design tends to lift or pop off far sooner than it should.
Attempting overly ambitious designs as a first project also trips up a lot of beginners. Jumping straight into a fully layered rose or a detailed animal face without first practicing simpler shapes tends to lead to frustration rather than a usable final result. I always recommend starting small and building confidence gradually, the same way I had to when I first started learning this skill myself.
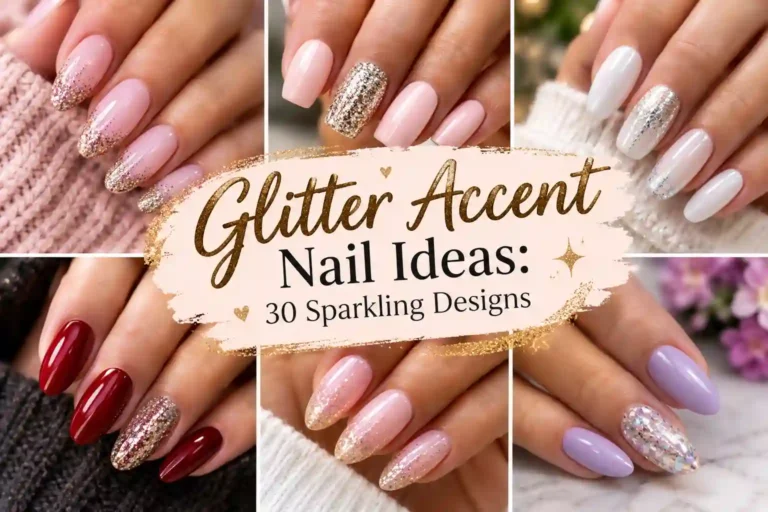
Read Also : Glitter Accent Nail Ideas: 30 Sparkling Designs for Every Style, Shape and Season
Tips For Beginners Trying 3D Nail Art For The First Time
If you are completely new to 3D nail art, practicing on nail tips or a practice hand before attempting anything on your actual nails remains the single most valuable piece of advice I can offer. This removes the pressure of working on a surface you cannot easily redo if something goes wrong, letting you build confidence with the material’s consistency and behavior first.
Starting with simple shapes, like basic dots, lines or a single small flower, gives you a much better foundation than attempting something complex right away. I also recommend working in a well lit space with good magnification if possible, since the fine detail involved in 3D nail art genuinely benefits from being able to clearly see what you are doing at such a small scale.
Pairing 3D Nail Art With The Right Base Design

One thing I always emphasize with clients is that 3D nail art tends to look most polished when paired with a relatively simple base rather than competing with another busy pattern underneath. A solid color base, whether glossy or matte, lets the sculpted elements genuinely stand out as the clear focal point of the design.
I usually reserve the most elaborate 3D elements for just one or two accent nails within a set, keeping the remaining nails solid or very minimally decorated. This balance keeps the overall look polished and intentional rather than overwhelming, which can happen quickly if every single nail features its own heavy sculpted design.
3D Nail Art For Special Occasions
3D nail art genuinely shines for special occasions like weddings, proms and milestone celebrations, since the added dimension and detail naturally photograph beautifully, something increasingly important given how often these moments end up shared on social media. Bridal clients in particular often request delicate 3D floral accents, sometimes incorporating small pearls alongside sculpted petals for an extra touch of elegance.
For clients attending a themed event or celebration, more playful 3D designs, like sculpted characters or bold geometric shapes, offer a fun way to make their manicure feel genuinely custom and memorable rather than something anyone else at the event is likely wearing.
Cost Considerations For Professional 3D Nail Art
Professional 3D nail art typically costs more than a standard manicure, and understanding why helps set realistic expectations. The time investment alone is significant, since sculpting even a single detailed flower can take considerably longer than painting a flat design of similar complexity. Many nail technicians, myself included, charge per accent nail or per specific design element rather than a flat rate for the entire set, since complexity varies so dramatically between a simple raised dot and an elaborate multi petal rose.
I always recommend discussing pricing clearly with your nail technician before your appointment begins, particularly if you are requesting something elaborate based on a reference photo, since the actual complexity of recreating that design might differ significantly from how it initially appears in a picture.
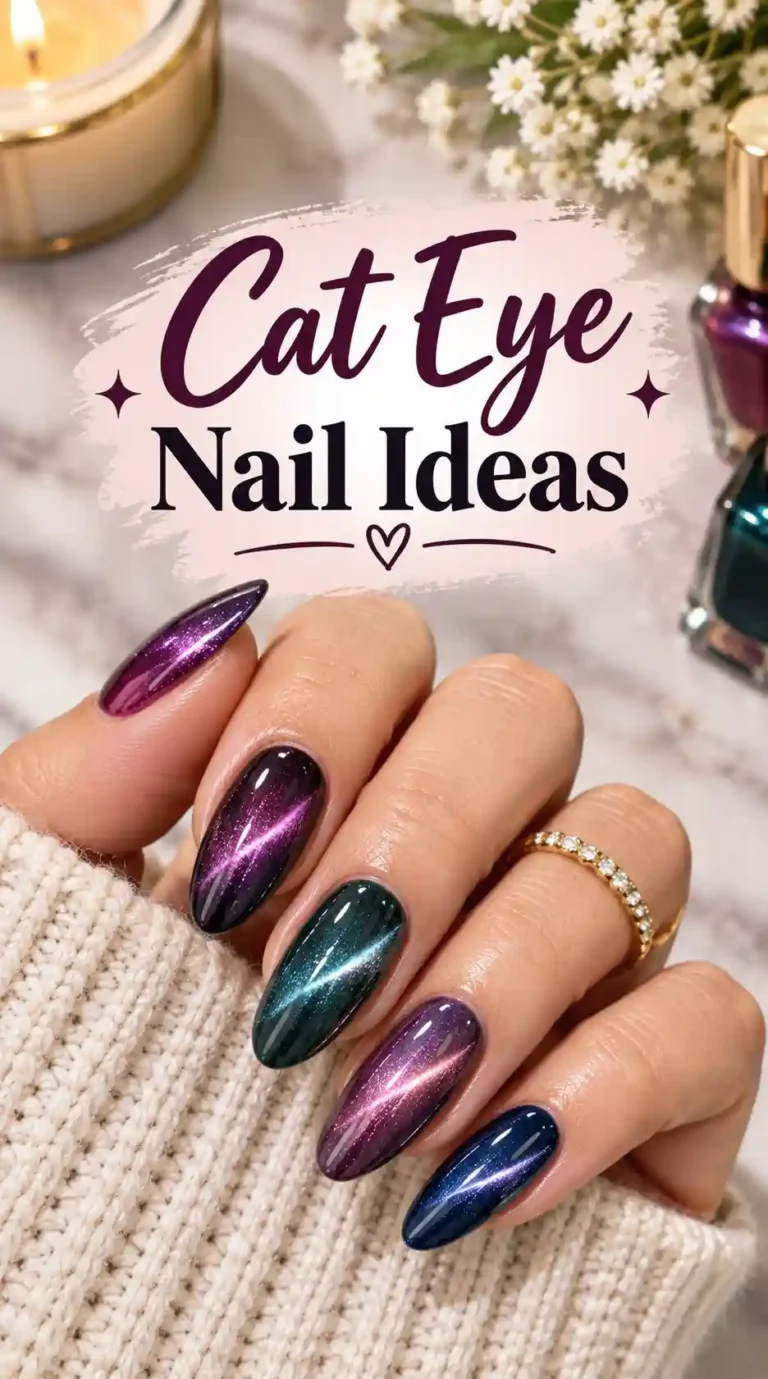
Also Read : Cat Eye Nail Ideas That Will Instantly Transform Your Manicure Into Pure Magic
Final Thoughts On 3D Nail Art
After years spent building, sculpting and occasionally troubleshooting 3D nail art in my own studio, I genuinely believe this remains one of the most rewarding skills within the entire nail art world, both for the technician creating it and the client wearing the finished result. There is something undeniably special about a manicure that has real, touchable dimension rather than simply looking good from a distance.
Whether you are drawn to delicate sculpted flowers, bold geometric shapes or playful embellished designs built from rhinestones and gems, there is a version of 3D nail art that fits your personal style and comfort level, regardless of whether you are a professional nail technician or someone experimenting at home for the very first time. My honest advice, after years of practicing this craft, is to start small, be patient with the learning curve and trust that even the most impressive sculpted designs started out as a lumpy first attempt on a practice nail tip.
Frequently Asked Questions
What is 3D nail art exactly?
3D nail art refers to nail designs that physically rise above the surface of the nail, created through sculpting with acrylic or gel, or by attaching embellishments like rhinestones and pearls
Is 3D nail art hard to do?
It can be challenging for beginners, particularly detailed sculpted designs, though simpler elements like dots and small flowers are genuinely achievable with practice and patience.
What materials do I need for 3D nail art?
Acrylic powder and liquid monomer or sculpting gel form the foundation, along with a detail brush, dotting tool, nail vinyls and embellishments like rhinestones for added texture.
Can I do 3D nail art on short nails?
Yes, short nails handle 3D nail art well when the design is scaled down appropriately, with smaller elements concentrated near the cuticle rather than across the entire nail.
How long does 3D nail art last?
Acrylic based 3D nail art typically lasts two to three weeks, similar to a standard acrylic fill, provided the sculpted elements were built on a properly prepared nail surface.
How do I remove 3d nail art?
Soaking the nails in pure acetone for fifteen to twenty minutes softens the product enough for gentle removal, and forceful picking should always be avoided to protect the natural nail.
Can I create 3D nail art at home without professional training?
Yes, with patience and practice on nail tips first, beginners can create simple 3D designs at home, though more elaborate sculpted work typically benefits from professional experience.
What is the difference between gel and acrylic for 3D nail art?
Acrylic hardens through a chemical reaction and holds fine detail extremely well, while gel requires curing under a lamp and offers more working time for shaping before it sets.


One Comment