

Gel Nail Art Mastery: The Ultimate Guide To Flawless, Long Lasting Designs That Actually Hold Up
There is a reason gel nail art has completely taken over my appointment book compared to traditional polish designs. The finish lasts longer, the colors stay true, and the overall durability means clients can actually enjoy their nail art for weeks instead of days. Once I started working almost exclusively with gel systems, my entire approach to nail design changed for the better.
I remember the shift happening gradually in my studio. Clients who used to come in every week for chipped polish touch ups started stretching their appointments out because gel nail art simply held up so much longer. That durability opened the door to more detailed, time consuming designs too, since clients were more willing to invest in intricate artwork knowing it would actually last.
In this guide I want to share everything I have learned about gel nail art over years of working with these products professionally, from choosing the right system to specific techniques, troubleshooting common issues and caring for gel manicures properly at home. Whether you are a fellow nail technician or someone wanting to understand gel nail art before your next appointment, this article covers it all in depth.
Also Read : Candy Corn Nail Ideas That Will Make Your Halloween Manicure Irresistibly Sweet
What Makes Gel Nail Art Different From Traditional Polish Designs
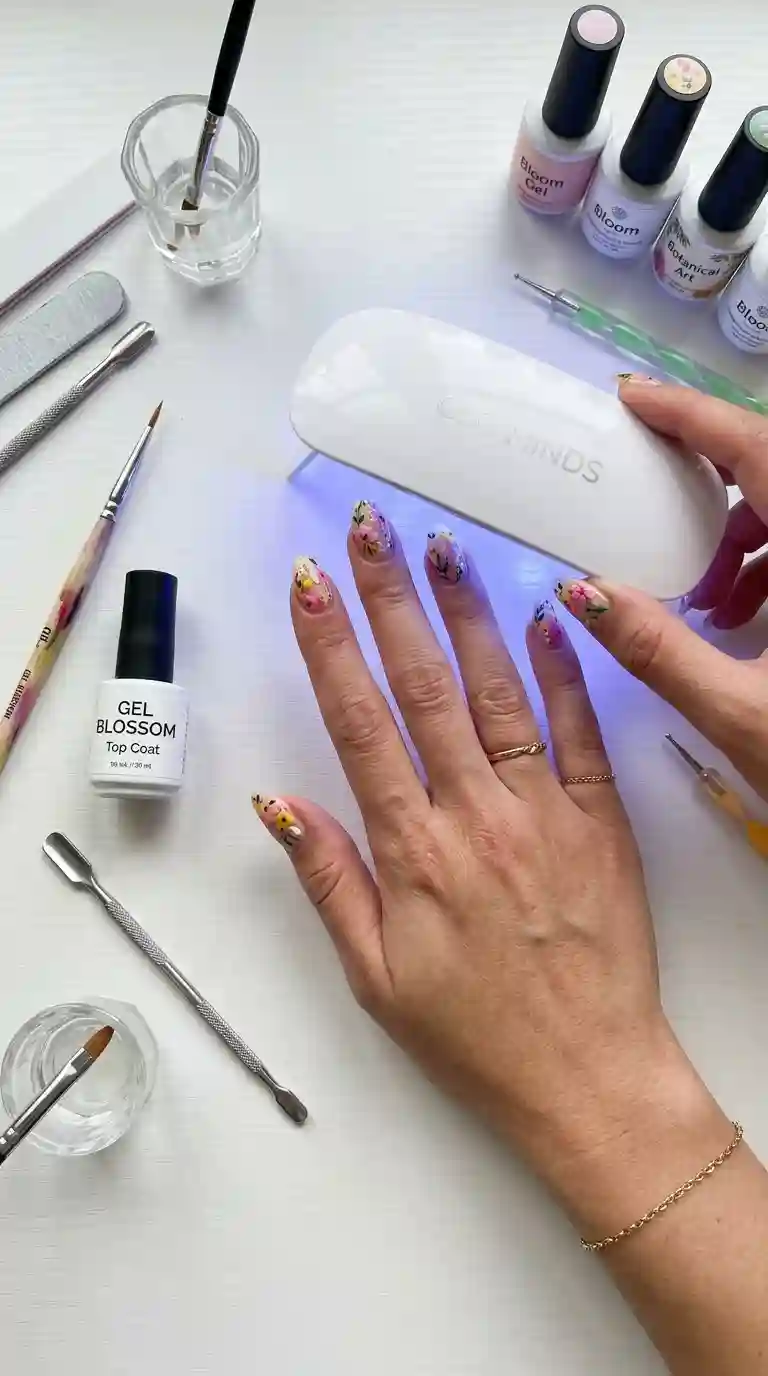
The biggest difference between gel nail art and regular polish comes down to the curing process. Traditional polish air dries over time, which means the finish remains somewhat soft and vulnerable to smudging or chipping for hours after application. Gel nail art, on the other hand, cures instantly under UV or LED light, creating a hard, durable finish the moment you step away from the lamp.
This curing process completely changes what is possible in terms of design. Because gel nail art hardens so quickly and thoroughly, I can layer multiple colors, add fine detail work and apply various textures without worrying about smudging between steps the way I would with regular polish. Each layer cures fully before the next one goes on, which means the final result stays crisp and precise.
Durability is the other major factor that sets gel nail art apart. A well applied gel manicure typically lasts two to three weeks without chipping, compared to just a few days for traditional polish. This longevity makes gel nail art a favorite among clients who want their nails to look freshly done for an extended period of time.
My Journey Learning Gel Nail Art As A Professional Nail Technician
When I first started working with gel nail art, the learning curve felt steeper than I expected. Traditional polish techniques do not always translate directly, since gel behaves differently in terms of viscosity, drying time and how it interacts with a detail brush. It took months of practice before I felt genuinely confident creating detailed gel nail art rather than just solid color applications.
One of the biggest lessons I learned early on was patience with the curing process itself. Rushing through cure times, even by just a few extra seconds under the lamp, can lead to peeling, lifting or an overall softer finish that does not hold up the way it should. Once I started strictly following proper cure times for every layer, the quality and longevity of my gel nail art improved dramatically.
Over time, gel nail art became not just something I offered clients, but something I genuinely enjoyed creating. The ability to layer colors, add fine detail work and experiment with different textures within a single appointment opened up so much creative freedom compared to what I could achieve with traditional polish alone.
Understanding The Different Types Of Gel Systems For Nail Art

Before diving into specific gel nail art techniques, it helps to understand the different product systems available, since each one behaves slightly differently. Soft gel, sometimes called gel polish, is probably the most common system used for gel nail art, applied similarly to regular polish but cured under a lamp between coats.
Hard gel, often used for building extensions or structural reinforcement, offers a thicker, more durable option that some nail artists prefer for particularly detailed or sculptural gel nail art. Builder gel falls somewhere between the two, offering strength for extensions while still maintaining a workable consistency for detailed designs.
Each system has its own strengths depending on what you are trying to achieve with your gel nail art. I personally use soft gel for the vast majority of my detailed nail art work, since it offers the best balance between workability and durability for fine line work, ombre effects and layered designs.
Must Read : Tropical Nail Art: 20 Ideas, Step-by-Step Tutorials and Pro Tips for a Vacation Manicure
Essential Tools And Products For Creating Gel Nail Art
Having the right tools makes an enormous difference in the quality of gel nail art you can create, regardless of skill level. A reliable UV or LED lamp is the most fundamental piece of equipment, since proper curing is what gives gel nail art its signature durability and finish.
Fine detail brushes are essential for anything beyond a solid color gel manicure. I keep a range of brush sizes on hand, from very thin liner brushes for delicate linework to slightly wider flat brushes for filling in larger design elements within my gel nail art.
A good quality base coat and topcoat round out the essentials. Skipping either of these steps significantly shortens the lifespan of gel nail art, since the base coat protects the natural nail while the topcoat seals and protects the design from daily wear and tear.
Must Have Accessories For Detailed Gel Nail Art
Beyond the basics, a few extra accessories can elevate your gel nail art significantly. A dotting tool makes adding small details like polka dots or the centers of flowers incredibly simple. Striping tape helps achieve crisp, straight lines without needing a perfectly steady hand, while a good quality nail file and buffer ensure the nail surface is properly prepped before any gel nail art application even begins.
How To Properly Prep Nails Before Gel Nail Art Application
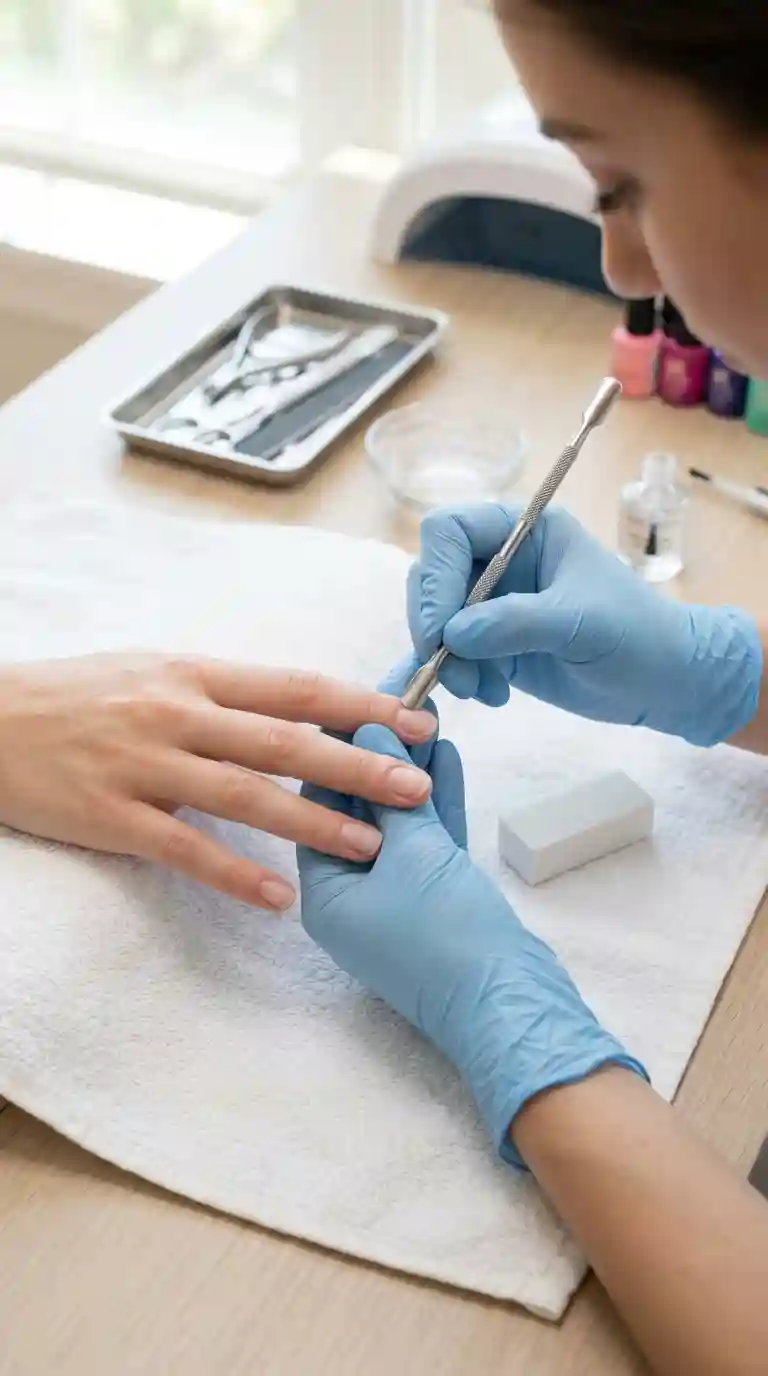
Proper nail prep is honestly the most underrated part of creating long lasting gel nail art. Skipping or rushing this step is one of the most common reasons gel manicures fail early, regardless of how beautiful the final design looks.
I always start by removing any existing polish completely, then gently pushing back the cuticles to expose the full nail bed. Next, I lightly buff the surface of the nail to remove shine and create a slightly textured surface that helps the gel adhere properly. Skipping this buffing step is one of the quickest ways to end up with gel nail art that lifts prematurely.
After buffing, wiping the nail down with a dehydrator or rubbing alcohol removes any remaining oils or dust particles. This final cleaning step ensures the base coat bonds directly to the nail surface rather than sitting on top of invisible residue that could compromise the wear time of your finished gel nail art.
Choosing The Right Colors And Finishes For Gel Nail Art
One of the best parts of working with gel nail art is the incredible range of colors and finishes available. Unlike traditional polish, gel formulas tend to offer richer pigmentation and more consistent opacity, which makes color selection and layering significantly easier.
Solid, opaque colors form the foundation of most gel nail art designs, but the finish options extend so much further. Chrome powders, cat eye effects, glitter gels and jelly finishes all bring something different to the table, allowing for endless variation even within a single color family.
I always recommend clients think about both the color and the finish together when planning their gel nail art, since the same shade of red, for example, looks completely different in a glossy finish compared to a matte or chrome application. Considering both elements together leads to a more cohesive, intentional final design.
Popular Gel Nail Art Techniques Every Nail Artist Should Know
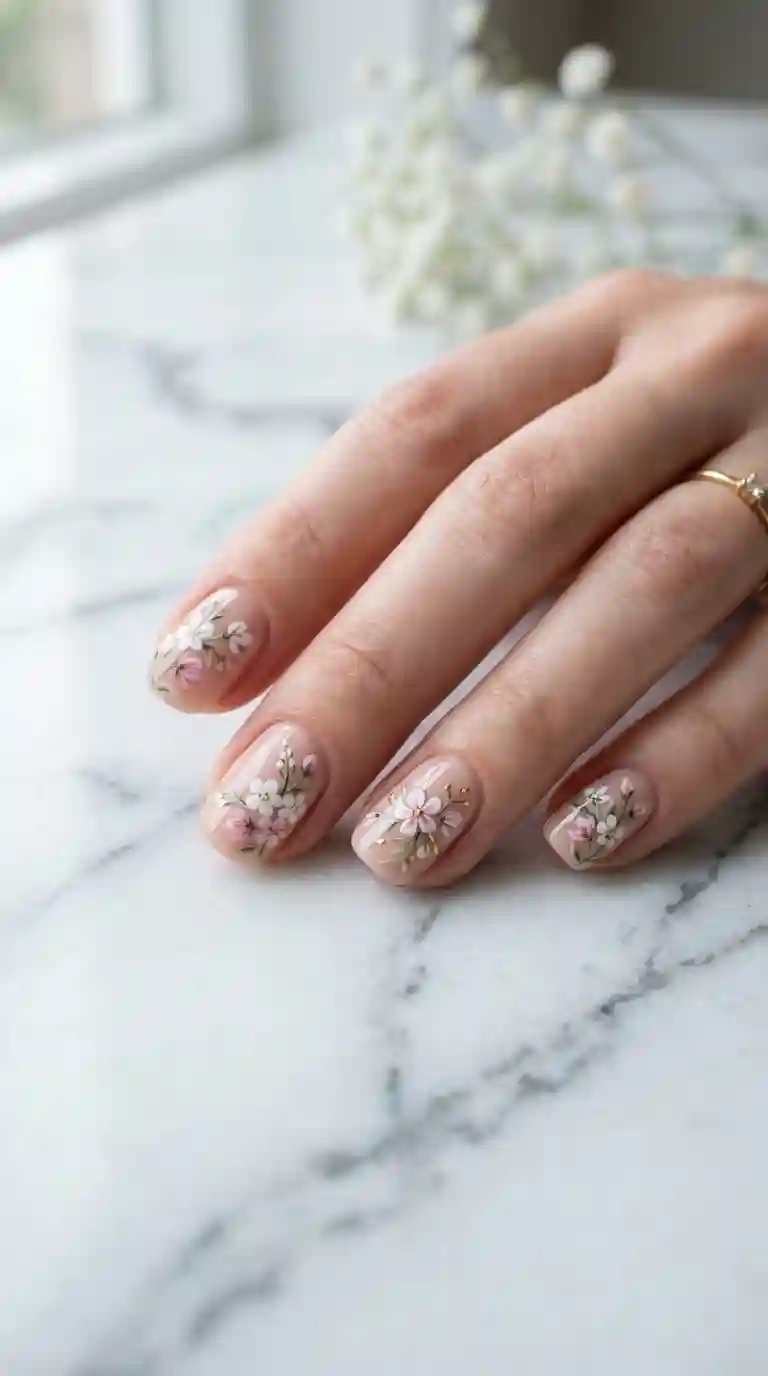
Over the years I have developed a solid toolkit of techniques that come up again and again when creating gel nail art for clients. Understanding these foundational methods makes it much easier to execute almost any design a client requests.
Hand painting remains the most versatile technique within gel nail art, allowing for anything from simple dots and lines to complex floral or character designs. Because gel cures between layers, you can build up incredibly detailed artwork without worrying about earlier layers smudging as you work.
Ombre and gradient effects are another popular technique, typically achieved using a makeup sponge to blend two or more gel colors together before curing. The instant cure time of gel nail art actually makes ombre techniques easier to control compared to traditional polish, since each layer sets before the next application.
Read Also : Light Pink Chrome Nails: 16 Ideas, a Shade Guide and Exactly How to Get the Look
Marble And Watercolor Techniques In Gel Nail Art
Marble effects have become incredibly popular within gel nail art, offering a soft, artistic texture that photographs beautifully. I usually create this effect by dragging a thin detail brush through wet gel colors before curing, creating organic, swirling patterns that never look exactly the same twice.
Watercolor techniques offer a similarly artistic approach, blending colors together in soft, diffused patterns rather than sharp defined lines. Both techniques add a beautiful, painterly quality to gel nail art without requiring extremely advanced detail work.
Chrome And Metallic Finishes For Gel Nail Art
Chrome finishes bring an entirely different visual impact to gel nail art compared to standard glossy or matte polish. The mirror like reflection created by chrome powder applied over a cured gel base gives an almost futuristic, high shine appearance that consistently draws attention.
Applying chrome powder correctly requires a completely cured, tacky free gel base underneath, followed by a special activator gel that the chrome powder adheres to. I usually buff the powder in using a soft applicator, working in small circular motions until the entire nail reflects light evenly across the surface.
Rose gold, silver and holographic chrome finishes are among the most requested within gel nail art, each bringing a slightly different mood depending on the client’s overall aesthetic preference.
Glitter And Sparkle Effects Within Gel Nail Art
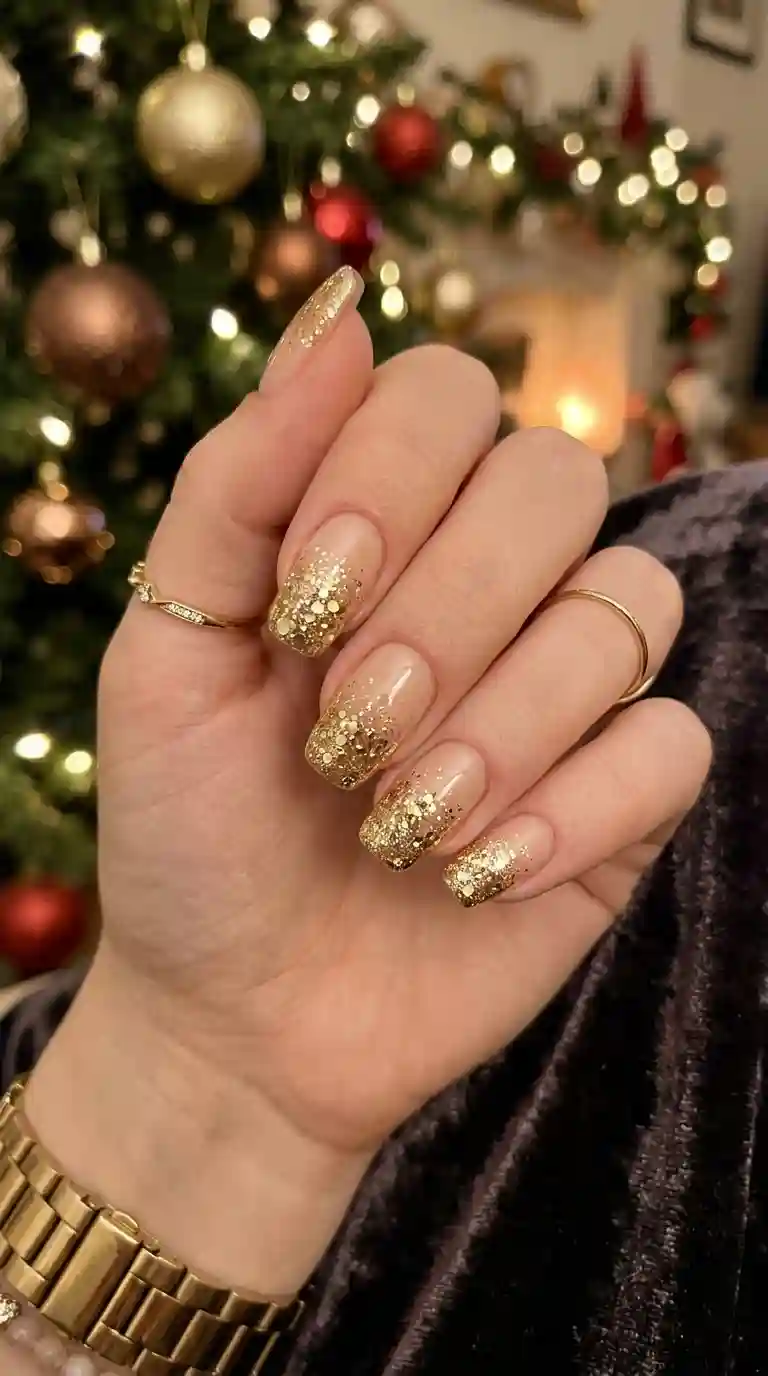
Glitter adds an instant element of sparkle and celebration to gel nail art, and there are several ways to incorporate it depending on the desired intensity. Fine glitter mixed directly into a clear gel topcoat provides subtle, all over shimmer, while chunkier glitter applied as an accent nail creates a bolder, more concentrated sparkle.
I often use glitter as a gradient technique within gel nail art, applying it more heavily near the tips of the nail and fading it out toward the cuticle. This creates a beautiful sparkling effect that still leaves room for the base color to show through, rather than completely covering the nail in glitter.
For clients who want maximum sparkle without an overwhelming amount of glitter texture, a fine glitter gel applied as a full topcoat over a solid color base tends to strike a nice balance within their gel nail art.
Negative Space Designs In Gel Nail Art
Negative space has become one of my favorite techniques to incorporate into gel nail art, particularly for clients who want something modern and minimal rather than heavily decorated. This technique involves leaving small sections of the natural nail unpainted, creating intentional gaps within the overall design.
Geometric negative space designs, like triangles or thin lines cutting across the nail, look incredibly sleek within gel nail art and pair beautifully with a simple, solid color base. Floral negative space, where the outline of a flower is painted while the center remains unpainted, offers a softer, more delicate alternative.
This technique requires careful planning before application, since the unpainted sections need to be mapped out clearly to avoid accidentally covering areas meant to remain bare throughout the gel nail art process.
Gel Nail Art For Short Nails
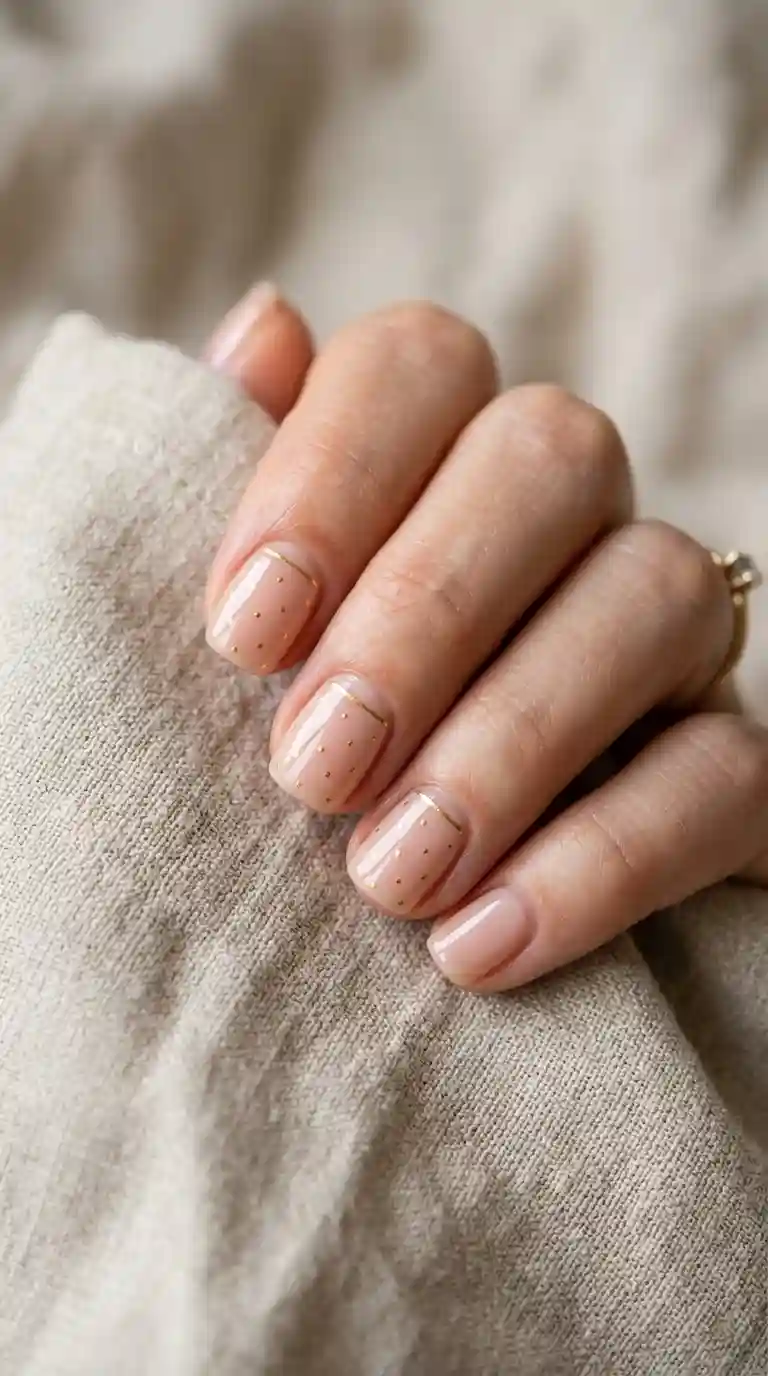
A common misconception is that detailed nail art only works well on longer nails, but gel nail art translates beautifully onto shorter nail beds when the design is scaled appropriately. The key lies in concentrating detail near the cuticle rather than spreading it across the entire nail surface.
For shorter nails, I usually recommend simpler elements like small dots, thin lines or a single delicate detail on just one or two accent nails rather than a full, elaborate illustration, which can feel cramped on limited nail surface area. Solid, glossy gel nail art with just a touch of shimmer often looks more polished on shorter nails than an overly busy design attempting to fit too much detail into a small space.
Must Read : Navy Blue Nail Inspo: 45+ Gorgeous Ideas for Every Shape, Season & Style
Gel Nail Art For Long And Almond Shaped Nails
Longer almond, coffin or stiletto shaped nails provide significantly more surface area to work with when creating gel nail art. I love using this extra space for bigger floral designs, layered ombre effects or more elaborate negative space patterns that simply would not fit comfortably on shorter nails.
French tips also take on a beautiful new dimension on longer nails within gel nail art, allowing for creative variations beyond the traditional white tip. Colored tips, ombre tips or even double lined french designs all look particularly striking when there is enough nail length to properly showcase the detail.
The extra length also allows for more dramatic layering within gel nail art, such as combining a marble base with a chrome accent nail and a few strategically placed rhinestones, creating a cohesive yet multifaceted design across the full set.
Gel French Tips And Modern Variations

The french manicure remains one of the most requested styles within gel nail art, largely because the clean, classic look pairs well with virtually any outfit or occasion. Using gel for this technique specifically improves precision, since the tacky free curing process allows for very clean, crisp tip lines that hold their shape far better than traditional polish.
I usually create french tips within gel nail art using a thin brush to freehand the tip line, though nail guides or striping tape can help achieve an even cleaner result for beginners still building confidence with a brush. Modern variations, like colored tips instead of white, or a slightly angled diagonal line instead of the classic smile shape, keep this timeless style feeling fresh and current.
Troubleshooting Common Gel Nail Art Problems
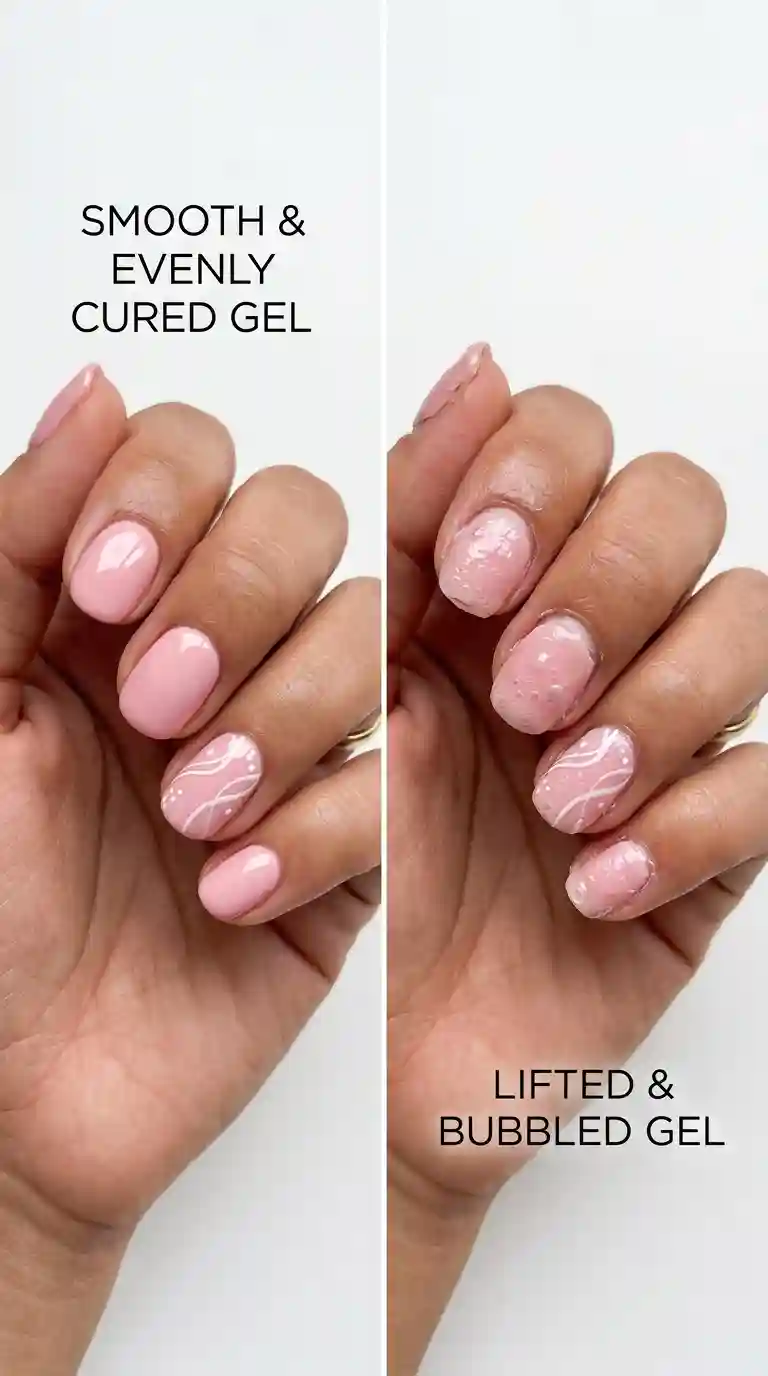
Even experienced nail artists run into occasional issues with gel nail art, and understanding how to troubleshoot these problems saves both time and product. Bubbling is one of the most common issues, usually caused by applying gel polish too thickly or shaking the bottle instead of gently rolling it before use, which introduces air bubbles into the formula.
Lifting, where the edges of the gel nail art begin peeling away from the nail bed, almost always traces back to improper prep work, whether that means skipping the dehydrator step or not buffing the natural nail surface enough before application. Curing time also plays a role here, since undercuring any layer leaves the gel softer and more prone to lifting prematurely.
Peeling topcoats can occur when the final layer is applied too thickly or when the tacky layer is not properly cleaned off after the final cure. Wiping down the cured gel nail art with a cleanser specifically designed for this purpose, rather than skipping this step entirely, helps ensure the topcoat maintains its shine and durability for as long as possible.
How To Remove Gel Nail Art Properly Without Damaging Natural Nails
Removing gel nail art incorrectly is one of the fastest ways to damage the natural nail underneath, so this step deserves just as much attention as the application process itself. Peeling or picking gel polish off, rather than properly soaking it away, tends to strip multiple layers off the natural nail along with it.
The proper removal process involves gently buffing the top shiny layer of the gel nail art to break the seal, then soaking cotton pads saturated in acetone directly on each nail, wrapped in small pieces of foil for about ten to fifteen minutes. After soaking, the softened gel should gently slide off using a cuticle pusher rather than aggressive scraping.
Following a proper removal process, applying a nourishing cuticle oil and giving the natural nail a bit of recovery time before the next gel nail art application helps maintain overall nail health throughout the year.
Read Must : Summer Mint Green Nails That Capture Every Ounce Of The Season’s Freshest Trend
Caring For Your Nails Between Gel Nail Art Appointments
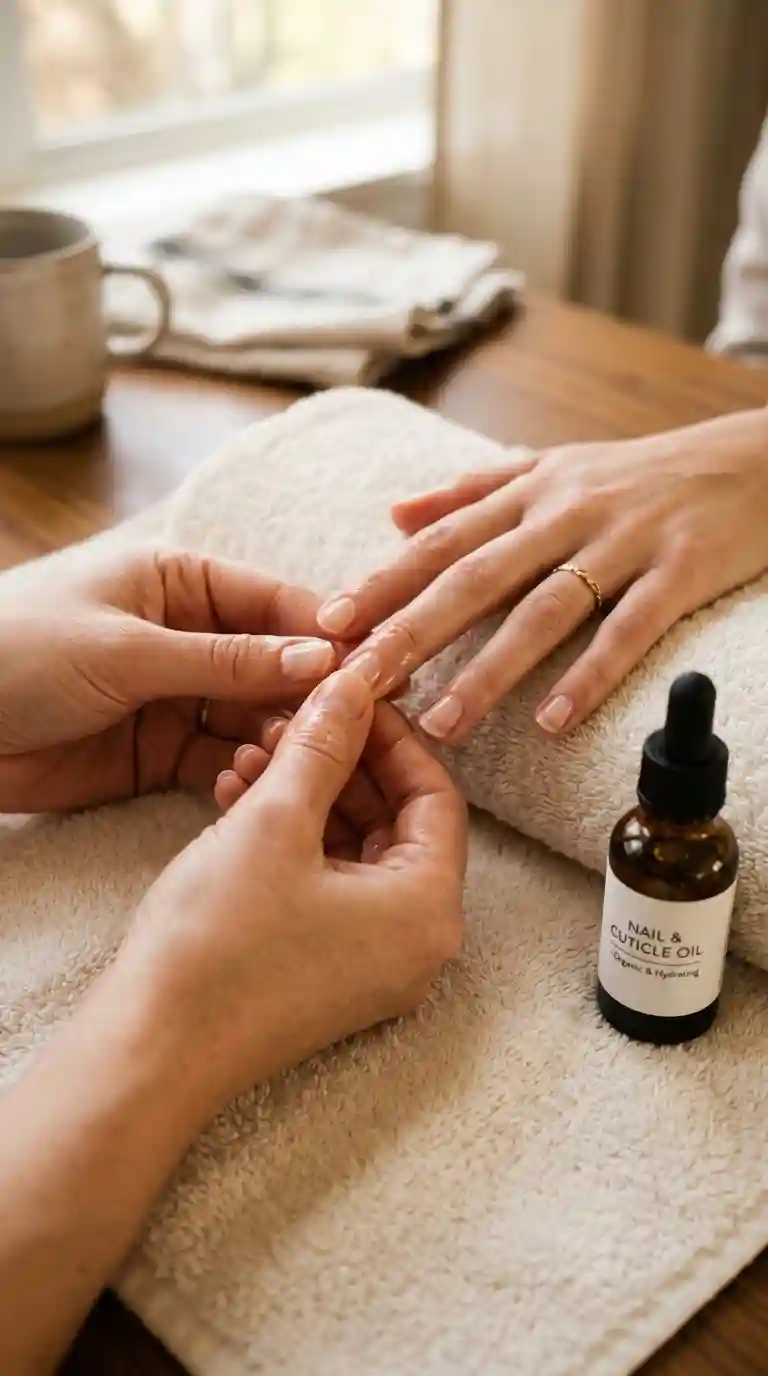
Healthy natural nails form the foundation for beautiful gel nail art, which means proper care between appointments matters just as much as the application itself. I always recommend applying cuticle oil daily, even during periods when you are not actively wearing gel, since consistent hydration keeps both the nail bed and surrounding skin in good condition.
Taking occasional breaks between gel nail art appointments, rather than maintaining continuous wear for months on end, gives the natural nail time to recover from repeated buffing and curing exposure. This does not need to be a long break, even a week or two of bare nails with regular oil application can make a noticeable difference in overall nail health.
Avoiding the temptation to pick or peel at lifting gel, even when it becomes tempting toward the end of a manicure’s wear cycle, protects the natural nail from unnecessary damage and keeps it in better condition for your next gel nail art appointment.
Gel Nail Art For Special Occasions And Events
Gel nail art often becomes a bit more elaborate when clients are preparing for specific events like weddings, formal parties or milestone celebrations. The durability of gel makes it a particularly practical choice for these occasions, since clients want their nails looking fresh and intact throughout an entire event without worrying about chips or smudging.
For bridal clients specifically, I often recommend gel nail art featuring subtle, elegant details like fine lace patterns, delicate pearls or soft ombre effects rather than anything overly bold, since the goal is usually complementing the overall bridal look rather than drawing attention away from it. For clients attending holiday parties or milestone birthdays, I tend to lean into bolder finishes like chrome or heavier glitter application, since these details catch the light beautifully under event lighting.
Seasonal Trends Within Gel Nail Art
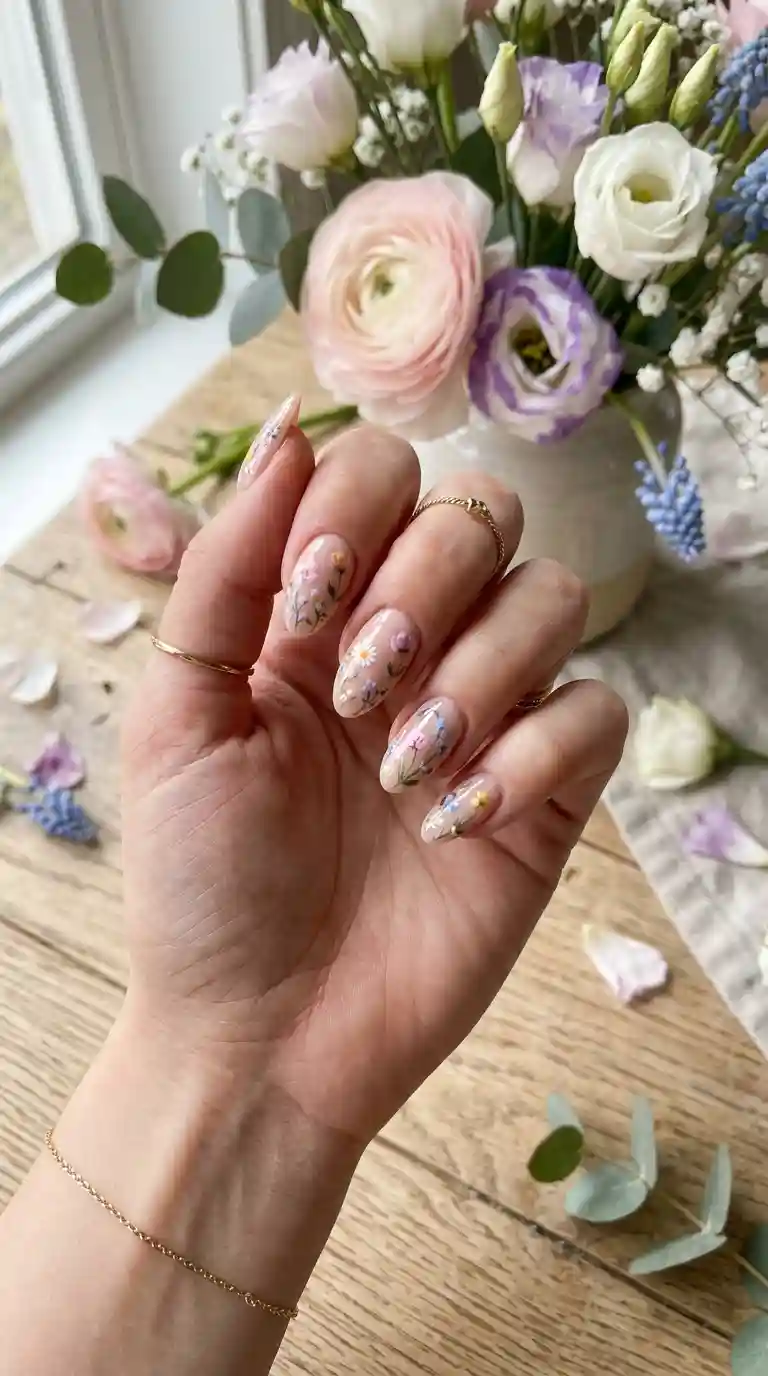
Gel nail art naturally evolves alongside the seasons, with color palettes and design themes shifting throughout the year based on what feels current and relevant. Spring often brings soft pastels and delicate floral designs, while summer tends to favor brighter, bolder colors alongside tropical or fruit inspired motifs.
Autumn shifts toward warmer, earthier tones within gel nail art, often incorporating plaid patterns, deeper reds and subtle metallic accents. Winter, as covered extensively elsewhere, leans into rich jewel tones, icy blues and chrome finishes that complement the colder, darker months.
Staying aware of these seasonal shifts helps keep gel nail art offerings feeling fresh and relevant, both for returning clients who want something new each time they visit and for anyone browsing inspiration photos looking for current, up to date design ideas.
Gel Nail Art For Beginners Learning At Home

Learning gel nail art at home has become increasingly accessible thanks to affordable starter kits that include a small UV or LED lamp alongside basic gel polish colors. For beginners, I always recommend starting with solid color applications before attempting any detailed artwork, since mastering the basic application and curing process first builds a strong foundation for more advanced techniques later.
Once comfortable with solid application, simple details like small dots, thin lines or a single accent nail design are a great next step within gel nail art. Practicing on a nail wheel before committing to an actual manicure remains one of the best ways to build confidence and refine brush control without the pressure of potentially ruining a finished look.
Patience truly is the most important skill when learning gel nail art. Rushing through curing times or attempting overly complex designs before mastering the basics tends to lead to frustration rather than the polished, professional looking results most beginners are hoping to achieve.
How Long Does Gel Nail Art Actually Last
One of the most common questions clients ask involves durability, and honestly, this varies depending on several factors. Properly applied gel nail art, with thorough nail prep and correct curing at each stage, typically lasts between two and three weeks before noticeable regrowth or lifting occurs.
Lifestyle factors play a significant role here as well. Clients who frequently submerge their hands in water, use their nails as tools or skip regular cuticle oil application tend to see their gel nail art wear down faster compared to those who follow proper aftercare routines. Choosing a high quality gel brand also makes a noticeable difference in overall longevity and finish quality.
The Cost Of Gel Nail Art And What Affects Pricing
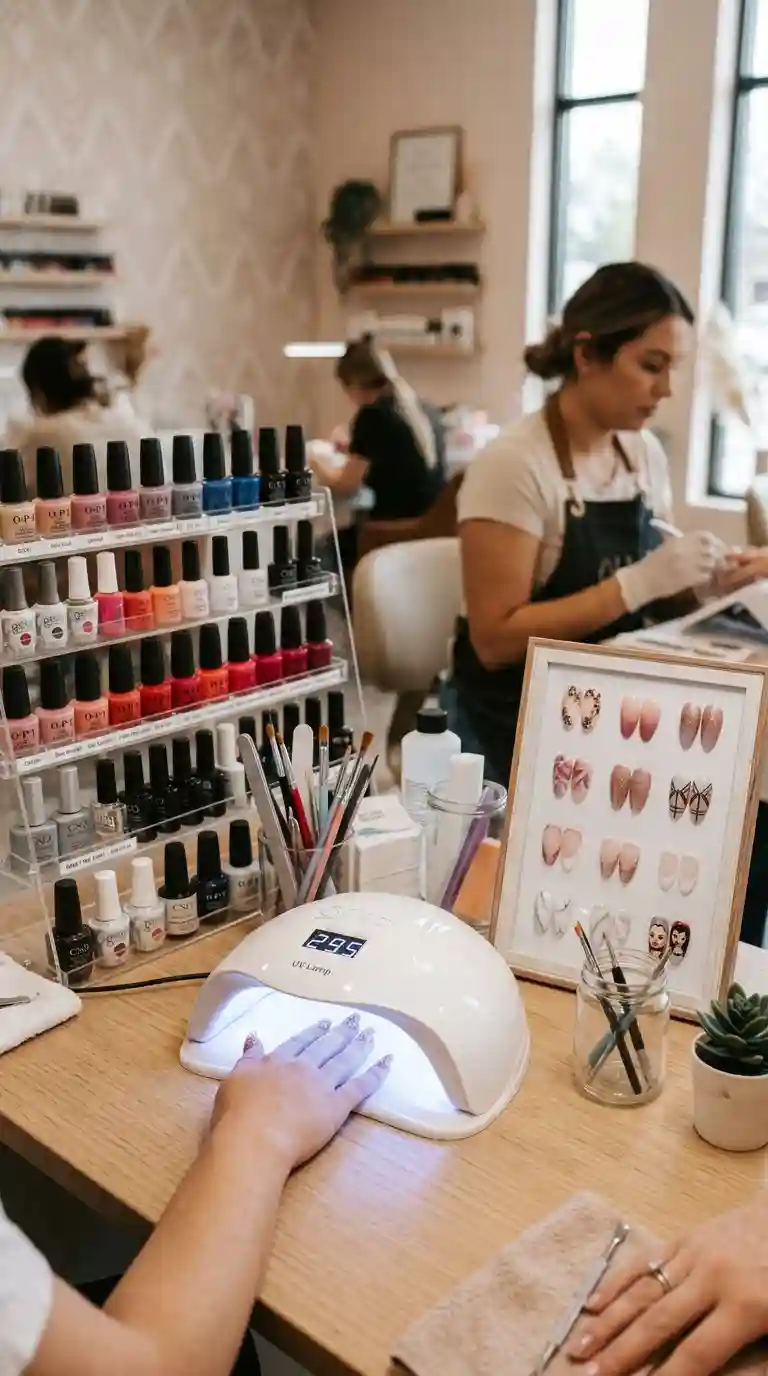
Pricing for gel nail art varies significantly depending on location, the nail artist’s experience level and the complexity of the design requested. A simple solid color gel manicure typically costs less than detailed artwork involving hand painted designs, chrome finishes or extensive rhinestone application.
I always explain to clients that the additional cost associated with detailed gel nail art reflects both the extra time required and the skill level needed to execute intricate designs cleanly. A simple accent nail with a small detail adds relatively little to the overall price, while a full set of hand painted floral gel nail art across all ten nails requires significantly more time and therefore costs more.
Choosing A Nail Artist For Detailed Gel Nail Art
If you are looking to get gel nail art done professionally rather than attempting it at home, choosing the right nail artist matters significantly. I always recommend looking at a potential nail technician’s portfolio closely, paying attention to how clean their lines are, how consistent their color application looks and whether their previous work matches the style you are hoping to achieve.
Reading reviews and asking about the specific products used can also give helpful insight into the quality and longevity you can expect from your gel nail art. A skilled nail artist should be happy to answer questions about their process, the products they use and how to properly care for your nails between appointments.
Final Thoughts On Gel Nail Art
After years of working with gel nail art professionally, I can confidently say this category has completely transformed what is possible in terms of nail design. The combination of durability, precision and creative flexibility makes gel an incredible medium for both simple, everyday manicures and elaborate, detailed artwork.
Whether you prefer a clean, solid color gel manicure or something more elaborate like hand painted florals, chrome finishes or intricate negative space designs, there is a version of gel nail art that fits your personal style and lifestyle needs. My biggest piece of advice, both as someone who works with these products daily and someone who genuinely loves this craft, is to prioritize proper prep and aftercare just as much as the design itself. A beautiful set of gel nail art means so much more when it actually lasts as long as it looks good.
Frequently Asked Questions About Gel Nail Art
How long does gel nail art typically last?
Properly applied gel nail art usually lasts between two and three weeks before noticeable regrowth or lifting occurs, depending on aftercare and lifestyle factors.
Is gel nail art bad for your natural nails?
Gel itself is not inherently damaging, but improper removal, like peeling or picking, can weaken and thin the natural nail over time. Proper soak off removal helps prevent this damage.
Can I do gel nail art at home without a lamp?
No, gel polish requires UV or LED curing to properly set. Without a lamp, the gel will remain soft, tacky and will not achieve its signature durable finish.
How do I remove gel nail art without damaging my nails?
Gently buffing the top layer, then soaking cotton pads saturated in acetone on each nail wrapped in foil for about ten to fifteen minutes, allows the gel to soften and slide off safely.
What tools do I need to start doing gel nail art?
A UV or LED lamp, a base coat, gel polish colors, a topcoat and a fine detail brush cover the essentials needed to begin creating gel nail art.
Why does my gel nail art keep lifting?
Lifting usually results from improper nail prep, like skipping the dehydrator step or not buffing the natural nail enough, or from undercuring one of the gel layers.
Can gel nail art be done on short nails?
Yes, gel nail art works beautifully on short nails. Keeping details concentrated near the cuticle helps the design stay proportionate on a smaller nail surface.
How much does professional gel nail art typically cost?
Pricing varies by location and design complexity, with simple solid color applications costing less than detailed hand painted or heavily embellished designs.
How often should I take a break from gel nail art?
Taking a short break of one to two weeks every few months allows the natural nail to recover from repeated buffing and curing, helping maintain long term nail health.
What causes bubbles in gel nail art?
Bubbling usually occurs from shaking the polish bottle instead of rolling it gently, or from applying the gel too thickly in a single coat.

4 Comments