
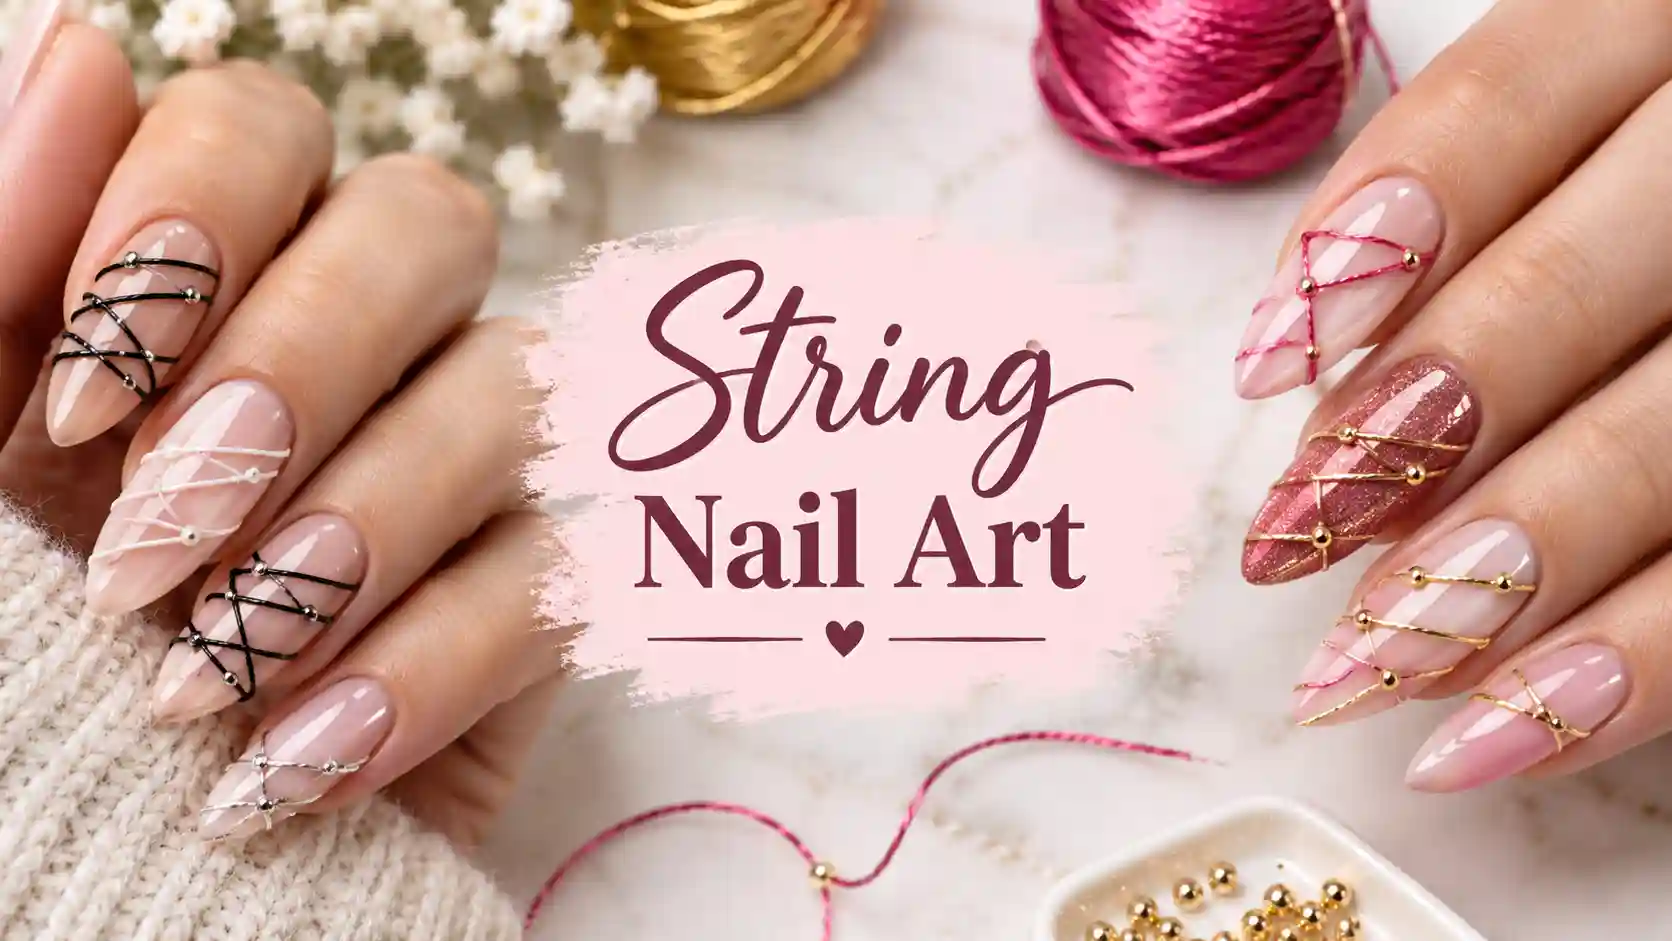
String Nail Art: The Delicate Lace Effect Technique Every Nail Lover Needs To Try
I still remember the first time a client showed me a blurry screenshot and asked if I could recreate it on her nails. It looked like a spider had spun a web directly onto her fingertips, delicate, lacy and completely unlike anything created with a regular brush. That screenshot turned out to be string nail art, and once I actually learned the technique myself, I understood immediately why it had caught her eye.
String nail art has been quietly floating around the nail world for years now, occasionally resurfacing as a trend, occasionally fading into the background, but never really disappearing completely. It is one of those techniques that looks far more complicated than it actually is, which makes it one of my favorite things to teach clients who want to try something new at home without investing in a dozen specialty tools.
In this guide I want to walk you through everything I know about string nail art, from what it actually is and how it differs from other lace or marble techniques, to the exact materials and steps involved, along with design ideas, troubleshooting tips and answers to the questions I hear most often about this particular style. This comes from real hands on experience creating these designs, not just a quick summary pulled together from other articles.
Also Read : Best Simple Nail Art Ideas That Look Salon Fancy
What Is String Nail Art Exactly
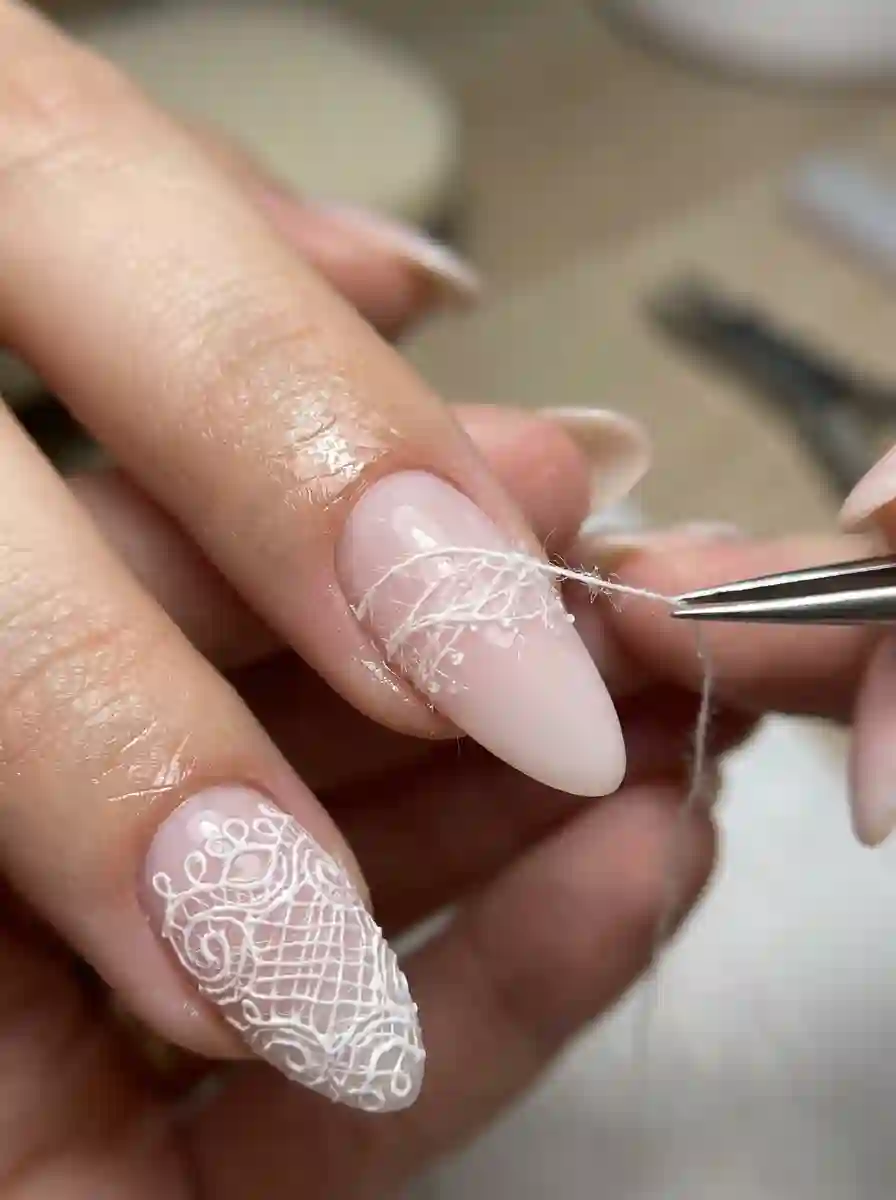
String nail art is a technique where ordinary embroidery thread, dipped into nail polish, gets wrapped repeatedly around the nail in random or deliberate patterns, then carefully removed once the polish has dried. What gets left behind is not the thread itself, but the delicate, web like imprint the polish left on the nail as it dried around each strand.
This is different from freehand nail art, where you paint directly onto the nail with a brush, and it is also different from stamping, where a premade design gets transferred using a metal plate and a stamper tool. String nail art relies entirely on the thread acting as a kind of stencil, creating thin, organic lines that are genuinely difficult to replicate with a brush alone, no matter how steady your hand is.
What makes string nail art so appealing to me as a nail artist is the element of unpredictability. Every single wrap of the thread creates a slightly different pattern, which means no two string nail art designs ever look exactly identical, even when using the same colors and technique on two different clients.
How String Nail Art Differs From Traditional String Art
It is worth clearing up some confusion here, since string nail art shares its name with an entirely different craft. Traditional string art involves hammering small nails into a wooden board and wrapping colored thread between them to form geometric shapes, portraits or monogram designs, usually meant to be hung on a wall as home decor.
String nail art has absolutely nothing to do with that wall decor craft, aside from both techniques involving thread. In string nail art, there are no actual nails involved in the craft sense at all, the only nails are the ones on your fingers. If you search for string nail art and end up on a page about wooden boards, wrapped thread and wall hangings, you have landed somewhere unrelated to what we are covering in this guide.
I bring this up because I have had more than one client walk into my studio holding up a photo of wall art, genuinely confused about why it did not look anything like what they expected to see on their nails. Understanding this distinction from the start saves a lot of confusion later.
A Brief History Of How String Nail Art Became A Trend
String nail art first gained real traction online around the early twenty tens, when DIY beauty bloggers started experimenting with unconventional household items as nail art tools. Embroidery thread, something most households already had tucked away in a sewing kit, turned out to be the perfect tool for creating delicate, web like patterns that would have been nearly impossible to paint freehand.
The technique spread quickly because it required almost no specialized equipment, just thread, polish and a toothpick or orange stick for cleanup. Unlike more advanced nail art techniques that require specific brushes or stamping plates, string nail art offered something achievable for complete beginners working with whatever polish they already owned.
Over the years, string nail art has resurfaced periodically, often alongside broader lace and negative space nail trends. I still see requests for it regularly, particularly from clients who want something that feels a little vintage and handmade compared to more polished, uniform looking nail art styles.
Why String Nail Art Still Deserves Attention Today
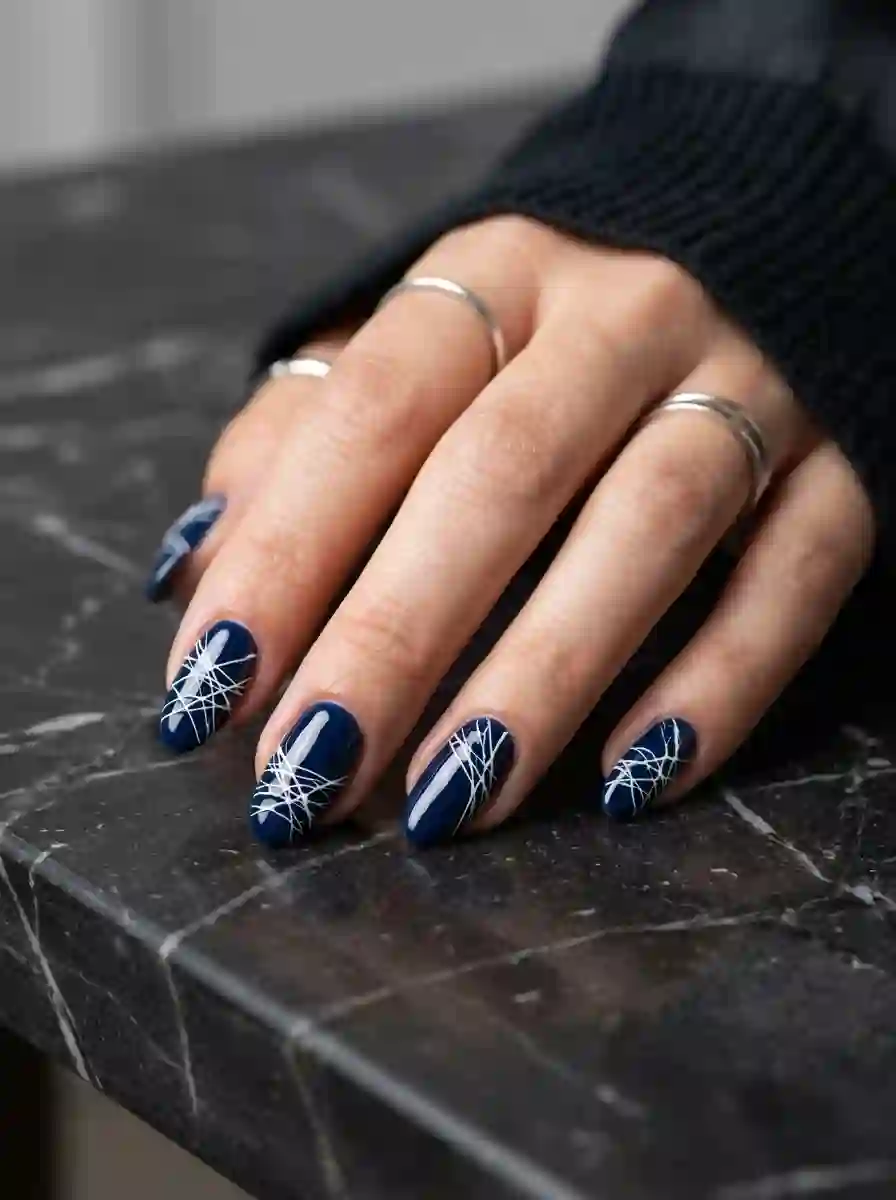
Despite newer techniques dominating a lot of current nail art trends, string nail art genuinely holds up as a technique worth learning. Part of the appeal comes down to accessibility. You likely already own embroidery thread, or can pick some up for just a couple of dollars, which makes string nail art one of the most affordable nail art techniques available to try at home.
The visual result also remains genuinely unique. Marble effects created with a brush or dotting tool tend to look relatively similar from one attempt to the next, while string nail art produces thin, irregular lines with a texture that feels closer to lace or spiderweb than anything achievable through standard painting techniques.
I also think string nail art appeals to people who enjoy a bit of experimentation in their beauty routine. Since the exact pattern depends so heavily on how the thread gets wrapped, every attempt feels a little like a small creative experiment, which keeps the process genuinely fun rather than feeling like you are simply following rigid, repeatable steps.
Read Also : Rose Nail Ideas: 60+ Gorgeous Designs, Shapes and Easy How-Tos for 2026
Essential Materials Needed For String Nail Art
Before attempting string nail art, gathering the right materials makes a significant difference in how smoothly the process actually goes. You do not need anything especially specialized, but having the correct type of thread and polish consistency genuinely affects your final result.
Embroidery floss remains the preferred material for string nail art, since it is thin, flexible and absorbs polish evenly without becoming overly stiff or clumpy. Regular sewing thread can work in a pinch, but it tends to be thinner and more fragile, which can make it harder to control during wrapping. Avoid anything too thick, like yarn or craft string, since bulkier materials create heavier, less delicate patterns that lose the lace like quality string nail art is known for.
You will also need a base color polish, a contrasting polish for the string itself, a topcoat, a small dish or lid for dipping the thread, tweezers or an orange stick for handling the thread, and a bit of tape or cuticle guard to protect the surrounding skin during application.
Choosing The Right Polish Consistency For String Nail Art
Polish consistency plays a surprisingly large role in how well string nail art turns out. Polish that is too thick tends to clump onto the thread unevenly, creating blobby, inconsistent lines rather than the thin, delicate pattern you are aiming for. Polish that is too thin may not adhere properly to the thread at all, resulting in a faint, barely visible design once the thread is removed.
I usually recommend testing your chosen polish on a spare nail wheel or piece of paper first, dipping the thread and dragging it across the surface to check how evenly it transfers before committing to your actual nails.
Step By Step Guide To Creating String Nail Art

Once your materials are ready, the actual process of creating string nail art follows a fairly straightforward sequence, though patience genuinely helps achieve the cleanest results. I always walk clients through this slowly the first time, since rushing tends to lead to smudged or uneven patterns.
Step One: Prep And Base Coat
Start with clean, properly prepped nails. Push back your cuticles, lightly buff the nail surface and apply a protective base coat, allowing it to dry fully before moving forward.
Step Two: Apply Your Base Color
Paint your chosen base color across the nail, applying two thin coats for full opacity. Allow this base color to dry completely, since wrapping thread over wet polish will smear and ruin your base before the string nail art pattern even gets a chance to form.
Step Three: Protect The Surrounding Skin
Apply a cuticle guard product or a thin layer of washable glue around the skin surrounding your nail. This creates a barrier that allows for easy cleanup once the string nail art portion of the design is complete, since polish inevitably gets on the surrounding skin during the wrapping process.
Step Four: Dip And Wrap The Thread
Cut a length of embroidery thread, roughly six to eight inches, and dip it into your chosen contrasting polish, making sure it is evenly coated along its length. Using tweezers or your fingers, begin wrapping the thread around the nail in a random, crisscrossing pattern, pressing gently so the polish transfers onto the nail surface as you go.
Continue wrapping in different directions, varying the angle and spacing of each pass, until the nail is covered in the amount of pattern density you want for your finished string nail art design.
Also Read : Glitter Accent Nail Ideas: 30 Sparkling Designs for Every Style, Shape and Season
Step Five: Let It Set, Then Remove The Thread
Allow the polish on the thread to sit against the nail for about fifteen to twenty seconds, giving it enough time to transfer and begin setting slightly. Then, carefully and slowly peel the thread away from the nail, revealing the delicate string nail art pattern left behind.
Step Six: Clean Up And Seal
Remove the cuticle guard or peel away any excess polish from the surrounding skin using an orange stick or a small brush dipped in acetone. Once your string nail art design looks clean and you are happy with the pattern, seal everything with a glossy topcoat to protect the delicate linework and extend the overall wear time.
Common Mistakes People Make With String Nail Art
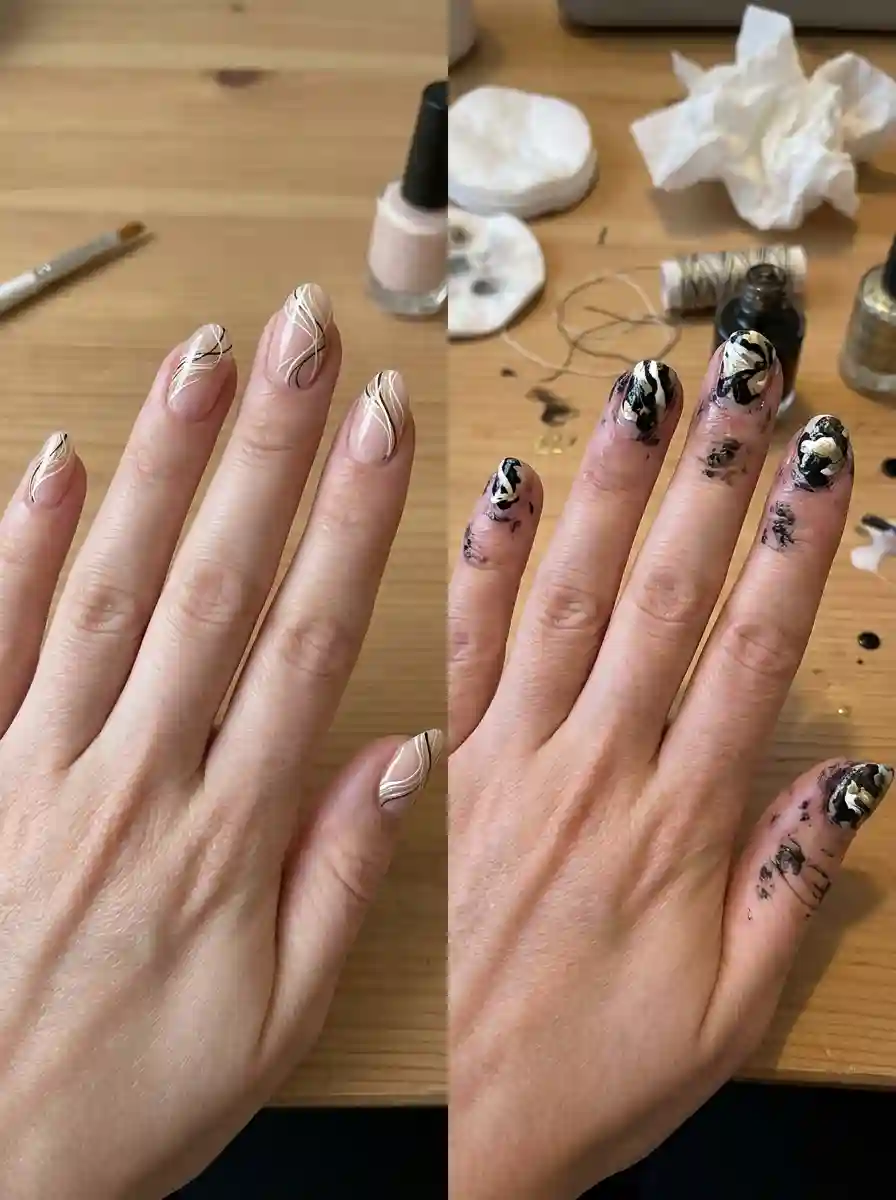
After teaching this technique to plenty of clients and experimenting with it extensively myself, I have noticed a handful of mistakes that come up again and again, particularly with first time attempts at string nail art.
Using polish that is too thick remains one of the most common issues, often resulting in thick, clumpy lines rather than the thin, delicate pattern string nail art is known for. Wrapping the thread too tightly or too densely is another frequent mistake, which can end up covering so much of the base color that the design loses its airy, lace like appearance entirely.
Removing the thread too quickly, before the polish has had a chance to properly transfer and begin setting, also tends to result in a faint, barely visible pattern. On the opposite end, waiting too long to remove the thread can cause it to stick and tear small sections of polish away unevenly as you pull it off.
String Nail Art Design Ideas Worth Trying
Once you feel comfortable with the basic string nail art technique, there is a lot of room to experiment with different color combinations and styles. One of my favorite approaches involves using white thread over a deep, saturated base color like navy, burgundy or black, which creates a striking, high contrast lace effect that photographs beautifully.
Metallic thread or polish also works wonderfully within string nail art, particularly gold or silver over a soft pastel or nude base, giving the finished design a delicate, almost jewelry like quality. For a softer, more subtle look, try using a slightly deeper shade of the same color family as your base, which creates a tonal effect rather than a sharp contrast.
Ombre String Nail Art
Combining string nail art with an ombre base creates a particularly beautiful effect, where the web like pattern sits on top of a gradient background that transitions from one shade into another. I usually create the ombre base first using a makeup sponge, let it dry completely, then layer the string nail art technique on top once the gradient base has fully set.
Accent Nail String Nail Art
For clients who want to try string nail art without committing to a full set, applying the technique to just one or two accent nails, while keeping the remaining nails a simple solid color, offers a beautiful, more subtle introduction to the style. This approach also tends to be significantly faster to complete, which makes it a great option for anyone newer to the technique.
String Nail Art For Different Occasions
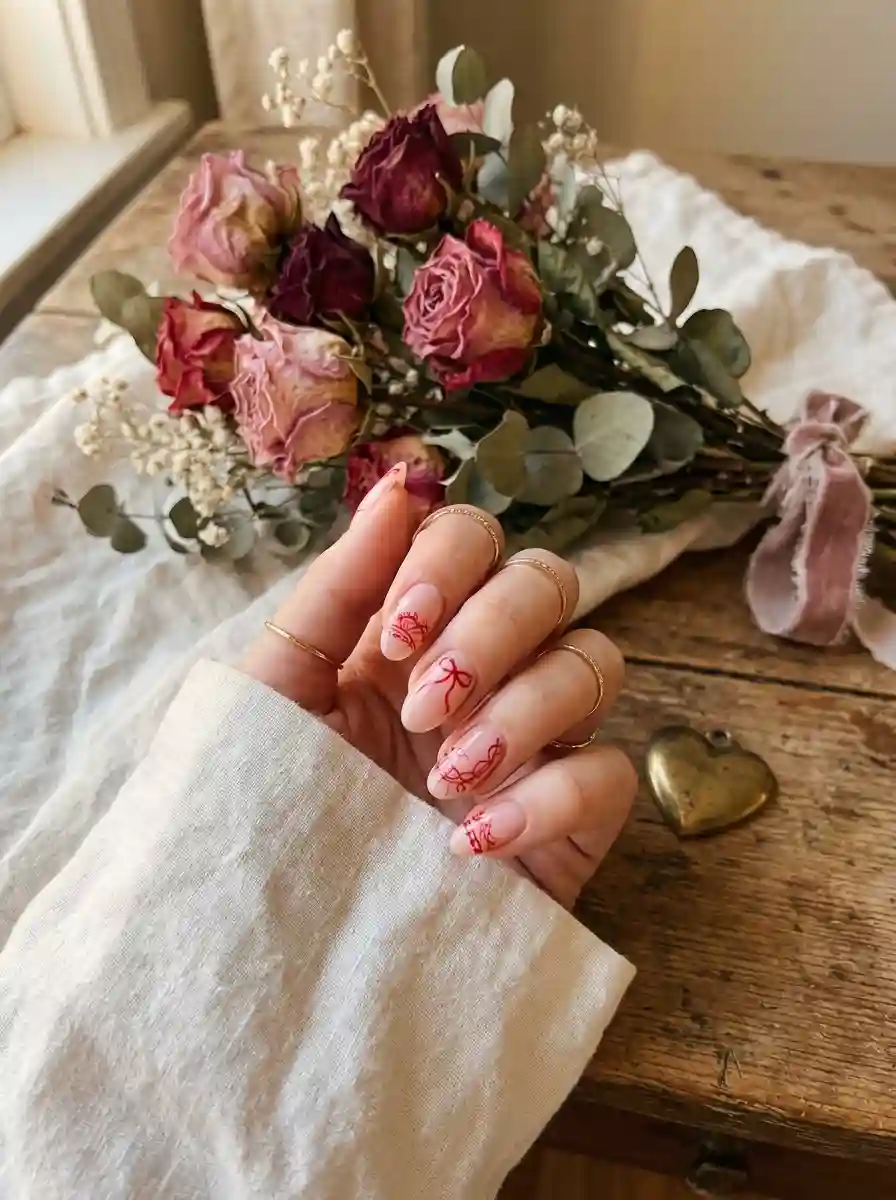
String nail art genuinely adapts well to a wide range of occasions, depending on the color palette and overall density of the pattern chosen. For Valentine’s Day, a soft pink or white base paired with red string nail art threading creates a delicate, romantic lace effect that feels perfectly suited to the holiday without being overly literal or themed.
For weddings, a sheer white or ivory base combined with white or pale gold string nail art creates a subtle, elegant texture reminiscent of actual lace fabric, which pairs beautifully with bridal gowns and makes for a genuinely memorable bridal manicure. For Halloween, black string nail art over an orange or deep purple base instantly evokes a spiderweb effect, perfect for a playful seasonal manicure.
Even for everyday wear, a neutral base with subtle, tonal string nail art offers a sophisticated, textured look that works beautifully in professional settings without feeling overly decorative or costume like.
Must Read : Pink Coffin Nail Ideas: 60+ Gorgeous Designs, Shades and Expert Tips for Every Style
How Long String Nail Art Typically Lasts
String nail art, when sealed properly with a quality topcoat, generally lasts about as long as any other standard nail art design, typically around five to seven days with regular polish, or two to three weeks when created using gel polish and properly cured under a lamp.
Since the design itself consists of thin polish lines rather than a thick, solid layer, I always recommend applying an extra layer of topcoat specifically over the string nail art portion to help seal and protect those delicate details from chipping prematurely. Reapplying a fresh topcoat every few days also helps extend the overall wear time and keeps the design looking crisp for longer.
Can You Do String Nail Art With Gel Polish

Yes, string nail art absolutely works with gel polish, though the process requires a slightly different approach compared to regular polish. Since gel polish does not air dry the way regular polish does, you need to wrap the thread while the gel base is still uncured, then cure the entire design under a UV or LED lamp before removing the thread.
I personally find gel string nail art slightly trickier to master compared to regular polish, since you have less time to experiment with thread placement before the base starts to feel tacky. That said, the payoff is worth it, since gel polish applications of string nail art tend to last significantly longer and resist chipping better than their regular polish counterparts.
Tips For Making String Nail Art Easier As A Beginner
If you are attempting string nail art for the first time, starting with a simplified, less dense pattern genuinely helps build confidence before moving on to more intricate designs. Wrapping the thread just a few times, rather than attempting to cover the entire nail in a dense web, makes it significantly easier to control and gives a cleaner, more intentional looking result.
Practicing on a spare nail wheel or even a piece of paper before committing to your actual nails also helps you get a feel for how the polish transfers from thread to surface, which varies depending on the specific formula and consistency of whatever polish you are using.
Working with slightly longer pieces of thread, roughly eight inches rather than four or five, also makes the wrapping process easier, since shorter pieces can be trickier to hold and maneuver around the nail without accidentally smudging your freshly applied base color.
String Nail Art Versus Other Lace Nail Techniques
String nail art is sometimes compared to other lace inspired nail techniques, like stamped lace designs or hand painted lace patterns, though each method produces a genuinely different result. Stamped lace designs offer precise, uniform patterns transferred from a premade metal plate, which looks beautiful but tends to feel more mechanical and repetitive compared to the organic, irregular quality of string nail art.
Hand painted lace, created entirely with a fine detail brush, allows for the most control and precision, but requires significantly more skill and a much steadier hand compared to string nail art, which relies on the thread itself to do much of the detailed linework for you.
I personally love string nail art specifically because it strikes a nice balance between effort and payoff. It requires far less steady hand control than freehand lace painting, while still producing a result that looks significantly more intricate and handmade than a stamped design.
Read Also : White Nail Design: 40 Fresh Ideas, Expert Tips and a Complete How-To Guide
Removing String Nail Art When You Are Ready For A Change
When it is time to remove string nail art, the process is identical to removing any other polish design. Soaking cotton pads in acetone, placing them over each nail and wrapping with foil for about ten minutes allows the polish to break down fully, making it easy to wipe away without excessive scrubbing or damage to the natural nail underneath.
For gel based string nail art, additional soaking time is typically needed, and gently buffing the surface before soaking can help the acetone penetrate more effectively, speeding up the overall removal process.
Final Thoughts On String Nail Art
After experimenting with string nail art extensively over the years, both in my own practice and while teaching clients how to recreate it themselves, I still think this technique deserves far more attention than it currently gets. It remains one of the most affordable, accessible nail art methods available, requiring nothing more than a bit of thread, some polish and a little patience.
Whether you are drawn to a bold, high contrast version for a special occasion, or a subtle, tonal design for everyday wear, string nail art offers a genuinely unique texture that is difficult to replicate through any other nail art method. My honest advice, after spending plenty of time perfecting this technique myself, is to embrace the unpredictability of it. Every wrap of the thread creates something a little different, and that is exactly what makes string nail art so much fun to keep experimenting with.
Frequently Asked Questions
What is string nail art?
String nail art is a technique where embroidery thread, dipped in nail polish, is wrapped around the nail to create a delicate, web like pattern once the thread is removed.
What type of thread works best for string nail art?
Embroidery floss works best for string nail art, since it is thin, flexible and absorbs polish evenly without becoming overly stiff or clumpy during the wrapping process.
Can I use regular sewing thread instead of embroidery floss?
Yes, regular sewing thread can work, though it tends to be thinner and more delicate, which can make it slightly harder to control compared to embroidery floss.
How long does string nail art typically last?
With regular polish, string nail art usually lasts around five to seven days, while gel based versions can last up to two to three weeks with proper sealing.
Does string nail art work with gel polish?
Yes, string nail art works with gel polish, though the thread must be wrapped while the gel is still uncured, then sealed under a UV or LED lamp before removal.
Why is my string nail art pattern too faint?
A faint pattern usually means the thread was removed too quickly, before the polish had enough time to properly transfer and begin setting against the nail surface.
Why is my string nail art design too thick and clumpy?
Thick, clumpy lines generally result from using polish that is too viscous, which clumps unevenly onto the thread rather than transferring thin, delicate lines.
Can beginners successfully create string nail art at home?
Yes, string nail art is genuinely beginner friendly, since the thread does most of the detailed work, requiring far less steady hand control than freehand nail art.

3 Comments