
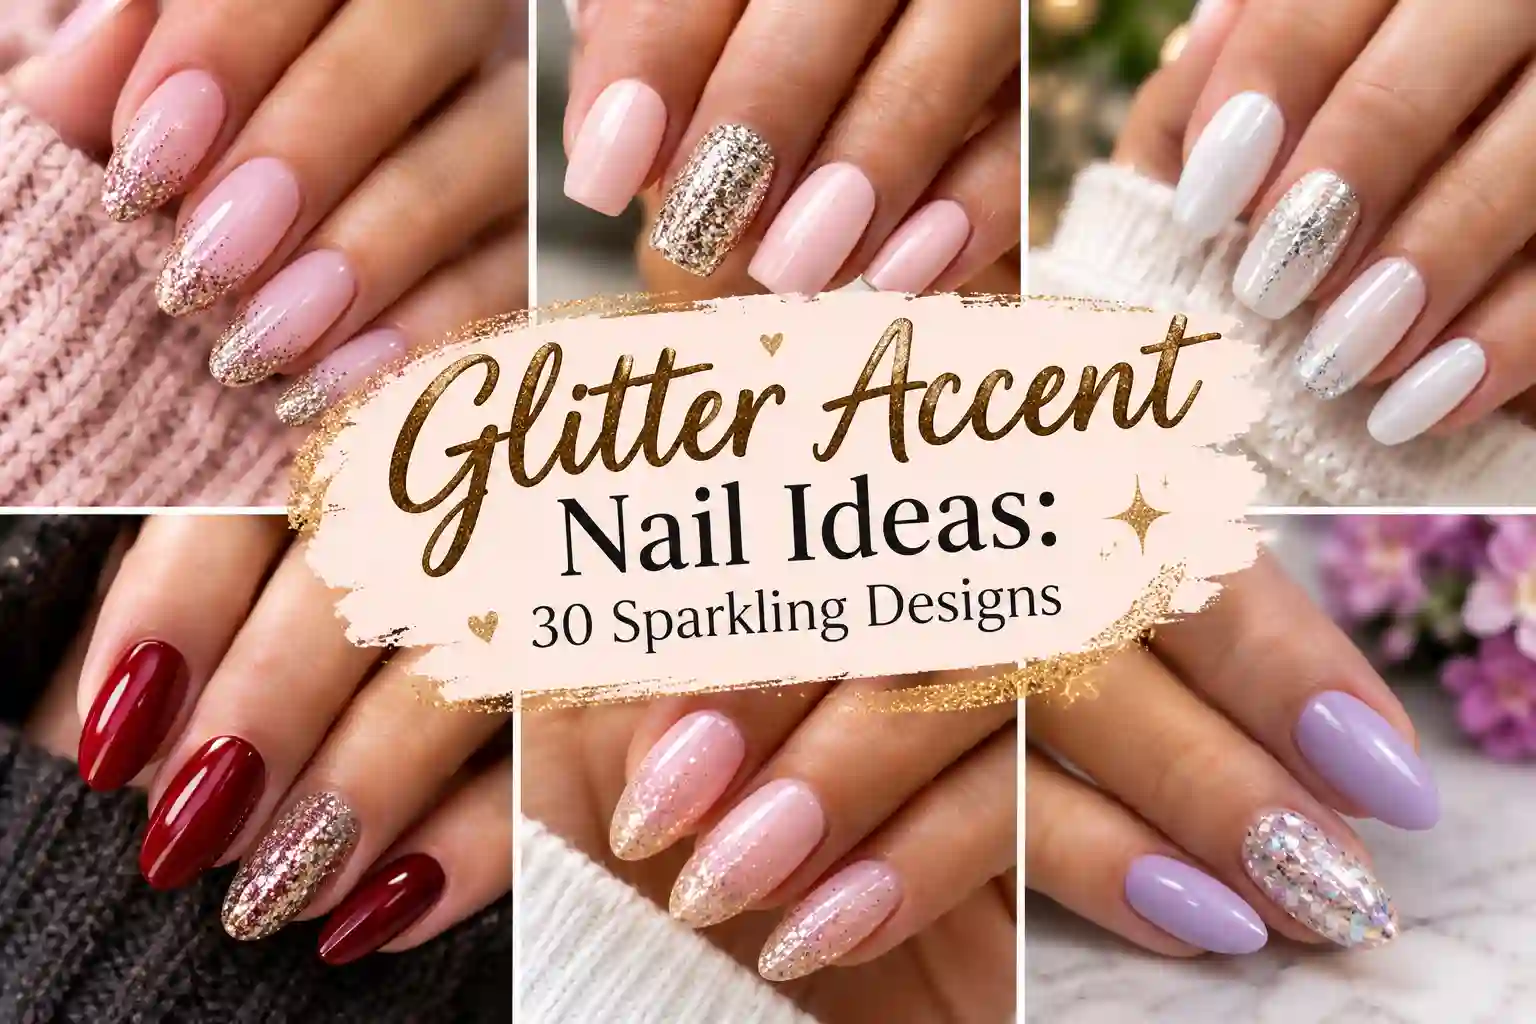
Glitter Accent Nail Ideas: 30 Sparkling Designs for Every Style, Shape and Season
There’s a moment, usually about ten minutes into scrolling nail inspiration, when you realise you want sparkle but you don’t want a full set of disco balls on your fingertips. You want something that catches the light when you reach for your coffee, that gets a quiet “oh, I love your nails” from a coworker, and that still looks like you.
That’s exactly why glitter accent nail ideas keep winning. One or two sparkly nails against a calm, polished base give you the glamour of glitter with none of the commitment. It’s the nail version of a great pair of earrings: small, deliberate, and impossible to ignore.
In this guide to glitter accent nail ideas, we’re going to walk through everything. You’ll learn what a glitter accent nail actually is, which finger to pick (it matters more than you’d think), how the different kinds of glitter behave, and 30 specific designs sorted by colour and occasion. After that we’ll cover nail shapes, a step-by-step method you can do at home, differences between regular polish, gel and acrylic, the mistakes that ruin glitter manicures, and how to take it all off without wrecking your nails.
Grab a coffee and explore these glitter accent nail ideas. Let’s get sparkly.

What Is a Glitter Accent Nail (and Why Does It Work So Well)?
An accent nail is simply one nail, or sometimes two, that’s styled differently from the rest of your manicure. A glitter accent nail takes that idea and uses sparkle as the point of difference. The other eight or nine nails stay in a solid colour, a sheer wash, or a clean French tip, while the accent nail carries the glitter.
So why do glitter accent nail ideas feel so right?
It uses contrast, and contrast looks expensive. Glitter is busy by nature. It has texture, light, and movement. When you place it next to a smooth, glossy or matte colour, your eye reads the glitter as intentional rather than chaotic. A full set of glitter can look like a party. A single glitter nail looks like a decision.
It’s forgiving. If you’re nervous about glitter at work, at school, or at a family event, an accent nail keeps things polished. You can go bolder with one nail than you’d dare with ten.
It works with almost any base colour. Nude, black, milky white, pastel, burgundy, navy: there’s a glitter shade that flatters each of them. That flexibility is why searching for glitter accent nail ideas turns up so many different looks, from understated to dramatic.
It’s easier to do at home. Painting one glitter nail is far less fiddly than dealing with ten, and if it goes slightly wrong, you only have one nail to fix.
It grows out gracefully. Glitter ombré and glitter French accents hide regrowth better than most full-colour sets, so your manicure looks fresher for longer.
The trend behind the sparkle
Glitter isn’t going anywhere. Recent seasonal roundups keep pointing to the same few themes: micro-glitter that reads as shimmer rather than confetti, glitter ombré fades, glitter French tips, and the “matte base plus one sparkly nail” formula. What ties these together is restraint. The look has moved away from heavy, gritty, full-coverage glitter and toward lighter, finer, more wearable sparkle. That makes accent nails the natural hero of the trend.
How to Choose Which Nail to Make the Accent
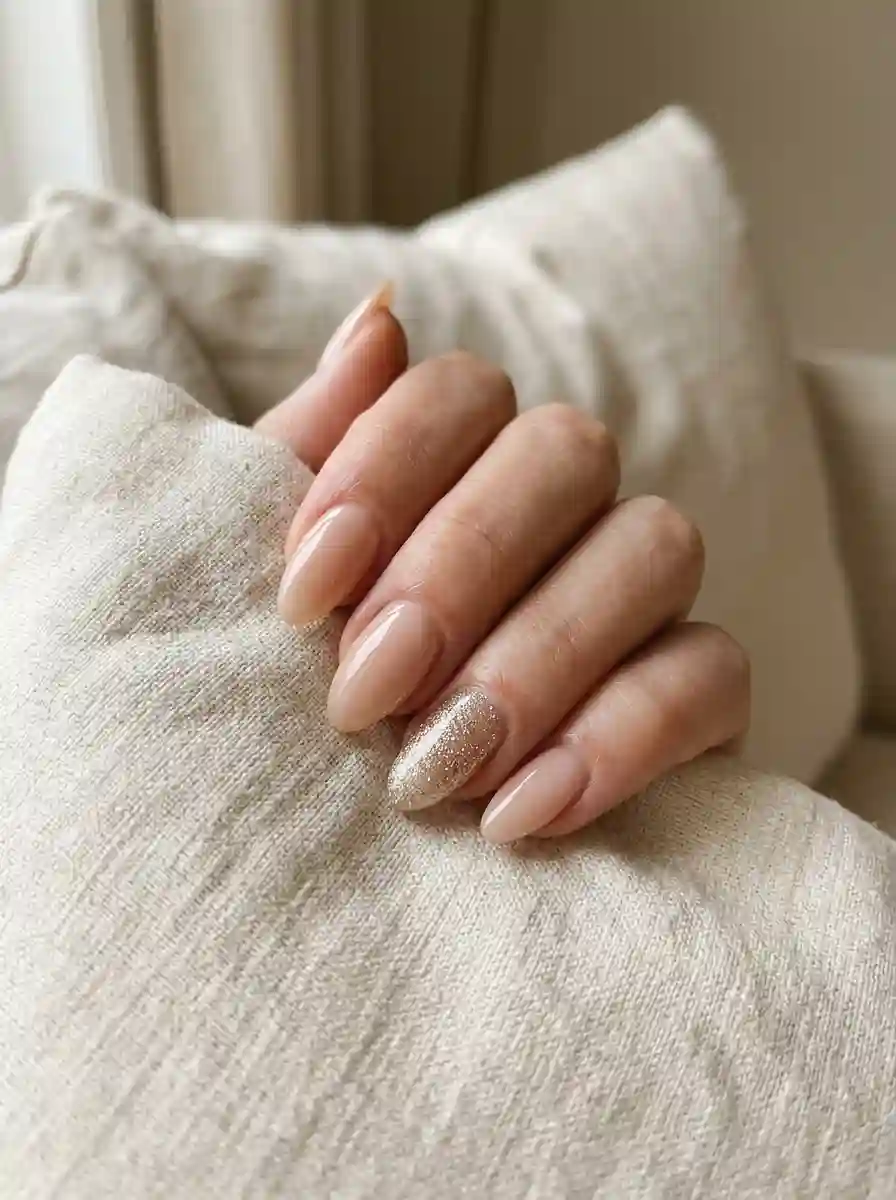
Most articles skip this part, but placement changes the whole feel of glitter accent nail ideas. Here’s how each option plays out.
The ring finger (the classic)
The ring finger is the traditional accent nail, and for good reason. It sits at the edge of your hand’s visual centre, it’s easy to spot when you wave or hold a glass, and it pairs naturally with rings. If you only try one placement, make it this one. It’s balanced, flattering, and nearly impossible to get wrong.
The index finger
Your index finger is the one people see most when you point, type or hold your phone. A glitter index nail feels a little more playful and a little more modern. It’s a lovely option if you wear a ring on your ring finger and don’t want the two competing.
The middle finger
This is the boldest choice because it sits dead centre. A glitter middle finger works best in symmetrical designs, such as a vertical glitter stripe on a solid base, where the centred placement feels architectural.
The pinky
A glitter pinky is a sweet, slightly unexpected detail. It reads as whimsical rather than dramatic, which makes it perfect for minimalists and anyone doing a tiny dose of sparkle.
Two accent nails
Going with two? Pair the ring finger on one hand with the index finger on the other, or put the accent on the ring finger of both hands. Mirror placement feels tidy. Staggered placement feels relaxed and editorial. Both work, so pick whichever fits your personality.
The thumb
The thumb is underrated. It’s wide, which gives glitter more space to show off, and it’s the finger people see when you give a thumbs-up, hold a cup or scroll your phone. A glitter thumb with a plain set is an easy way to look quietly put-together.
A quick rule of thumb: use one accent per hand for everyday looks, and two per hand only when the base colour is very simple (like sheer nude or milky white).
Know Your Glitter: Types, Sizes and How They Behave
Not all glitter is created equal. Choosing the right kind for your glitter accent nail ideas is the difference between a sleek accent and a gritty mess. Here’s a plain-English breakdown.
Micro or fine glitter
Tiny particles that blend into a shimmery, almost metallic finish. Fine glitter is the easiest to work with, gives the smoothest result after top coat, and suits the “quiet luxury” look. Best for beginners, office-friendly manicures and gradients.
Chunky glitter
Larger flecks, often in a mix of sizes. Chunky glitter is dramatic, textured and eye-catching. It can feel gritty under top coat, so it usually needs a few layers of sealing. Best for party nails and bold accent looks.
Hex glitter
Small, hexagon-shaped pieces. They sit flatter than irregular chunks and catch light in a very regular, jewelled way. Hex glitter looks fantastic in holographic or iridescent shades on a dark base.
Holographic glitter
Glitter that splits light into a rainbow effect. It looks silver in some lighting and full of colour in others. Holographic glitter is the star of the “galaxy” and “rainbow shimmer” looks.
Iridescent and opalescent glitter
Softer than holographic, with a pearly, milky shift. This is the glitter you want on pale bases: milky white, lavender, soft pink, sheer nude.
Glitter flakes and foils
Thin, irregular pieces that look like crushed foil. They’re perfect for abstract, cloudy accents, especially in gold, silver and rose gold.
Reflective glitter
A more modern type that flashes brightly under camera flash or direct light. Reflective glitter looks quiet in daylight and explosive at night, which makes it fun for evening events and photos.
Glitter polish vs loose glitter vs glitter gel
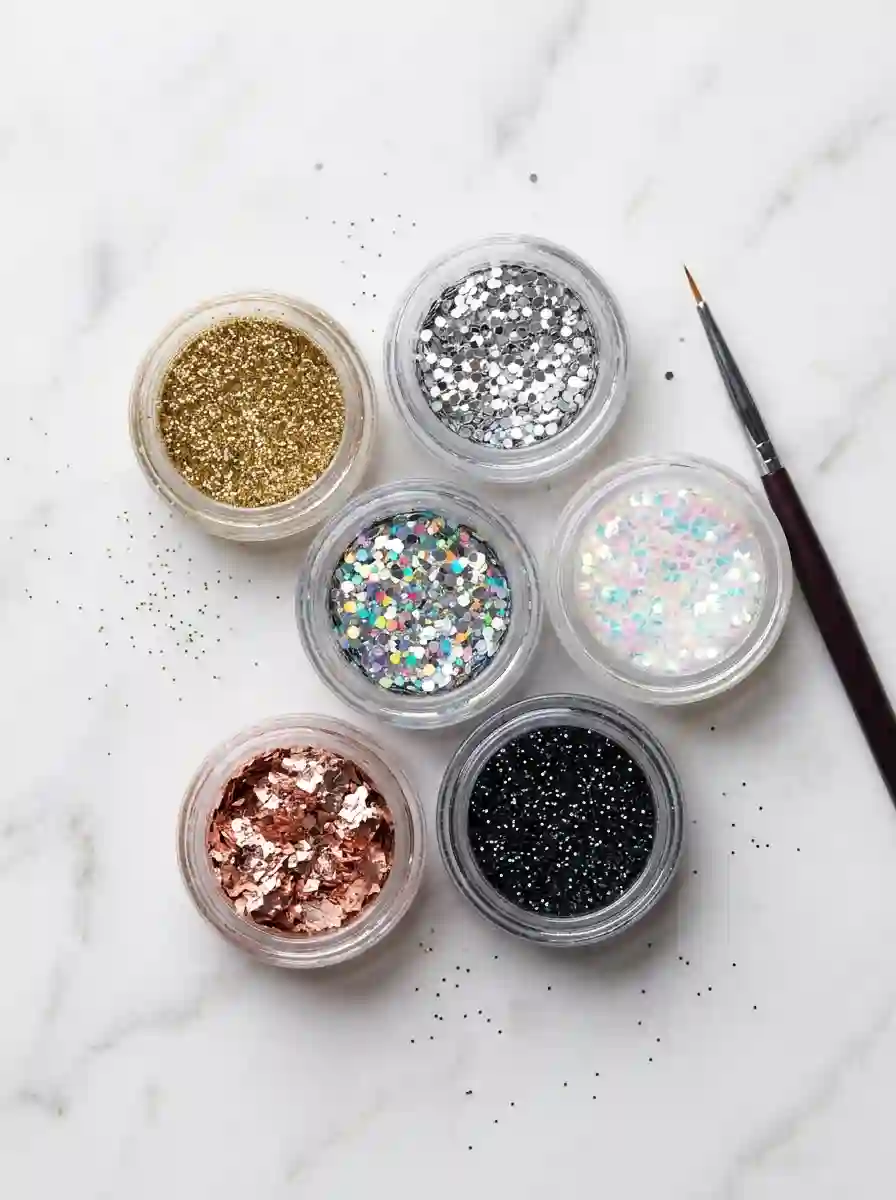
- Glitter polish is the easiest. It’s glitter suspended in a clear or tinted base. You just brush it on. Good for beginners, but coverage can be uneven and you often need two or three coats.
- Loose glitter (pots of pigment or glitter) gives you the most control and the most intense sparkle. You press it onto a tacky base. It takes practice but looks richer.
- Glitter gel is gel polish with glitter in it, cured under a UV or LED lamp. It lasts longer and is easy to build up in layers.
Which glitter should you pick?
If you want it simple: pick a fine glitter polish in a shade close to your base colour. If you want it dramatic: choose loose chunky or hex glitter in a contrasting colour. If you want modern and soft: go for iridescent micro-glitter.
30 Glitter Accent Nail Ideas, Sorted by Colour and Occasion
Now for the fun part: 30 glitter accent nail ideas. Each idea below includes what to do, what you’ll need and why it works. Mix and match freely. Almost every design can be recreated with regular polish, gel or acrylic.
Nude and Neutral Glitter Accent Nail Ideas
Neutrals are the easiest canvas for glitter. They keep everything soft, so the sparkle looks refined rather than loud.
1. Sheer Nude with a Champagne Gold Ring Finger
This is the classic starter look. Paint all nails in a sheer, milky nude. On your ring finger, apply two coats of fine champagne-gold glitter polish, concentrating the density at the tip so it fades slightly toward the cuticle. Seal with a glossy top coat.
Why it works: the warmth of the gold lifts the nude without fighting it. It looks great on every skin tone, and it’s about as office-friendly as glitter gets.
2. Beige with Silver Micro-Glitter
If gold feels too warm, swap it for silver. A neutral beige or greige base paired with a micro-glitter silver accent has a cooler, more modern look. Use a very fine glitter so it reads as shimmer.
Why it works: silver on beige feels clean and slightly futuristic. It’s wonderful for anyone who wears mostly black, grey, white and denim.
3. Taupe with a Rose Gold Glitter Ombré Accent
Paint your nails in a soft taupe. On one accent nail, sponge rose gold glitter from the tip toward the middle, letting it thin out naturally. The gradient gives the nail depth and a luminous look.
Why it works: the glitter ombré is one of the most flattering ways to wear sparkle. The fade means there’s no hard edge to chip, and regrowth is far less obvious.
4. Nude with a Glitter French Tip Accent
Keep every nail in sheer nude, but give your ring finger a glitter French tip. Use a thin, curved line of fine silver or gold glitter along the free edge. You can also do the French tip in an iridescent shade for a softer shift.
Why it works: it’s a quiet twist on the French manicure. From a distance it reads as classic. Up close, it sparkles.
5. Warm Tan with Chunky Bronze Hex Glitter
Try a warm tan or caramel base with a ring finger covered in bronze or copper hex glitter. Press the hex pieces onto a tacky base coat, then seal with two layers of top coat to smooth the surface.
Why it works: the tone-on-tone warmth feels autumnal and rich, and the hex pieces add real texture.
6. Nude with a Glitter Half Moon
Leave a thin gap at the cuticle, then fill the rest of one accent nail with glitter in a curved shape, leaving the base of the nail natural. Paint everything else in a nude shade that matches your skin.
Why it works: the negative space feels airy, minimal and clever. It’s a favourite among people who like their nails to look “designed” rather than decorated.
Milky White and Pearl Glitter Accent Nail Ideas
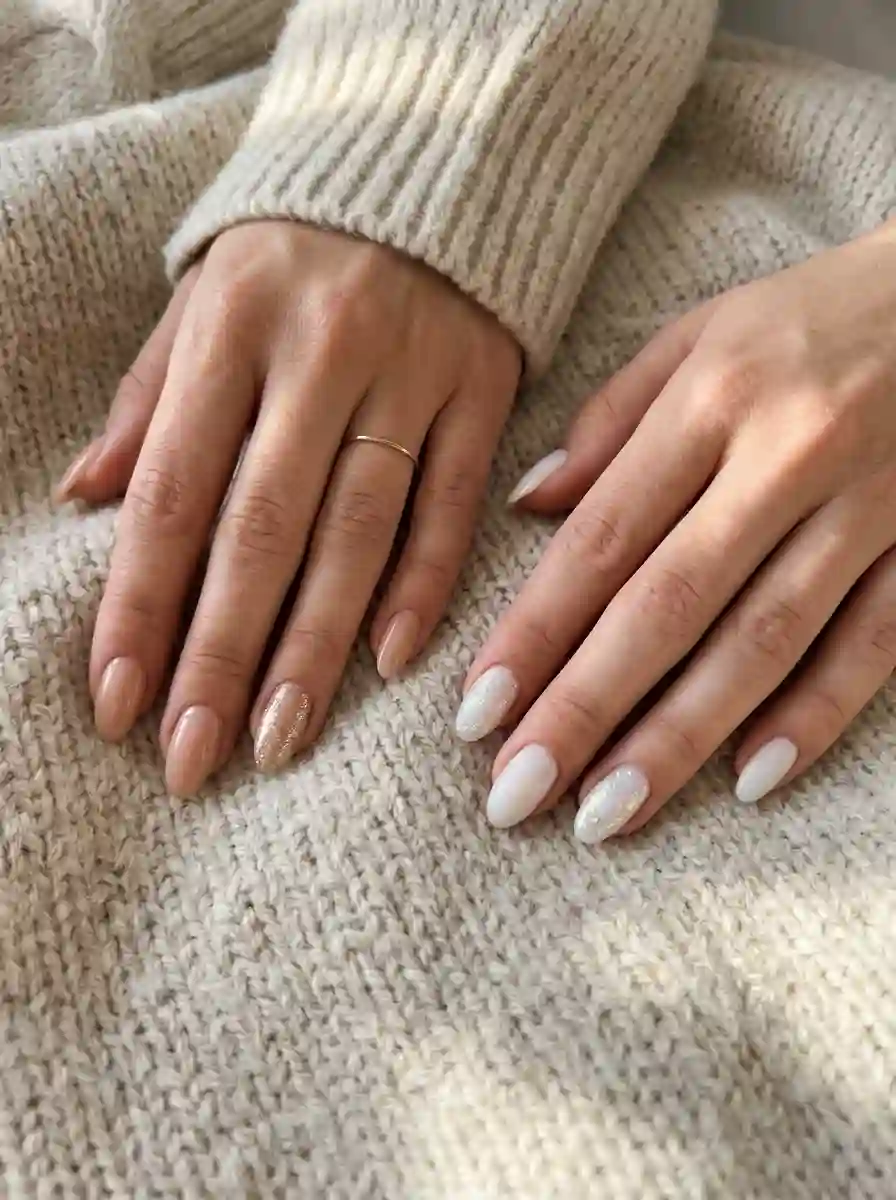
White bases feel fresh and clean, and they make glitter pop. Milky whites give a softer, more romantic backdrop than stark white.
7. Milky White with Iridescent Accent
Paint your nails in sheer milky white (two coats usually give a soft, jelly-like finish). Add iridescent glitter to the index and ring fingers. Keep the glitter fine so it shifts between pearl, pink and blue depending on the light.
Why it works: it’s clean, minimal and polished enough for formal events, weddings and work. It’s also one of the most popular combinations seen in summer glitter roundups for good reason.
8. Crisp White with a Silver Glitter Gradient
For a sharper, more graphic look, start with an opaque white base. On your accent nail, apply silver glitter from the cuticle upward, fading as it moves toward the tip. You can reverse it for a different feel.
Why it works: the high contrast makes the glitter sparkle harder, and the fade keeps it from looking heavy.
9. White with a Holographic Glitter Stripe
Using nail tape or a striper brush, add a single vertical or diagonal stripe of holographic glitter down your accent nail. Peel the tape while the polish is still slightly wet for a clean edge.
Why it works: a stripe is a minimalist take on glitter that feels architectural. It’s a beautiful choice if you don’t like the look of full-coverage sparkle.
10. Pearl White with a Glitter and Pearl Cluster
Paint a pearly white base, then on one nail create a small cluster of fine glitter and two or three tiny pearls near the cuticle. Seal around the pearls carefully so they stay put.
Why it works: it’s romantic and slightly bridal. It also gives you a tactile detail without needing a full set of 3D art.
Black and Dark Glitter Accent Nail Ideas
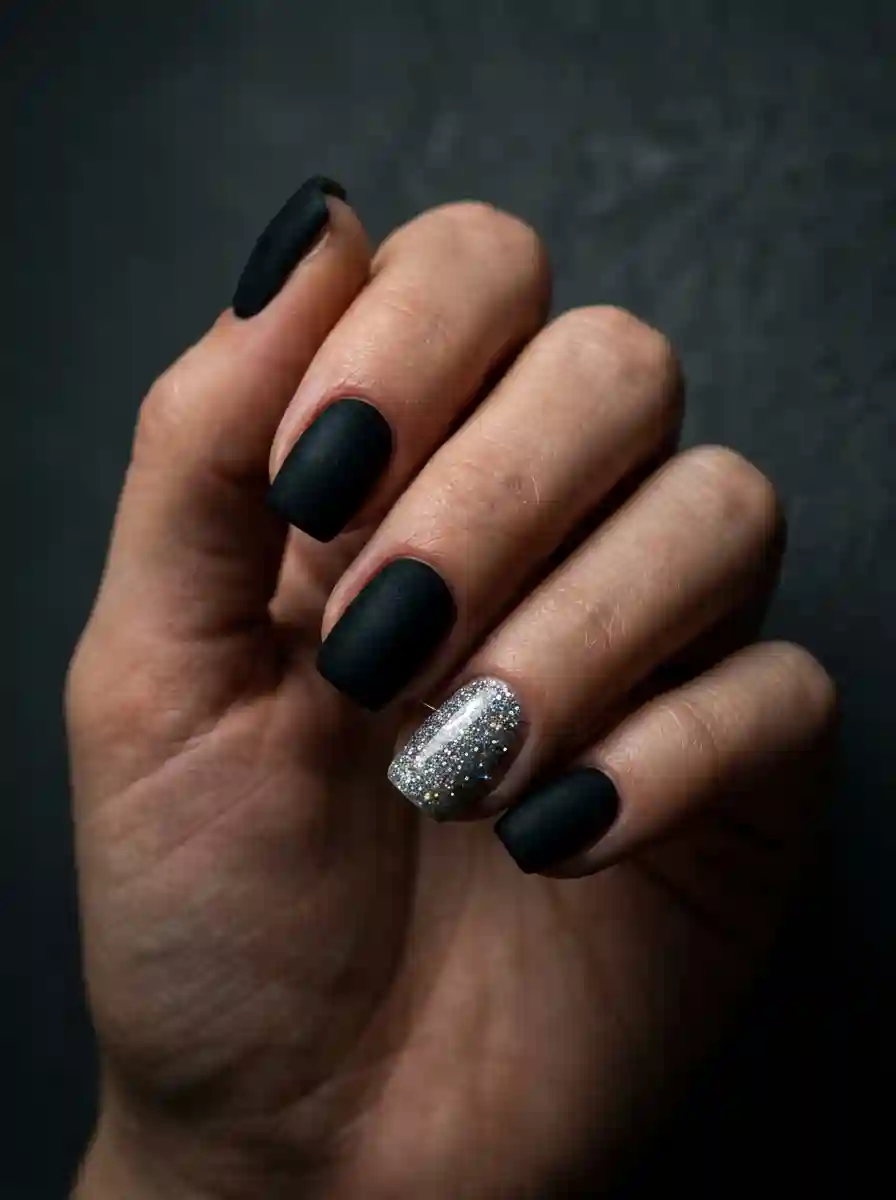
Dark bases make glitter look dramatic. If you want a manicure with a bit of edge, this is where to look. Black glitter looks are also some of the most searched trends in recent seasonal roundups, especially the matte base plus single sparkly nail formula.
11. Matte Black with a Silver Glitter Ring Finger
This one is a modern classic. Paint all nails in matte black. Make the ring finger glossy by applying a clear coat, then cover it with silver glitter. Seal with glossy top coat.
Why it works: the contrast between matte and glossy is the whole effect. It feels sleek, edgy and surprisingly wearable.
12. Glossy Black with a Gold Glitter Ombré
Paint your nails black with a glossy finish. On your accent nail, sponge gold glitter from the tip to the middle. Add a second layer for density at the tip.
Why it works: gold against black has a timeless, slightly luxe look that works for evenings out, dinners and festive occasions.
13. Black with a Holographic Galaxy Accent
Use a deep black base, then dab holographic glitter in a cloudy, uneven pattern across an accent nail. Add a few specks of blue or purple for a galaxy effect.
Why it works: the holographic glitter shifts between colours as you move, which gives the nail a dreamy, cosmic feel.
14. Black with a Glitter French Accent
Keep all nails black, but give your ring finger a thin glitter French tip in silver or gold. You can go even more graphic with a double French line.
Why it works: it’s a subtle upgrade to a black manicure. It adds interest without overpowering the darker base.
15. Charcoal with Gunmetal Glitter
Swap black for charcoal grey and use a gunmetal or graphite glitter on an accent nail. The monochrome palette feels refined and understated.
Why it works: tone-on-tone glitter looks sophisticated and expensive, and it’s one of the more unexpected approaches to dark glitter accent nail ideas.
Pink and Red Glitter Accent Nail Ideas
Pink and red are natural partners for glitter. They feel romantic, playful and festive, depending on how you style them.
16. Baby Pink with Silver Glitter
Paint your nails baby pink, then add a silver glitter accent on your ring finger. Use fine glitter for a soft, sugary look.
Why it works: the combination feels youthful, clean and a little bit dreamy. It’s an ideal pick for spring or any time you want something sweet.
17. Hot Pink with Fuchsia Glitter
Go bold: a vibrant hot pink base with a fuchsia or magenta glitter accent. The glitter should be just a few shades deeper or lighter than the polish for a tone-on-tone effect.
Why it works: it’s playful, high-energy and photographs beautifully. It’s great for holidays, birthdays and summer weekends.
18. Rose Pink with a Rose Gold Ombré
Soft rose pink on all nails, with a rose gold glitter ombré on the ring finger. The gradient moves from the tip toward the middle.
Why it works: the colour story is warm and flattering. It also feels very feminine without being too sweet.
19. Classic Red with Gold Glitter
Paint your nails in a true red. On one accent nail, add a fine gold glitter fade or a glitter French tip. Seal with a high-shine top coat.
Why it works: red and gold is a timeless pairing. It’s glamorous for evenings and festive occasions, and it never feels out of date.
20. Burgundy with Rose Gold Glitter
Deep burgundy or merlot nails with a single rose gold glitter accent create a moody, elegant look. Try a half-moon shape or a glitter ombré for added interest.
Why it works: burgundy is rich and warm, and the rose gold adds a soft glow. It’s one of the best autumn and winter glitter accent nail ideas.
Blue, Green and Purple Glitter Accent Nail Ideas
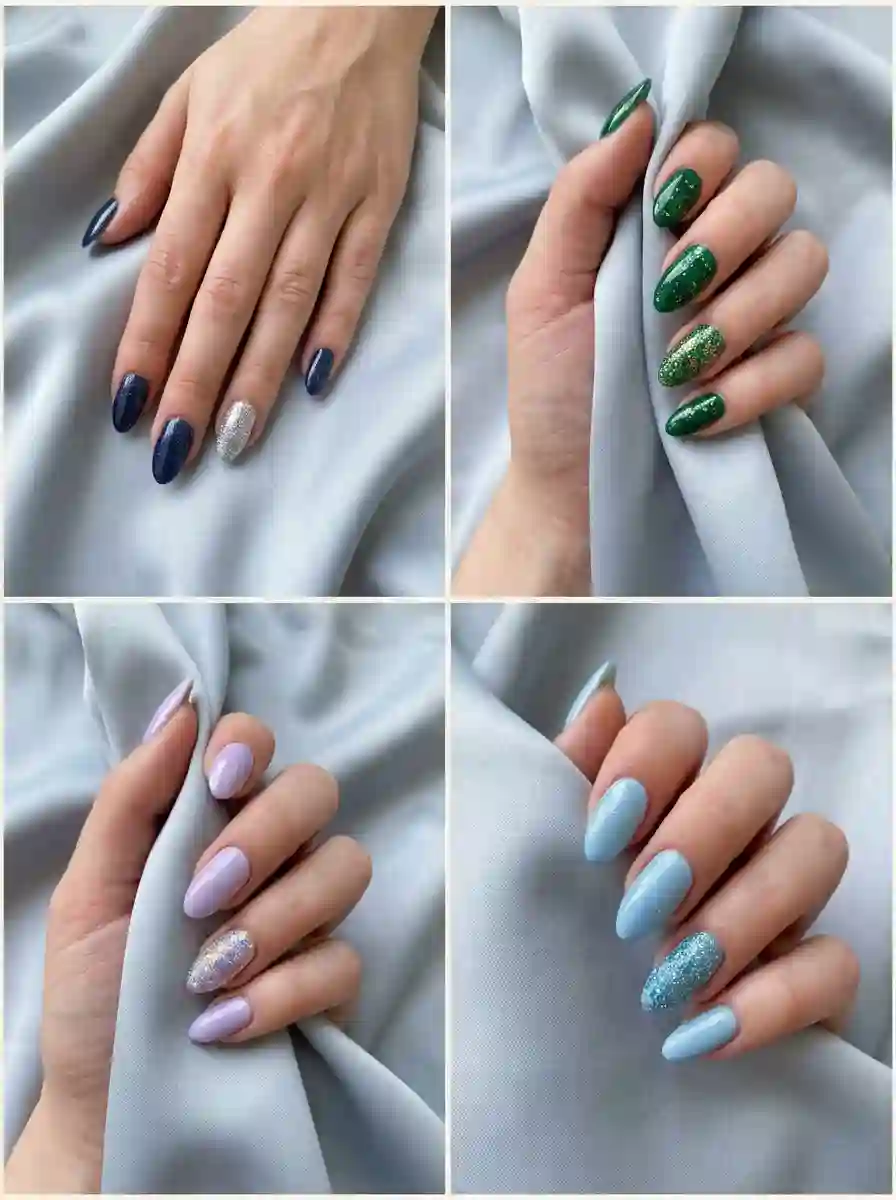
Cooler colours bring a different mood: dreamy, jewelled, a little mysterious. Glitter in these shades feels like night skies, forests and gemstones.
21. Navy with Silver Stardust
Paint your nails a deep navy, almost midnight. On the ring finger, scatter fine silver glitter so it looks like stars across a night sky. Don’t aim for even coverage. Gaps are the point.
Why it works: navy is a softer alternative to black, and the silver feels crisp against it. It’s a polished choice for winter, formal events and anyone who finds black a bit harsh.
22. Emerald Green with Gold Flakes
Choose a rich emerald or forest green. Press a few torn gold foil flakes onto one accent nail while the polish is tacky, then seal. Let some of the green show through between the flakes.
Why it works: green and gold is jewellery in nail form. It’s rich without being loud, and it suits warm and olive skin tones beautifully.
23. Lavender with Iridescent Glitter
A milky lavender base is soft and calming. Add iridescent glitter to one or two accent nails, keeping the sparkle fine so it shifts between pink, blue and silver as it moves.
Why it works: the pastel and the pearly glitter share the same airy quality. It looks lovely with white linen, denim and floral prints.
24. Sky Blue with Icy Blue Glitter
Paint your nails in a pale sky blue, then add a glitter accent in a slightly deeper icy blue. Try a gradient that starts dense at the tip and fades toward the middle of the nail.
Why it works: the tone-on-tone effect looks like frosted glass. It’s refreshing in summer and surprisingly elegant in winter.
Pastel, Spring and Summer Glitter Accent Nail Ideas
Warm-weather glitter should feel light, fresh and a bit playful. Think sunshine on water rather than a night out.
25. Coral with Fine Gold Glitter
A bright coral base with one gold glitter accent looks like a sunset on your fingertips. Use a very fine glitter and keep the finish glossy.
Why it works: coral is warm and happy, and the gold glitter amplifies that glow. It looks stunning against a tan.
26. Mint or Sage with Champagne Glitter
Soft mint or sage green on all nails, and a champagne glitter accent on the ring finger. The colours are calm, and the glitter adds a touch of polish.
Why it works: muted green and soft gold feel natural and sophisticated. It’s a good pick if you like colour but don’t want anything too loud.
27. Sunset Confetti Accent
Paint your nails in a sheer peachy-orange. On one accent nail, sprinkle multicoloured glitter, including pink, orange, yellow and a little gold, over wet polish to create a confetti effect. Press gently to settle it, then seal with two layers of top coat.
Why it works: it’s fun, festive and made for holidays, festivals and warm evenings. The sheer base lets the confetti do all the talking.
Occasion Glitter Accent Nail Ideas: Weddings, Holidays and Party Nights

Sometimes a manicure has a job to do. These three ideas are built for occasions.
28. Bridal Blush with a Delicate Glitter Line
Paint your nails in sheer blush or milky pink. On the ring finger, draw a single fine line of glitter along the cuticle or a thin diagonal across the nail using a striping brush. Keep everything else glossy and clean.
Why it works: it’s subtle, romantic and photographs well. Guests who see it up close will notice the sparkle, but it never competes with a ring or a dress. It’s an easy choice for brides, bridesmaids and wedding guests.
29. Festive Red or Green with Gold Glitter
For the holidays, pick a deep red or forest green and add a gold or silver glitter accent. You can do a glitter French tip, a full glitter nail or a few dots of glitter arranged like tiny ornaments.
Why it works: the colours say “holiday” instantly, but the single accent keeps it classy rather than costume-like.
30. New Year’s Eve Reflective Glitter
Go for a black, deep burgundy or champagne base, then cover one or two accent nails in reflective glitter. The sparkle will look calm in daylight and explode under flash photography.
Why it works: it gives you a showstopper moment at midnight without needing a full glitter set. Add a glossy top coat for extra shine.
The Best Nail Shapes and Lengths for Glitter Accent Nails
The same glitter looks different depending on the canvas. Here’s how shape and length change the effect.
Short nails
Short nails are fantastic for glitter accents. Because there’s less surface area, a single glitter nail feels deliberate and neat. Go for fine glitter, glitter ombré, or a half-moon. Avoid very chunky glitter, which can overwhelm a small nail.
Medium nails
Medium length gives you room to play. Glitter French tips, vertical stripes and gradients all look great. This is the most versatile length for glitter accent nail ideas.
Long nails
Long nails are a bigger canvas, so you can go bolder: holographic galaxy effects, chunky hex glitter, or full-coverage accents. Just keep the rest of the set simple so the design doesn’t become too busy.
Nail shapes at a glance
- Almond: soft and elongating. Glitter ombré follows the curve beautifully.
- Oval: gentle and classic. Glitter French tips and half-moons look graceful here.
- Square: modern and clean. Glitter stripes and geometric lines feel sharp on square tips.
- Squoval (soft square): flattering and practical. It handles every kind of glitter well.
- Coffin or ballerina: dramatic and long. Chunky or holographic glitter makes a statement.
- Stiletto: edgy and sharp. A glitter fade toward the point gives a dramatic effect.
Choosing glitter for your skin tone
There’s no strict rule, but a few guidelines help. Cool undertones tend to love silver, icy blue, lilac and rose pink glitter. Warm undertones glow with gold, bronze, copper and coral. Neutral undertones can wear almost anything. Deeper skin tones look incredible with high-contrast glitter, such as gold on black, silver on navy, or bright holographic on deep burgundy. When in doubt, hold the polish against your hand in daylight and see how it looks.
How to Do a Glitter Accent Nail at Home: Step-by-Step
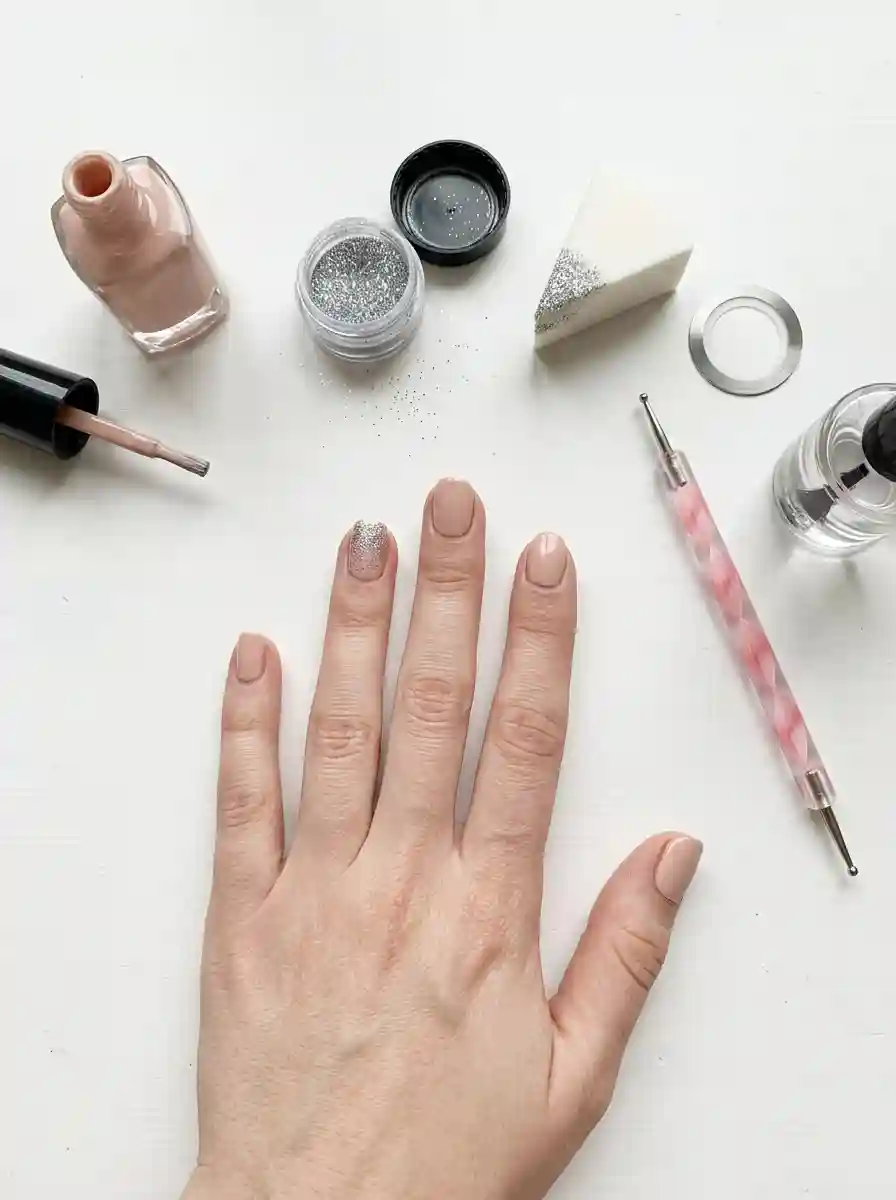
You don’t need a salon to pull this off. With a few basics and a bit of patience, you can create a polished glitter accent nail at home.
What you’ll need
- Base coat
- Your chosen colour polish
- Glitter polish or loose glitter
- Clear polish or a sticky glitter base
- A fine detail brush or dotting tool
- A makeup sponge (for gradients)
- Nail tape (for stripes and geometric shapes)
- Glossy top coat
- Nail polish remover and a small brush (for clean-up)
Step 1: Prep your nails
Push back your cuticles, shape your nails and wipe them with remover to take off oils. Clean, dry nails are the foundation of any manicure that lasts.
Step 2: Apply a base coat
A good base coat protects your natural nails from staining and helps the colour stick. Let it dry for a minute or so.
Step 3: Paint your base colour
Apply two thin coats of your chosen shade to all nails, including your accent nail. Thin coats dry faster and look smoother than one thick coat. Let each coat dry properly.
Step 4: Add the glitter to your accent nail
This is where the technique depends on the look you want.
For glitter polish: brush on one or two coats over the dry base colour, concentrating the glitter where you want it most. Dab the brush rather than swiping to pull glitter pieces onto the nail.
For loose glitter: brush a thin layer of clear polish or sticky base over the accent nail. While it’s still tacky, press glitter onto the surface with a small brush, a silicone tool or a dry sponge. Tap away excess.
For a gradient: dab glitter polish onto a makeup sponge, then press the sponge onto the nail, working from the tip (or cuticle) and tapering off toward the middle. Repeat two or three times for density.
For a stripe: place nail tape on the dry base colour, paint glitter polish over the open area, then peel off the tape before the polish dries completely.
Step 5: Place stubborn glitter with a dotting tool
If larger pieces refuse to lie flat, use a slightly damp dotting tool or the tip of your brush to nudge them into place. Hex glitter in particular needs a little guidance.
Step 6: Seal with top coat
Glitter has texture, so one layer of top coat usually isn’t enough. Apply a generous layer, let it dry, then add another to smooth the surface. Make sure to cap the free edge by running the brush along the tip of the nail.
Step 7: Clean up the edges
Dip a small brush in remover and trace around the cuticle and sidewalls to remove any stray polish or glitter. This step makes a homemade manicure look professional.
Step 8: Let it cure
Give your nails at least ten to fifteen minutes before you use your hands. Thin layers and patient drying are the secret to avoiding smudges.
Regular Polish, Gel, Acrylic, Dip Powder and Press-Ons: What Changes?
The core idea of a glitter accent nail stays the same, but the method and longevity differ depending on the system you use.
Regular nail polish
This is the easiest and cheapest route. It’s perfect for beginners and for changing your look often. The downside is durability: expect around five to seven days before chips appear, sooner if you work with your hands. Glitter polish also tends to be harder to remove.
Gel polish
Gel is cured under a UV or LED lamp, so every layer sets instantly and you don’t have to wait for drying. It’s glossy, long-lasting and gives you complete control when placing glitter. Many people get two weeks or more of wear. If you’re using loose glitter, gel is the easiest medium to work with because you can place each piece and then cure it in position.
Acrylic and builder gel
With acrylic or builder gel, glitter can be mixed right into the product or encapsulated between layers. That gives you a smooth, durable surface with no gritty feel, and it’s how many of the dramatic, long-wear glitter looks are created. This option is best handled by a nail technician, particularly if you’re new to the process.
Dip powder
Dip powder is a durable option where glitter powder can be dipped, brushed or layered on. It’s sturdy and long-lasting. Just remember that removal takes time, and you should be careful not to peel it off.
Press-on nails
Press-ons are the fastest way to try glitter accent nail ideas without any commitment. Choose a set with one glitter accent nail, or buy plain sets and decorate your own accent with glitter and top coat. They’re also a great way to test out a colour combination before doing it for real.
Quick comparison
| Method | Wear time | Difficulty | Best for |
|---|---|---|---|
| Regular polish | 5 to 7 days | Easy | Beginners and quick changes |
| Gel polish | 2 to 3 weeks | Medium | Smooth, glossy, long wear |
| Acrylic or builder gel | 3 to 4 weeks | Advanced | Encapsulated and 3D glitter |
| Dip powder | 3 to 4 weeks | Medium | Sturdy everyday wear |
| Press-ons | Days to weeks | Very easy | Trying a look with no commitment |
Wear times vary with nail growth, lifestyle and how well the manicure is applied.
Common Glitter Manicure Mistakes (and How to Avoid Them)
Glitter is tricky, and most problems come down to a handful of avoidable habits.
Using too much glitter. More isn’t always better. A thick glitter layer feels rough and tends to peel. Build up in thin layers instead.
Skipping the top coat. Without sealing, glitter can snag on hair and clothing, and it can catch the edge of a nail and lift. Always seal with at least one generous layer.
Forgetting to cap the free edge. The tip of the nail takes the most abuse. Wrapping top coat over the edge keeps the glitter from chipping.
Applying glitter over wet polish. Unless you’re doing a loose glitter technique that needs a tacky base, let polish dry before adding glitter polish on top. Otherwise it can smear and drag.
Choosing glitter that fights the base. Not every combination works. If your base is very busy, the glitter just adds noise. Keep the rest of your manicure calm.
Using glitter that’s too coarse for the nail. Very chunky glitter on short nails can look heavy. Match the size of the glitter to the size of the nail.
Peeling off glitter. This one’s tempting, and it’s the fastest way to damage your nail plate. Peeling takes the top layers of your nail with it, leaving them thin and sensitive.
Rushing the drying time. Glitter polish holds more product than regular polish, so it takes longer to set. Give it time.
How to Remove Glitter Nail Polish Without Damaging Your Nails
Glitter is famously stubborn, but a smart method makes removal much easier.
The foil method for regular glitter polish
- Tear small squares of aluminium foil, one for each glittery nail.
- Soak a cotton pad in acetone-based remover (or a non-acetone version if you prefer, though it takes longer).
- Place the pad over the nail and wrap with foil to hold it in place.
- Wait about ten minutes, then press and slide the foil off, taking the loosened glitter with it.
- Use a gentle wipe for any remaining traces.
This method prevents you from scrubbing endlessly, which can irritate your nail and the skin around it.
For gel polish
Gently buff the shiny top layer, then use the same soak-and-wrap method with acetone. Don’t scrape aggressively. Gently push away the softened product with a wooden or rubber tool. If it doesn’t lift easily, soak again.
For acrylic and dip powder
These are best removed by a technician, who can file them down safely and soak off the rest. If you’re removing them at home, file down most of the product first, then soak, and be patient.
Aftercare after removal
Acetone dries out skin and nails, so look after them after removal. Wash your hands, then massage cuticle oil and a rich hand cream into your fingers and nails. Give your nails a day or two of rest if they feel thin or brittle before applying another manicure.
How to Make Your Glitter Accent Nails Last Longer
A few simple habits make a big difference.
- Prep thoroughly. Oils on the nail are the number one reason polish lifts early.
- Apply thin layers. Thick coats stay soft and wrinkle or chip.
- Seal the edges. Cap the free edge of every nail with base, colour and top coat.
- Refresh your top coat. Adding a thin layer of top coat every two or three days refreshes shine and adds protection.
- Wear gloves for chores. Hot water and cleaning products break down polish quickly.
- Moisturise your cuticles. Hydrated nails flex more and chip less, so oil your cuticles daily.
- Treat your nails as jewellery, not tools. Using your nails to open cans or scrape off stickers is a quick route to chips.
Styling Your Glitter Accent Nails: Outfits, Jewellery and Occasions
A glitter accent nail is a detail, so when wearing these glitter accent nail ideas, think of the glitter like an accessory.
With jewellery: match your glitter to your metals. Gold glitter with gold rings is cohesive. Silver glitter with silver rings looks sleek. Mixing metals is fine too, as long as the rest of your outfit is simple.
For work: keep glitter fine, glitter colour close to your base, and placement on the ring finger. Nude with champagne or milky white with iridescent are almost always appropriate.
For weekends: go for colour, such as hot pink with fuchsia glitter, coral with gold, or sunset confetti.
For evenings: black, burgundy or navy with reflective or metallic glitter looks sharp and photographs well.
For weddings: keep it soft and pale. Blush, sheer white and champagne glitter are safe and pretty.
For holidays: lean into seasonal colours but keep the glitter limited to one or two nails.
Final Thoughts: Why Glitter Accent Nail Ideas Never Go Out of Style
Glitter has had a reputation for being loud, but these glitter accent nail ideas prove it doesn’t have to be.
Whether you start with a champagne ring finger on a sheer nude set, a matte black base with a silver accent or a pastel confetti nail for summer, the best glitter accent nail ideas are the ones that make you smile every time you look down at your hands. Start small, experiment often, and let these glitter accent nail ideas sparkle exactly where you want them.
Frequently Asked Questions About Glitter Accent Nail Ideas
1. Which finger should I choose for a glitter accent nail?
The ring finger is the traditional and most flattering choice, especially if you wear rings. The index finger gives a modern, playful feel, and the thumb is a lovely, underrated option. If you’re doing two accent nails per hand, try the ring and index fingers.
2. How many glitter accent nails should I have per hand?
One is the classic approach and the safest for work and daily life. Two works well if your base colour is very simple, such as sheer nude or milky white. Beyond two, the look starts to shift from accent toward full glitter.
3. What colours go best with glitter accent nails?
Neutrals like nude, beige and milky white are the easiest. Black, navy and burgundy make glitter look dramatic. Pastels pair beautifully with iridescent glitter, while red and green are classic for the holidays. The safest rule is to pair glitter in a similar tone or a classic metallic like gold or silver with your base.
4. Are glitter accent nails appropriate for the office?
Yes, if you keep things subtle. Choose fine or micro glitter, a neutral base and a single accent nail. A champagne ring finger on sheer nude is about as office-friendly as sparkle gets. Chunky holographic glitter is better saved for weekends.
5. Can I do glitter accent nails at home without a lamp?
Absolutely. Regular nail polish with glitter polish or loose glitter works well without any lamp. Use a sticky base, press the glitter on, and seal with two layers of top coat. It won’t last as long as gel, but it’s a great starting point.
6. How do I stop glitter nails from feeling rough or gritty?
Apply multiple thin layers of top coat, allowing each to dry. Choose finer glitter, which sits flatter than chunky pieces. You can also press the glitter down gently with a silicone tool before sealing to smooth it out.
7. How long do glitter accent nails last?
With regular polish, expect about five to seven days. Gel typically lasts two to three weeks, and acrylic or dip powder can last longer. Longevity depends on your prep, your lifestyle and how well the free edge is sealed.
8. What’s the easiest way to remove glitter nail polish?
Use the foil method: soak a cotton pad in remover, place it over the nail, wrap it with foil, and wait about ten minutes. The glitter slides off with far less scrubbing. Always moisturise afterwards.
9. What are the most popular glitter accent nail trends right now?
Glitter ombré fades, glitter French tips, matte base with a single glitter nail, micro-glitter shimmer and iridescent accents on milky white bases are all widely featured in current trend roundups. The common thread is a lighter, more refined kind of sparkle.
10. Can I add glitter to a nail design I already have?
Yes. If your manicure is still fresh, apply glitter polish or a tacky layer of clear top coat to one nail and press glitter into it, then seal. For gel or acrylic nails, it’s better to have a technician add it so it’s properly sealed and lasts.






5 Comments