
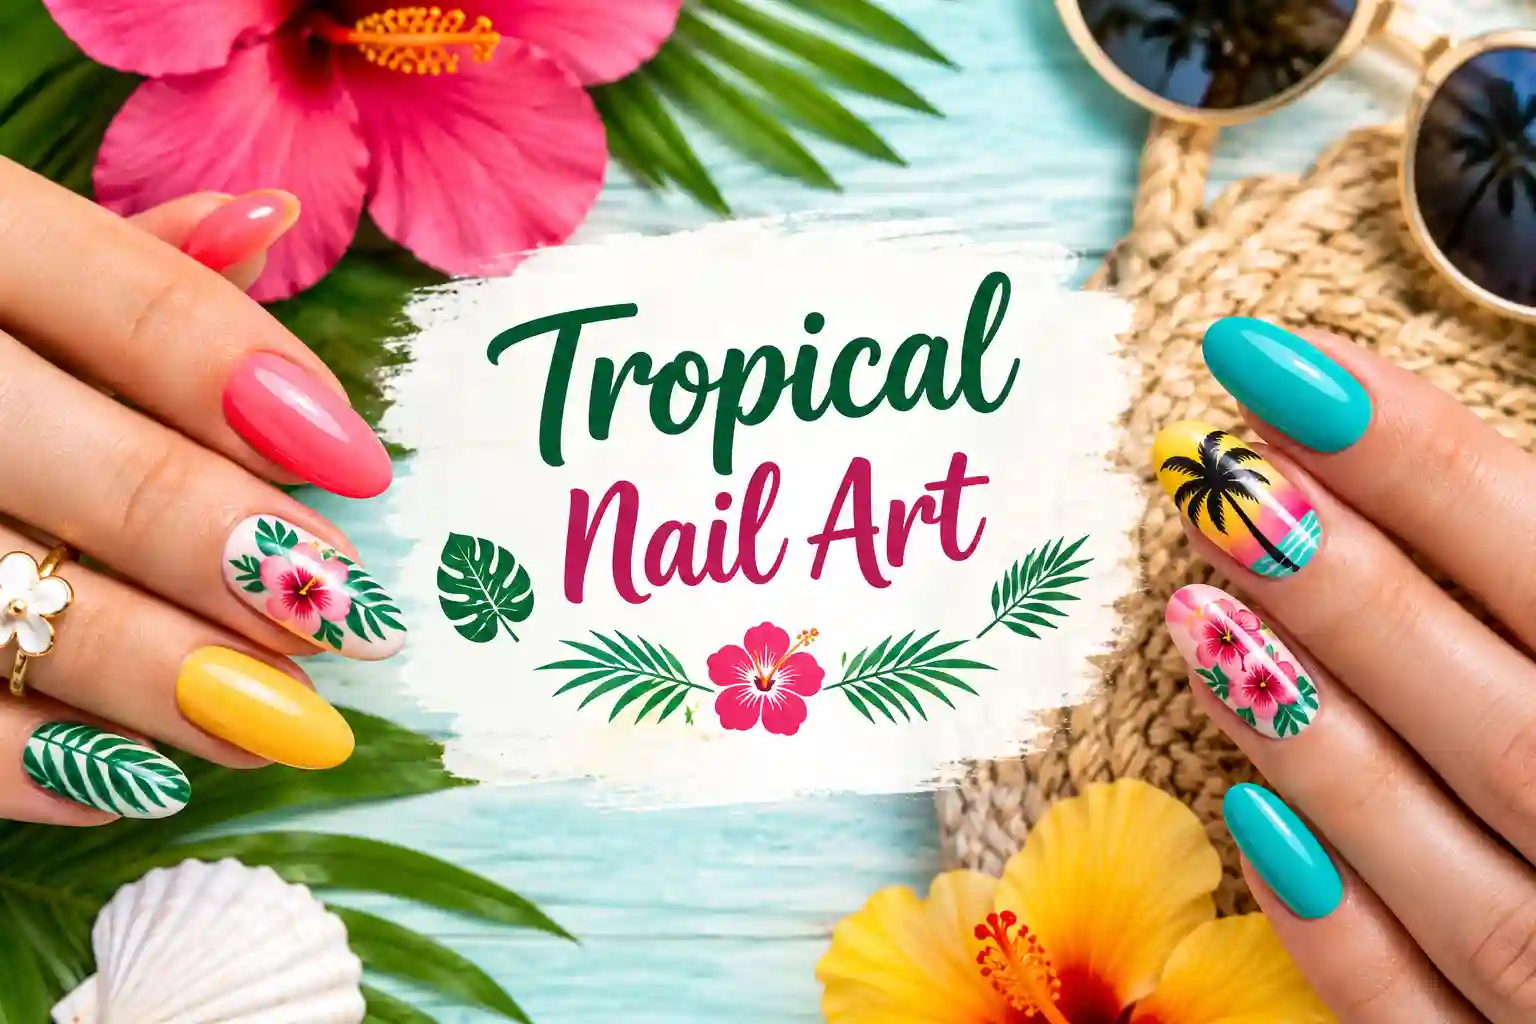
Tropical Nail Art: 20 Ideas, Step-by-Step Tutorials and Pro Tips for a Vacation Manicure
There is a particular kind of joy in glancing down at your hands and seeing a tiny palm tree. It’s the same feeling as the first sip of something cold on a hot afternoon. Tropical nail art does that. It packs a whole holiday into ten small canvases and lets you carry it into the office, the school run, or the grocery store queue.
And here’s something most guides won’t tell you: this style isn’t only for July. It’s mid-October as I write this, and plenty of us are already booking winter-sun trips or simply craving color as the days get shorter. A tropical manicure works just as well with a cozy sweater as it does with a swimsuit. It’s a mood, not a season.
In this guide, I’ll walk you through everything I’d want to know before sitting down in a nail chair or reaching for my own brushes. You’ll find 20 tropical nail designs grouped by theme, a no-nonsense color guide, advice for short nails, step-by-step tutorials you can actually follow, honest comparisons of salon, DIY and press-on options, and care tips so your set survives the whole trip. Let’s get into it.
Also Read : String Nail Art: The Delicate Lace Effect Technique Every Nail Lover Needs To Try
What Is Tropical Nail Art, Exactly?
Tropical nail art is any manicure that borrows from the look and feel of warm, lush, coastal places. Think leaves with big dramatic edges, flowers that look like they’re mid-bloom, juicy fruit, sunset skies, turquoise water, shells and sand. Birds like parrots, toucans and flamingos show up too.
The easiest way to think about it is this: tropical nails aren’t defined by a nail shape or a length. They’re defined by a reference system. If your design makes someone think of an island, a jungle, a lagoon or a beach bar at golden hour, it counts. That’s why a single fine-line monstera leaf on a milky base and a full set of neon hibiscus with 3D shells can both be tropical. One is whispered, the other is shouted.
The trend has a surprisingly specific origin story. A big wave of interest followed a palm-leaf manicure with swirls and a bird of paradise flower painted on the middle finger, shared by a nail artist back in late 2020. Since then, artists around the world have kept remixing the idea, adding toucans, bright backgrounds and hand-painted details. Today, the look has split in two directions: ultra-detailed maximalist sets on one side, and clean, minimalist, almost abstract versions on the other.
Why Tropical Nail Art Is Everywhere Right Now
Three things are happening at once.
First, escapism is back in a big way. People want their small daily rituals to feel like a mini-vacation. A manicure is one of the cheapest, fastest ways to do that.
Second, the 2000s are having a moment. Summer 2026 forecasts have leaned heavily into that early-internet, aqua-tinted, bubbly “Frutiger Aero” feeling: ocean tones, bubbles, sea creatures, hibiscus and glossy, soap-like textures. Tropical nails fit this beautifully. If you’ve seen glassy blue nails with little floating bubbles, that’s the same family.
Third, texture is the new color. Jelly finishes, glossy gel, chrome and 3D details give tropical designs depth that flat polish can’t. Short, squared nails are also having a big moment, which means you don’t need extensions to wear a tropical set well.
All of this adds up to a style that feels both nostalgic and fresh. It’s flexible enough for minimalists, and fun enough for people who like their nails to be a conversation starter.
The Tropical Color Palette: What to Use and How to Mix It

Color does most of the heavy lifting in tropical nail art. Get the palette right and even a simple design will look intentional. Get it wrong and a beautiful hibiscus can look muddy. Here’s how I think about it.
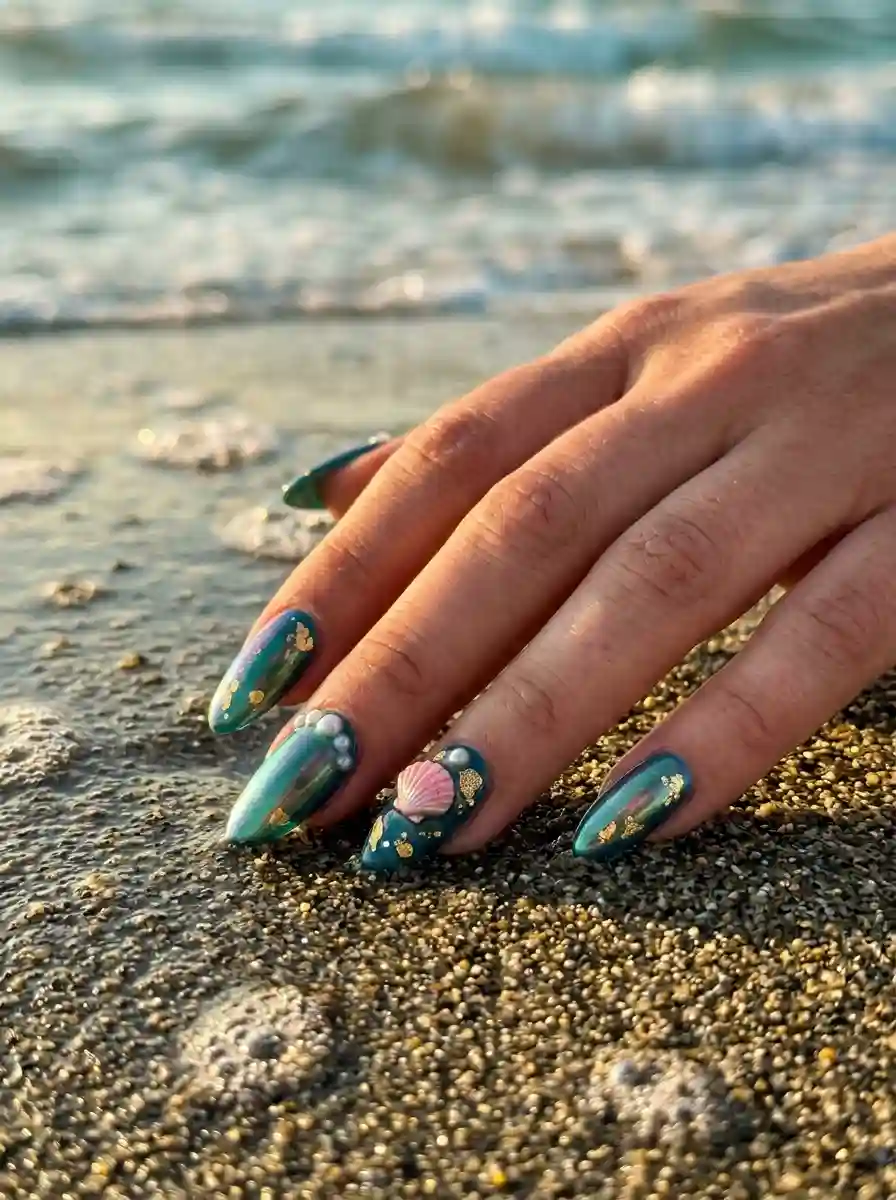
The core shades
- Coral and papaya: warm, flattering on almost everyone, and the fastest way to say “sunset.”
- Hot pink and fuchsia: hibiscus, flamingos, dragon fruit. Bold, joyful, photographs well.
- Turquoise and aqua: lagoon water, swimming pools, sky. Cools down a hot palette.
- Leaf green and emerald: the backbone of palm, monstera and banana leaf designs.
- Sunny yellow and lemon: pineapple, citrus, sunshine, and a fresh pop next to blues.
- Milky white and sand: your negative space, shell colors, and coconut.
- Deep teal and navy: for evening ocean looks and moodier jungle scenes.
Three palettes that always work
- Sunset palette: coral, orange, hot pink, a touch of purple. Perfect for gradients and warm skin tones.
- Lagoon palette: aqua, white, pale green, a sliver of gold. Fresh, clean, and great for short nails.
- Jungle palette: emerald, deep green, mustard, a pop of fuchsia. Dramatic, high contrast, ideal for hand-painted leaves.
Matching colors to your skin tone
I’m a firm believer that the best manicure is one that makes your hands look good, not just one that photographs well on a stranger.
- Fair skin: soft corals, peachy pinks, aqua and mint look gorgeous. Very neon shades can read harsh, so try them as accents.
- Light to medium skin with warm undertones: golden yellows, papaya, warm greens and terracotta are lovely.
- Olive and tan skin: almost everything works, but turquoise, hot pink and bright white create gorgeous contrast.
- Deep skin tones: neon pinks, electric blue, lime, tangerine and sunny yellow look incredible. Metallic gold and chrome also pop beautifully.
If you’re unsure, pick one hero color you love and add two supporting shades. Three colors plus white is plenty.
Must Read : Best Simple Nail Art Ideas That Look Salon Fancy
20 Tropical Nail Art Ideas to Try
I’ve grouped these by theme so you can jump to what appeals to you. For each one, I’ve added a note on who it suits and how complex it is, because a pretty idea you can’t execute isn’t much help.
Floral Tropical Nail Art
1. Classic Hibiscus Accent Nails
Hibiscus is probably the most recognizable tropical flower, and it’s forgiving to paint because the petals are loose and layered. Put a large hibiscus on one or two accent nails and keep the rest solid or sheer. A coral or soft pink flower on a milky base looks refined. A hot pink one on a turquoise base looks playful. Difficulty: medium. Great for short nails.
2. Plumeria (Frangipani) Dots
Plumeria has five soft, overlapping petals and a yellow heart, which makes it perfect for dotting tool art. Place a dot of white, drag four more around it, add a yellow center, and you have a flower in under a minute. Scatter a handful across a sheer pink or peach base. Difficulty: easy. Beginner friendly.
3. Bird of Paradise
This is the flower that helped kick off the whole modern trend. Its spiky orange and blue petals look like a bird mid-flight, which makes it a stunning statement on a ring or middle finger. Pair it with deep green leaves and a bright pink or red base for a real heat-wave effect. Difficulty: advanced. Best for long or medium nails.
4. Orchid Watercolor
For a softer take, wash a pale lilac or pink across the nail with a damp brush, then add delicate orchid outlines in white and magenta. The dreamy, blurred edges feel romantic rather than loud. Difficulty: medium. Great for almond and oval shapes.
Foliage and Botanical Designs
5. Palm Leaf on a Bright Base
A palm frond is basically one curved line with short strokes branching off. On a hot pink, orange or turquoise base, green or white fronds look instantly vacation-ready. It’s the easiest “serious” tropical design to learn, and I’ll show you how in the tutorials below. Difficulty: easy to medium.
6. Minimalist Monstera
One single monstera leaf, drawn in fine gold or green line art, floating on a sheer milky or jelly base. That’s it. It’s the tropical manicure for people who say they don’t like busy nails. Add a tonal turquoise or sage backdrop for extra elegance. Difficulty: medium (steady hand needed). Perfect for short nails.
7. Electric Jungle With Negative Space
Leave part of the natural nail bare and paint sharp, bold palm leaves in neon green or lime that bleed off the edge. The contrast between clear space and vivid color feels modern and a little futuristic. Difficulty: medium.
8. Banana Leaf Gradient
Blend two or three greens from the cuticle to the tip, then add thin vein lines in a lighter shade. Banana leaf patterns look rich and layered without requiring detailed painting. Difficulty: medium.
Fruit-Inspired Tropical Nails
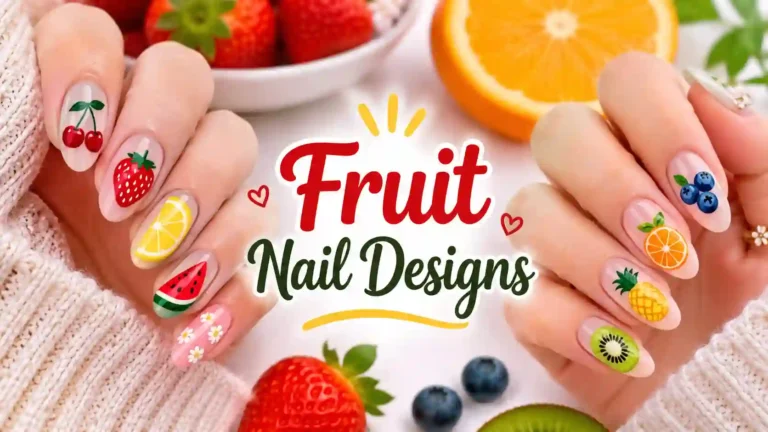
9. Micro-Fruit Sets
This is one of my favorite 2026 twists. Instead of a giant watermelon slice, you paint tiny fruit, as small as a seed or a pinhead. Little citrus wedges, cherries or a single pineapple on a soft background look chic and deliberate rather than novelty. Difficulty: medium. Ideal for short nails.
10. Pineapple Crush
Yellow base, crosshatch lines in gold, a small green crown at the tip. Done with a bit of chrome powder, it looks luxe. Done matte, it feels casual and fun. Difficulty: easy to medium.
11. Watermelon and Citrus Slices
Slices are great for 3D gel or flat decals. A watermelon wedge on a pale pink base with tiny black seeds is an instant smile. Orange and lime slices work beautifully as accent nails. Difficulty: easy with stickers, medium by hand.
12. Coconut and Cream
Milky white base, a soft brown coconut shell shape on one nail, a little glossy shine to suggest coconut water. Calm, creamy and beachy. Difficulty: easy.
Creatures of Paradise
13. Flamingo Oasis
A pink flamingo silhouette against turquoise or a deep green leaf background. Simple, graphic and cheerful. You can use stickers for the bird and paint the background yourself. Difficulty: easy with decals.
14. Toucan and Parrot Accents
Birds bring personality. A tiny hand-painted toucan beak in orange and yellow, or a green parrot perched on a branch, instantly tells a story. Save the detail for one nail and let the others be solid color. Difficulty: advanced.
Water, Sky and Sunset
15. Tropical Sunset Gradient
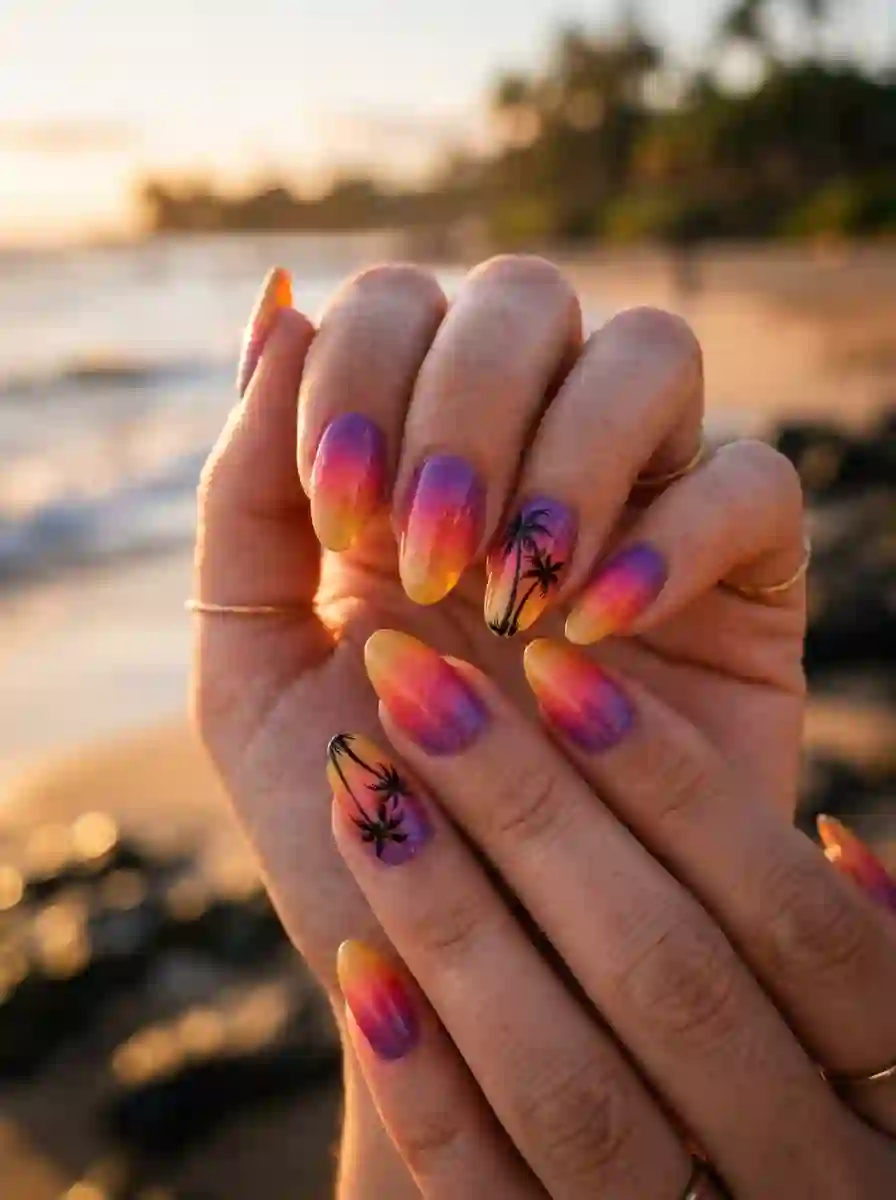
Orange, coral, pink and a hint of purple, blended with a sponge. Add a thin black palm silhouette across the bottom for the full postcard effect. It looks harder than it is, and I’ll walk you through it. Difficulty: easy to medium.
16. Blue Lagoon Waves
Layer sheer aqua and deeper blue, then draw white wavy lines to suggest foam. A line of clear glossy gel on top gives a wet, watery look. Great for short nails because the effect comes from color and gloss, not size. Difficulty: easy.
17. Shells, Pearls and Sand
Pearly, shimmering shell shapes in pale pink or blue, a few tiny pearls near the cuticle, and a sandy beige base. It’s elegant, wearable, and takes tropical into “quiet luxury” territory. Difficulty: medium. Best with gel and 3D charms.
Finishes and Twists
18. Jelly Tropical
Sheer, juicy, see-through color in coral, lime or watermelon pink. It feels like candy, and it grows out gracefully. Add one tiny hibiscus or leaf for the tropical link. Difficulty: easy.
19. Tropical French Tips
Swap the white tip for something else. Try a wavy turquoise tip, a lime green tip with a tiny leaf, or a double French in coral and yellow. It’s a polished way to wear tropical colors at work. Difficulty: medium.
20. Y2K Bubble Tropical
Aqua gradients, floating bubbles drawn with glossy white dots, tiny stars or hibiscus, and a very shiny top coat. It captures that early-2000s, sun-drenched, clean-water look. Difficulty: easy to medium.
Must Read : Glitter Accent Nail Ideas: 30 Sparkling Designs for Every Style, Shape and Season
Tropical Nail Art for Short Nails
If you take one thing from this section, let it be this: short nails are not a limitation. They’re a design choice, and a very current one.
When your canvas is small, the trick is to reduce the amount of information you’re asking it to carry. Here’s what works best:
- Pick one hero motif. A single hibiscus, a single monstera leaf, or a single shell on one nail.
- Go tonal. Layer shades of the same color family (say, three greens or three blues) so the nail feels designed without being crowded.
- Use negative space. A bare nail edge or a clear gap around a design makes a small nail look bigger and cleaner.
- Keep elements micro. Tiny fruit, small flowers, thin lines. Big motifs on short nails get cropped awkwardly.
- Choose glossy finishes. A high-shine top coat makes short nails look polished and juicy.
- Try jelly or sheer bases. They give a sense of depth without any painting at all.
The best shapes for short tropical sets are short square (very on-trend), soft squoval, short round and natural oval. They all give you enough flat surface to paint on without looking fussy.
Tropical Nail Art for Long Nails
Long nails give you room to play, and tropical designs love space. If you wear almond, coffin, stiletto or long square shapes, you can try:
- Full-nail landscapes with sunsets, palm silhouettes and gradient skies
- Larger bird-of-paradise flowers and layered leaf compositions
- 3D shells, starfish and metal charms
- Chrome and aurora powders over deep blue or green bases
- Hand-painted toucans, parrots or flamingos with detailed feathers
One practical tip: with long nails, plan your design so the most important detail sits on the main viewing area (the center of the nail) rather than the tip. Tips chip and get filed, and you don’t want your toucan losing its beak by day three.
Which Nail Shape Suits Which Tropical Design?
| Shape | Best tropical designs | Why it works |
|---|---|---|
| Short square | Micro-fruit, minimalist monstera, jelly, lagoon waves | Flat canvas, modern look |
| Short round / oval | Plumeria dots, watercolor orchid, pastel gradients | Soft, feminine, easy to wear |
| Almond | Hibiscus, palm leaves, sunset gradient | Elongates fingers, great for flowing designs |
| Coffin / ballerina | Landscapes, 3D shells, bird of paradise | Wide tips hold large scenes |
| Stiletto | Chrome, jungle, dramatic leaves | Bold and sculptural |
| Squoval | Almost everything | A flexible all-rounder |
Tools and Materials You’ll Need for DIY Tropical Nail Art
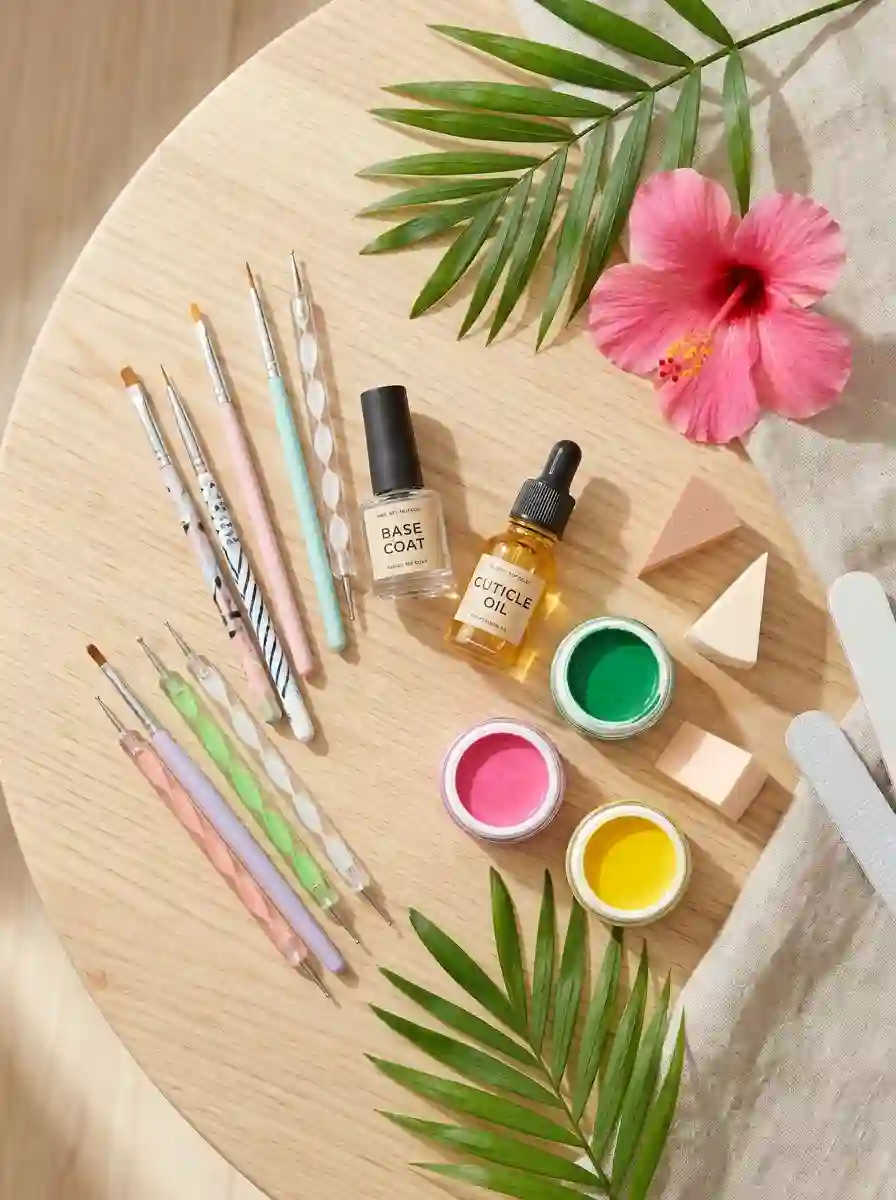
You don’t need a salon-grade kit to create beautiful tropical nails at home. You do need a few good basics. Here’s what I’d put in a starter kit.
The essentials
- Base coat and glossy top coat (non-negotiable)
- Cuticle oil and a cuticle pusher
- A fine detail brush (size 0 or 00) and a thin liner brush
- A dotting tool set (various sizes) or a simple toothpick
- Cosmetic sponge for gradients
- Nail polish remover and a few lint-free wipes
- Polish or gel in your three or four palette colors, plus white and black
Nice to have
- Gel polish and an LED lamp, if you want long wear
- Nail art gel paint or acrylic paint in tubes (easier to control than regular polish)
- Chrome or aurora powder and a silicone applicator
- Tiny 3D charms, rhinestones or pearls, plus a strong builder or charm glue
- Stamping plates with leaf patterns
- Striping tape or small stencils
A quick tip on polish type: regular polish dries quickly, which can make blending frustrating. If you’re doing gradients or watercolor effects, gel is much more forgiving because it stays workable until you cure it.
Step-by-Step Tutorials: Three Tropical Looks You Can Do at Home
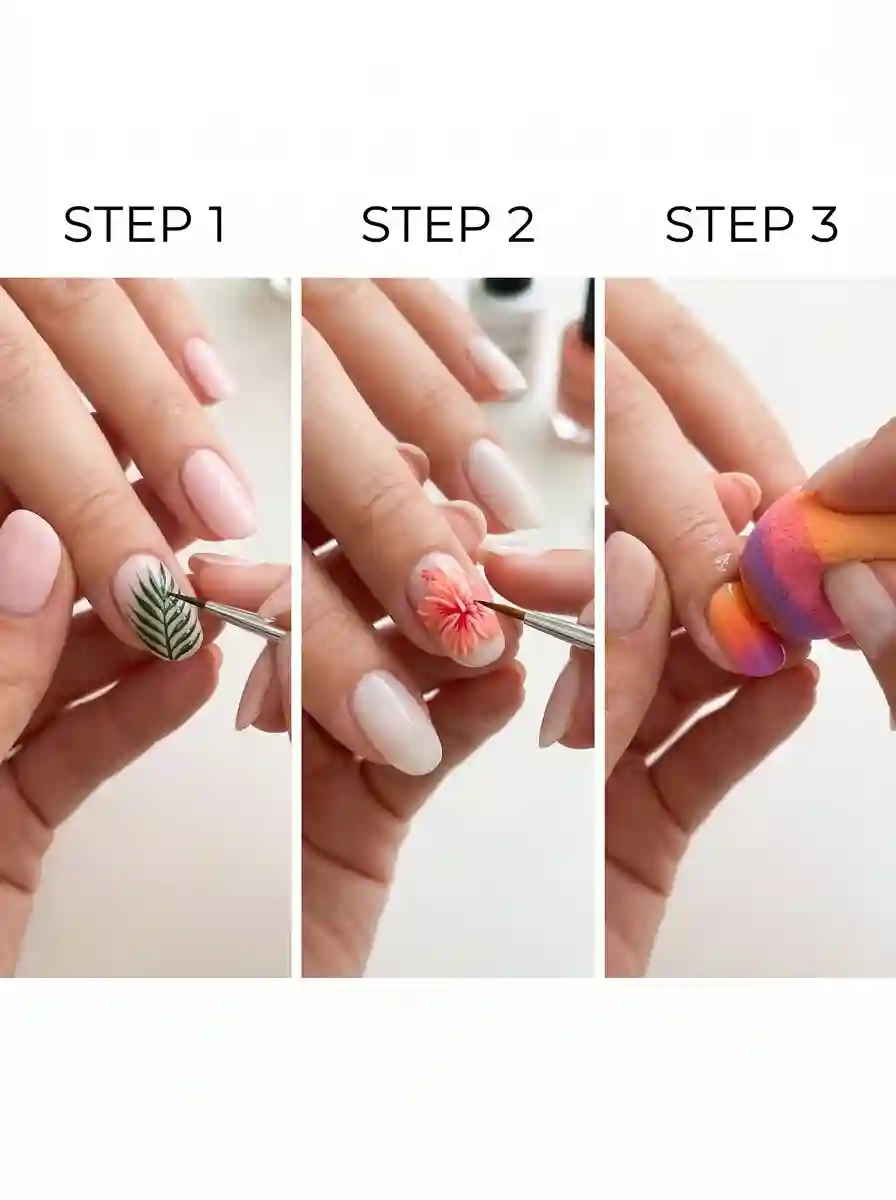
Now for the part nobody else in the search results seems to bother with. These three tutorials build on each other, starting with the easiest.
Also Read : Cat Eye Nail Ideas That Will Instantly Transform Your Manicure Into Pure Magic
Tutorial 1: Palm Leaf Accent Nails (Beginner)
You’ll need: a base color (hot pink, coral or turquoise), green or white polish, a thin liner brush, base and top coat.
- Prep. Push back your cuticles, buff the nail lightly, wipe with remover so the surface is oil-free.
- Base coat. Apply one thin layer and let it dry.
- Color. Paint two thin coats of your bright base. Let each layer dry before the next. Thin coats prevent bubbling and smudging.
- Draw the stem. With your liner brush and green polish, draw a gently curved line from one side of the nail toward the other. It should look like a thin arc.
- Add the fronds. Starting at the base of the stem, draw short, slightly curved strokes along both sides, getting smaller toward the tip. Think of the teeth of a comb that’s been bent.
- Add a second leaf. For balance, add a smaller leaf crossing the first one, or place one in a corner.
- Seal. Once fully dry, apply a glossy top coat, and cap the free edge.
Troubleshooting: If your lines look shaky, thin the polish with a drop of remover or use nail art paint. Work from your wrist outward, bracing your pinky on the table.
Tutorial 2: Hand-Painted Hibiscus (Intermediate)
You’ll need: a pale or milky base, three shades of one flower color (light, mid, deep), yellow, green, a fine brush and a dotting tool.
- Prep and base. Apply base coat and two coats of a milky nude or soft pastel.
- Place the flower. Decide on the center point of your hibiscus, ideally off-center and near the free edge so it feels natural.
- Paint five petals. Using the light shade, make five rounded, slightly overlapping petal shapes radiating from the center. They don’t need to be symmetrical. Real petals aren’t.
- Add depth. Dab the mid shade into the center of each petal, then drag it outward. Add a touch of the deep shade near the middle. Blend lightly with a clean brush.
- The stamen. Draw a thin line from the center outward in yellow or deep pink, and add a tiny dot at the end.
- Leaves. Add two or three pointed green leaves behind the flower.
- Finish. Let it dry, then apply a glossy top coat. If you want extra shine, apply two thin layers rather than one thick one.
Pro tip: Mistakes in floral painting are often fixable. If a petal looks odd, paint over it with a bit of base color and try again.
Tutorial 3: Tropical Sunset Gradient With Palm Silhouette (Intermediate)
You’ll need: a sponge, yellow or light orange, coral or hot pink, a touch of purple, black polish, a liner brush, base and top coat.
- Prep. Apply base coat. For this look, a white or very pale base underneath helps the colors look brighter.
- Load the sponge. On a piece of foil or a palette, place stripes of yellow, orange, pink and purple next to each other, touching slightly.
- Dab on the nail. Press the sponge onto the nail with a gentle bouncing motion. Pale colors go at the bottom or tip, deeper colors at the top, or reverse them depending on your preference.
- Repeat. Two or three passes build intensity. Clean up the skin around the nail with a brush dipped in remover.
- Cure or dry. If using gel, cure between layers.
- Palm silhouette. Paint a slim, slightly curved black trunk rising from the bottom corner. At the top, draw five or six short, curved strokes to make fronds.
- Top coat. Seal with a glossy top coat.
Salon, DIY or Press-On? How to Choose
There isn’t one right answer, only the right answer for your budget, time and skill. Here’s an honest comparison.
Going to a nail salon or nail artist
Pros: Professional detail work, advanced techniques (chrome, 3D, airbrush, hand-painted birds), gel durability, and the chance to leave with a custom design. Cons: Cost, booking time, and the need to communicate clearly what you want. Best for: Complex designs like bird of paradise, toucans, detailed landscapes, or anything you’re wearing for a special trip.
Doing it yourself
Pros: Cheapest option, total creative freedom, and a satisfying new skill. Cons: A learning curve, longer time, and less polished results at first. Best for: Simple designs like plumeria dots, palm leaves, gradients, or jelly bases with one accent.
Press-on nails and nail stickers
Pros: Fast, reusable if you’re careful, a big range of designs (hand-painted or 3D tropical sets are widely sold), and great for travel when you can’t get to a salon. Cons: Fit can vary, quality varies a lot, and wear time depends on how well they’re applied. Best for: Vacations, events, or trying a bold design without commitment.
If you’re short on time, here’s a middle route I like: buy a sheet of tropical decals (flamingos, hibiscus, palm leaves) and apply them over your own painted base. You get the personality of custom nail art with a fraction of the effort. Seal everything with top coat so the edges don’t lift.
How to Talk to Your Nail Tech (So You Get What You Pictured)
A great design can go sideways when expectations aren’t aligned. A few things make a big difference.
- Bring two or three reference photos and tell them what you like about each (the color, the flower, the finish).
- Be specific about the vibe. “Minimal and clean with one hibiscus” gets very different results from “full jungle, lots of detail.”
- State your nail length and shape upfront. If you’re keeping short nails, ask for designs scaled to suit.
- Ask about time and cost before they start. Hand-painted details and 3D elements can add time and price.
- Mention your lifestyle. If you type all day, wash dishes often or swim, tell them. They can suggest a more durable finish.
- Be kind about edits. If one nail isn’t right, ask politely. Most artists want you to love your set.
Tropical Nail Ideas by Destination
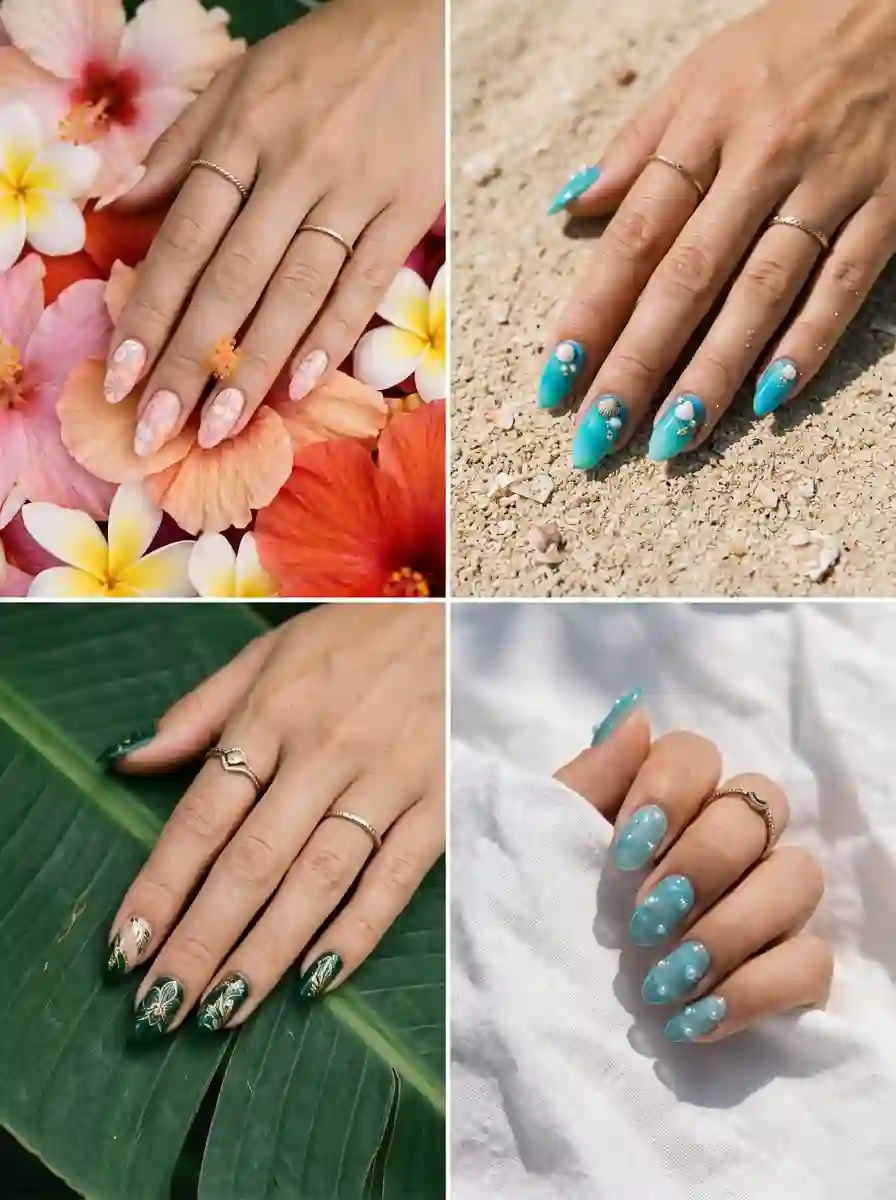
Here’s a fun way to plan your next set: match your nails to where you’re going (or where you wish you were).
- Hawaii: Hibiscus, plumeria and monstera on pastel or nude bases. Soft and floral.
- Caribbean: Turquoise water, coral sunsets, yellow citrus, and playful shells.
- Bali and Southeast Asia: Deep greens, orchids, frangipani, gold accents and temple-inspired metallic details.
- Maldives and island resorts: Clear jelly aqua, pearls, tiny shells and white sand tones.
- Mexico and Latin America: Vivid pinks, oranges, cactus-and-bloom mixes and joyful, saturated colors.
- Florida and the Gulf Coast: Flamingos, palm trees, retro pastel sunsets.
- Anywhere you’re staying home: A tropical manicure with a cozy outfit is its own little rebellion against gray weather.
Read Also : Light Pink Chrome Nails: 16 Ideas, a Shade Guide and Exactly How to Get the Look
Matching Tropical Nails to Your Outfit and Occasion
A tropical manicure doesn’t have to match your clothes, but a few guidelines make everything look more intentional.
At the beach or poolside: Go bold. Bright colors, 3D shells, chrome, anything that sparkles in the sun. Waterproof top coat (or gel) helps.
At work: Choose minimal or tonal. One monstera on a sheer base, a lagoon French tip, or a single hibiscus accent keeps things polished.
At a wedding or dinner: Pearly shells, soft gradients and gold line leaf work look elegant. Avoid anything too cartoonish.
At a festival or party: Neon, glitter, mixed prints, and Y2K bubble effects. This is where maximalism belongs.
With neutral outfits: Let your nails be the color. A bright jungle set can transform a white shirt and jeans.
With colorful outfits: Echo one color from your clothing in your nails and keep the rest quiet, so the two don’t fight.
Tropical Toe Nail Art
Don’t forget your feet. Toes are some of the easiest places to experiment, because the nails are flat, the design is small, and nobody examines them with a magnifying glass.
A few ideas:
- Solid bright toes with one accent: Hot pink or coral toes, with a tiny white flower on the big toe.
- Matching gradient: Echo your fingers with a sunset blend, painted vertically or diagonally.
- Mini shells or starfish: Add small charms to one or two toes.
- Jelly toes: Sheer color is easy to apply and grows out gracefully.
- Palm tree silhouette on the big toe: Simple, cute, and instantly summery.
Because feet get more friction in shoes and sand, gel polish tends to last better than regular polish on toes. A good top coat is essential.
How to Make Your Tropical Nail Art Last
Great nail art deserves to last. Here’s what actually makes a difference.
1. Prep well. The single biggest cause of chipping is oils or moisture on the nail plate. Push back cuticles, lightly buff the shine off the surface, and wipe with an alcohol-based cleanser before base coat.
2. Use thin layers. Thick coats take longer to cure or dry and are more likely to peel.
3. Cap the free edge. Run each layer along the very tip of the nail to seal it.
4. Don’t skip base and top coat. They protect your natural nail and your art.
5. Let it dry properly. If you’re using regular polish, give it plenty of time between coats, and consider a quick-dry drop or a few minutes in cool water at the end.
6. Moisturize cuticles daily. Cuticle oil keeps skin flexible and prevents lifting around the edges.
7. Wear gloves for chores. Hot water and cleaning products break down polish.
8. Protect against salt and chlorine. After the pool or ocean, rinse nails with fresh water and pat them dry. Reapply cuticle oil.
9. Avoid using your nails as tools. Opening cans, scraping labels, peeling stickers: we all do it, and it all causes chips.
10. Refresh the top coat. If your set is starting to look dull after a week or so, a fresh layer of top coat can bring back the shine.
Removing Tropical Nail Art Safely
When it’s time to say goodbye to your set, treat your natural nails kindly.
- Regular polish: Use a gentle, acetone-free or low-acetone remover and a cotton pad. Hold it on the nail for a few seconds to dissolve the polish before wiping.
- Gel polish: File the top coat lightly, soak cotton pads in acetone, place them on your nails, wrap with foil, wait 10 to 15 minutes, then gently push off the softened gel. Don’t scrape or peel it off, because that takes layers of your natural nail with it.
- Press-ons: Soak in warm, soapy water or use a manufacturer-recommended remover. Pry gently, never forcefully.
- Aftercare: Wash hands, apply cuticle oil and a rich hand cream, and consider giving your nails a short break before the next gel set.
If your nails feel thin, sore or discolored after removal, give them a rest and consider seeing a professional.
Must Read : Rose Nail Ideas: 60+ Gorgeous Designs, Shapes and Easy How-Tos for 2026
2026 Tropical Nail Trends to Watch
If you want to look current rather than generic, here’s what’s setting the tone this year.
- Minimalist monstera and tonal tropical: One leaf, one color family, one calm base.
- Micro-fruit: Miniature fruit instead of oversized slices.
- Jelly and glassy textures: Translucent color and a wet-look finish.
- Y2K, Frutiger Aero and bubbles: Aqua gradients, floating dots, clean-water shine.
- Ocean chrome and mermaid shimmer: Iridescent powders over blue and green, with a shell-like glow.
- Short, squared shapes: A practical, easy-to-wear canvas for tropical art.
- 3D details, but in moderation: A single shell or flower rather than ten charms.
- Destination-coded sets: Nails that reference a place and its colors, not just generic palm trees.
- Soft airbrushed florals: Flowers that look like they glow from within instead of being painted on top.
The common thread is intention. The strongest tropical sets this year feel curated, with a clear idea and a limited palette, rather than a pile of every tropical motif at once.
Common Tropical Nail Art Mistakes (and How to Fix Them)
Too many motifs. Palm trees, flamingos, pineapples and shells on the same nail rarely work. Choose one or two.
Too many colors. If you use more than four, the design can look chaotic. Add white or a sheer base to give the eye a rest.
Wrong scale for short nails. Large designs get cut off. Scale down.
Thick polish layers. They cause bubbling and smudging. Go thin, always.
Skipping the top coat. Bright tropical colors can look dull without a glossy finish.
Poor contrast. Green leaves on a green base disappear. Make sure your design color differs from your base.
Rushing the dry time. Smudged palm leaves are heartbreaking. Wait.
Ignoring cuticle care. Even the best design looks unfinished with dry, ragged cuticles.
Budget Guide: What Does Tropical Nail Art Cost?
Prices vary widely by country, city and artist, so treat this as a rough framework rather than a quote.
- DIY with basic polish: The cheapest route. After an initial kit, each set costs only the polish you use.
- DIY with gel and a lamp: A higher upfront cost, but cost-per-manicure drops quickly if you do your nails regularly.
- Press-ons and stickers: From a few dollars for decal sheets to a premium for hand-painted, handmade press-on sets.
- Salon manicure with simple art: Mid-range, usually a base price plus a charge per accent nail.
- Custom hand-painted or 3D sets: The top tier. You’re paying for artist time and skill.
A smart strategy is to spend where it matters: get a professional gel base and one or two detailed accent nails, then keep the rest simple.
Tropical Nail Art for Different Ages and Lifestyles
Teens and students: Playful stickers, bright jelly colors, and simple dotting-tool flowers are budget-friendly and fun.
Busy professionals: Minimalist monstera, tonal turquoise and French tips with a leaf accent keep things polished.
Brides and wedding guests: Soft pearly shells, pastel gradients and gold line art. Elegant, not cartoonish.
Travelers: Gel or durable press-ons, ideally with a repair kit in your bag.
Moms and caregivers: Short, rounded nails with sturdy gel. Pretty and practical.
Nail art enthusiasts: Go wild. Mix textures, add 3D, experiment with chrome and airbrush.
Also Read : Summer Mint Green Nails That Capture Every Ounce Of The Season’s Freshest Trend
Final Thoughts on Tropical Nail Art
At its best, tropical nail art isn’t about perfectly replicating a trend. It’s about picking a small piece of paradise that makes you smile every time you look down. Maybe that’s a single leaf on a glossy jelly nail. Maybe it’s a full set of toucans, hibiscus and shells for your honeymoon. Both are completely valid.
Start simple. Choose a palette of three colors, pick one motif you love, and give yourself time. Use the tutorials above, borrow from the 20 ideas, and don’t forget the boring-but-crucial stuff like prep, thin layers and a good top coat.
And if you’re reading this on a gray October afternoon, wishing you were somewhere warmer, a tropical manicure is the closest thing to a ticket you can get for an hour and a few bottles of polish.
Frequently Asked Questions
1. What is tropical nail art?
Tropical nail art is a style of manicure that uses colors and motifs from warm, lush places. That includes palm and monstera leaves, hibiscus and other flowers, tropical fruit, sunsets, ocean waves, shells and exotic birds. It can be bold and detailed or minimal and quiet
2. What colors are best for tropical nails?
Coral, hot pink, turquoise, emerald green, sunny yellow, milky white and deep teal are the core shades. For a cohesive look, choose three colors plus white and build the design from there. Warm sunset tones work especially well on warm skin tones, while turquoise and hot pink pop on olive and deeper skin tones.
3. Can I do tropical nail art on short nails?
Absolutely. Short nails suit minimalist designs like a single monstera leaf, micro-fruit, sheer jelly colors, lagoon waves and tonal gradients. Keep your motifs small, use negative space, and choose a glossy top coat for a polished look. Short square and short round shapes are both great choices.
4. What is the easiest tropical nail design for beginners?
Plumeria dots and a simple palm leaf are the easiest to start with. A dotting tool lets you create a flower in seconds, and a palm leaf needs just one curved line with short strokes. A sheer jelly base with one small accent is also very beginner friendly.
5. How do I make tropical nail designs last longer?
Start with clean, dry nails and a good base coat. Apply thin layers, cap the free edge, and seal with a quality top coat. Gel polish typically lasts longer than regular polish. Daily cuticle oil, gloves for chores and rinsing off salt water and chlorine all help too.
6. What tools do I need for DIY tropical nail art?
At minimum, you need a base coat, top coat, a fine detail brush, a dotting tool and a few polish colors. A cosmetic sponge helps with gradients, and nail art gel paint or acrylic paint makes detailed work easier. Optional extras include chrome powder, 3D charms, stamping plates and a gel lamp.
7. Are press-on tropical nails worth it?
They can be, especially for travel or special occasions. They save time, let you try bold designs without commitment, and many sellers offer hand-painted or 3D tropical sets. Quality varies, so read reviews, measure your nails carefully, and prepare your nails properly before applying.
8. How much does a tropical nail art manicure cost?
It depends on where you live, your artist’s experience and how detailed the design is. Simple accent nails cost less than full hand-painted or 3D sets. If you’re on a budget, ask for art on one or two nails only, or try a DIY or sticker-based approach.
9. How do I remove tropical nail art without damaging my nails?
For regular polish, use a gentle remover and cotton pads. For gel, lightly file the top coat, soak cotton in acetone, wrap with foil for 10 to 15 minutes, then gently push the gel away. Avoid peeling or scraping, since that can remove layers of the natural nail. Finish with cuticle oil and hand cream.
10. Is tropical nail art only for summer?
Not at all. While it’s most popular in warm weather, it’s also a favorite for winter vacations and a cheerful pick when the weather turns gray. Minimalist or tonal tropical designs, like a single leaf on a milky base, also look great year-round and even work in more formal settings.

4 Comments