

Firework Nail Design: 25 Stunning Ideas, Tutorials and Pro Tips for Every Occasion
There’s a particular kind of joy in watching a firework open up against a dark sky. That tiny pause before the burst, the crackle of color, the way everyone around you goes quiet and then cheers. Now imagine carrying that feeling on your fingertips every day.
That’s exactly why firework nail design has become one of the most loved nail art trends for celebrations and, increasingly, for everyday wear. It’s bold without being complicated, glamorous without being fussy, and it works on almost any nail length, shape and skill level. Whether you’re getting ready for Independence Day, a New Year’s Eve party, Diwali, Bonfire Night or just want something that feels like a celebration, a good firework manicure delivers.
In this guide, I’ll walk you through everything: what a firework nail design really is, the tools you need, nine different techniques, four detailed tutorials, 25 design ideas, color palettes, occasion guides, aftercare and more. Whether you’re a total beginner with a dotting tool you bought on a whim or someone who books a nail tech every three weeks, there’s something here for you.
Let’s light it up.
Also Read : Christian Nail Ideas: 45 Faith-Inspired Designs for Church, Easter, Christmas and Everyday Life
What Is a Firework Nail Design?
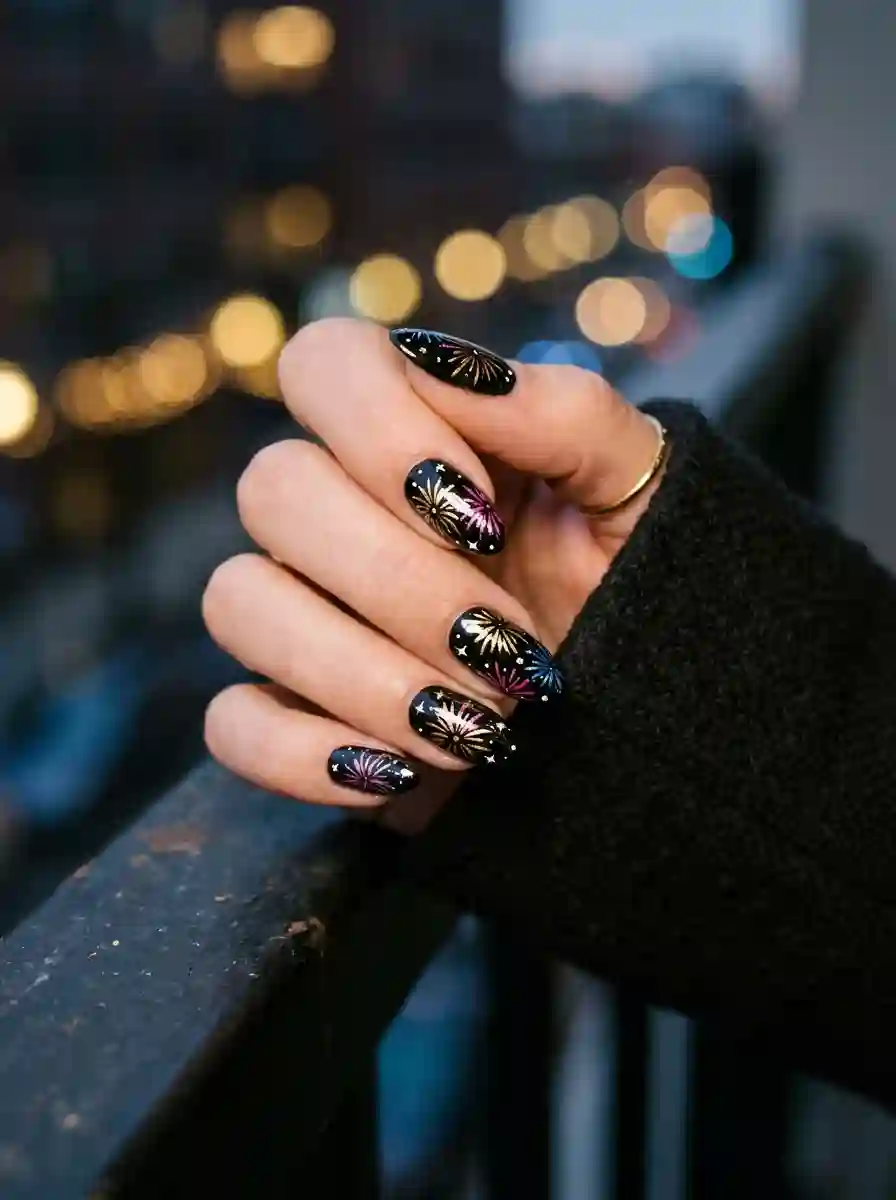
A firework nail design is any nail art that recreates the look of fireworks: radiating lines, scattered sparks, glittering bursts, or the glowing trails of rockets against a dark background. At its simplest, it’s a few thin lines fanning out from a central dot. At its most elaborate, it’s a layered night-sky scene with chrome bursts, 3D rhinestone sparks and a gradient horizon.
What makes it so appealing is how flexible the idea is. A firework nail design can be:
- Minimal: a single tiny burst on an accent nail over a nude base.
- Dramatic: full black base, neon bursts on every finger, glitter topcoat.
- Patriotic: red, white and blue sparks with stars.
- Glamorous: gold and silver chrome on deep navy or black.
- Playful: pastel bursts, confetti dots and rainbow sparkles.
The common thread is movement. The best firework nails look like something is happening, as though a burst of light just exploded and is still settling.
Why Firework Nail Designs Are So Popular
If you scroll through nail inspiration for even five minutes, you’ll notice fireworks pop up constantly. There are a few reasons this design has real staying power.
It’s seasonal and yet timeless. Most holiday nail art disappears after the holiday. Fireworks don’t. They fit into New Year’s Eve, birthdays, weddings, festivals, concerts and summer nights. You can wear them in July or in December and never feel out of place.
It flatters every skin tone. Dark bases make bright colors pop, and metallic accents like gold, rose gold and silver suit warm, cool and neutral undertones alike. A deep navy or black base also tends to make fingers look elegant.
It’s forgiving. Fireworks are meant to look a little chaotic. A slightly uneven line or an off-center dot reads as artistic rather than mistaken. That makes it one of the friendliest designs for beginners who are nervous about freehand nail art.
It photographs beautifully. Glitter, chrome and glossy topcoat catch light in a way that looks stunning on camera, which is a big reason it keeps trending on social media.
It scales with your skill. You can start with a three-dot version and gradually work up to layered chrome paint effects. There’s always a next level.
When to Wear Firework Nails
While the 4th of July gets most of the attention, firework nail design suits far more occasions than most people realize.
Independence Day celebrations. In the United States it’s the obvious one, but many countries celebrate national days with fireworks. If you’re in Pakistan, August 14th is a perfect excuse for green, white and gold bursts. Canada Day, Bastille Day and other national holidays work just as well with local color schemes.
New Year’s Eve. Gold, silver, champagne and black are the classic palette. Glitter-heavy bursts feel right at midnight.
Diwali. The Festival of Lights is practically built for firework nails. Think deep maroon, royal blue or emerald bases with gold and saffron bursts, and perhaps a tiny diya motif on the ring finger.
Bonfire Night. In the UK, November 5th calls for moody, earthy tones: black, burnt orange, deep red and glints of gold.
Weddings and engagement parties. A soft, pastel or champagne version with fine gold sparks feels celebratory without overshadowing the bride.
Concerts and festivals. Neon, holographic and chrome versions are made for stage lights.
Birthdays and everyday wear. A single accent firework in your favorite color makes a regular day feel a little more special.
Must Read : Nail Design with Lines: Ideas, Techniques and Tips for Clean, Modern Nails
Tools and Materials You Need for Firework Nail Design

You don’t need a professional kit to get great results, but a few specific tools make a significant difference. Here’s what I recommend, from essential to optional.
The Essentials
Base coat and top coat. A good base coat protects your natural nails and helps color adhere. A glossy top coat seals everything in and gives that polished finish. If you’re using gel, you’ll need a gel base and a no-wipe gel top coat plus an LED lamp.
A dark base color. Black is the classic. Deep navy, midnight purple, charcoal and dark emerald also work beautifully. The darker the base, the more your colors pop.
A thin striping brush or liner brush. This is the real hero tool. A long, thin brush with fine bristles lets you draw those delicate radiating lines in one smooth stroke. If you can only buy one nail art tool, make it this.
A dotting tool. Perfect for creating the center of each burst and the tiny sparks around it. Dotting tools come in different sizes; a set with at least three sizes is handy.
Bright nail polish or gel colors. You’ll want a handful of vivid shades. Gold, hot pink, electric blue, bright orange, white and lime are all strong choices.
Nice to Have
Nail art pens. These are great for beginners because they work like a marker and give you good control. They’re especially useful for fine details.
Chrome or mirror powder. For that metallic, light-bouncing effect. It works over gel polish and creates stunning gold, silver and holographic bursts.
Glitter in different sizes. Fine glitter for sparks, chunky glitter for a bold statement.
Striping tape. Useful if you want clean, straight lines for a geometric take on fireworks.
Rhinestones and nail gems. Tiny crystals at the center of each burst add 3D sparkle.
A makeup sponge. For gradient and ombre sky effects.
A palette or piece of foil. For mixing colors and holding small amounts of polish while you paint.
Cleanup brush and acetone. To fix mistakes around the cuticle area and make the whole manicure look sharper.
How to Prep Your Nails Before Any Firework Nail Design
The prettiest design in the world won’t last if your prep is rushed. A little time here pays off for the whole life of your manicure.
- Remove old polish completely. Use acetone and a lint-free pad. Leftover residue is a leading cause of lifting and chipping.
- Shape your nails. File in one direction rather than sawing back and forth to avoid splitting. Pick the shape you want (more on this below).
- Push back and tidy your cuticles. Gently, after a warm soak or a little cuticle remover. Never cut living tissue.
- Lightly buff the nail surface. Just enough to remove shine. This helps polish or gel grip.
- Wipe away dust and oils. Use isopropyl alcohol or a nail cleanser. Skipping this step is the number one reason designs peel early.
- Apply a thin base coat. Thin layers, always. Thick layers lead to bubbles and longer drying time.
This prep takes ten minutes and makes your firework nail design noticeably smoother, glossier and longer-lasting.
Best Nail Shapes and Lengths for Firework Designs
Fireworks can work on any nail, but different shapes show off different effects.
Short nails. A short manicure is a great canvas for a single burst per nail or one accent nail. Keep the design compact: smaller bursts, fewer lines and more negative space. Short nails with a dark base look sleek and modern.
Medium nails. This is the sweet spot. There’s enough room for a full burst with radiating lines and a few sparks without things looking crowded.
Long nails. Long coffin, stiletto or almond nails give you enough room to create an entire sky scene. You can place a large burst near the tip and add smaller sparks and a gradient toward the cuticle.
Shape guide:
- Almond: Soft and elegant. The curved tip echoes the arc of a firework.
- Coffin or ballerina: Wide, flat tip that suits large bursts.
- Square or squoval: Practical and sturdy, with a clean look for geometric or tape designs.
- Round: Great for minimal, delicate bursts on shorter nails.
- Stiletto: Dramatic and eye-catching, ideal for long trails and rocket shapes.
9 Techniques to Create a Firework Nail Design
There isn’t just one way to achieve this look. Here are nine techniques, from the easiest to the most advanced, so you can pick what suits your skill and tools.
1. Freehand Painting with a Striping Brush
This is the classic approach. You dip a long, thin brush in polish or gel and draw short lines radiating outward from a central point. Light pressure at the start and a quick flick at the end creates tapered, delicate lines that look like real sparks. It takes practice, but the result looks the most authentic.
2. Dotting Tool Bursts
Great for beginners. Place a larger dot in the center, then surround it with smaller dots in a circle or spiral. You can add tiny lines between the dots for extra effect. It’s nearly impossible to mess up.
3. Nail Art Pen Details
Pens give you marker-like control. Draw your burst lines directly on a dry base. They’re ideal for fine detail and very quick to apply.
Read Also : Light Pink Chrome Nails: 16 Ideas, a Shade Guide and Exactly How to Get the Look
4. Glitter Gradient
Apply a line of chunky glitter at the tip and sweep it toward the cuticle with a nearly dry brush so it thins out. The result looks like sparks fading as they fall. It’s one of the easiest ways to get a sparkling firework effect.
5. Sponge Ombre Sky
Dab two or three colors onto a makeup sponge and press onto the nail for a soft gradient. This creates a twilight sky behind your bursts: navy fading into purple, or deep blue into hot pink.
6. Splatter or Straw-Blow Effect
Drop a small bead of thinned polish near the nail and blow through a straw to push it outward in branching lines. The results are unpredictable and organic, which is exactly how a firework looks.
7. Chrome Powder Paint
Mix chrome powder with a little clear gel base coat to create a metallic paint, then draw your lines with a fine brush. It gives a jewel-like, mirror finish that catches the light.
8. Nail Stickers and Decals
The fastest route. Water decals or stickers with printed bursts can be applied over a dark base and sealed with top coat. Great when you’re short on time or want a perfectly symmetrical look.
9. Stamping Plates
Stamping lets you transfer a detailed burst pattern in seconds. It’s not the most natural-looking, but it produces crisp, repeatable designs.
Which technique should you choose?
| Technique | Skill Level | Time Needed | Best For |
|---|---|---|---|
| Freehand striping | Medium to advanced | 45–60 min | Authentic, delicate bursts |
| Dotting tool | Beginner | 20–30 min | Quick, playful designs |
| Nail art pen | Beginner | 20–30 min | Fine detail |
| Glitter gradient | Beginner | 20 min | Sparkly, low-effort look |
| Sponge ombre | Beginner to medium | 30 min | Sky backgrounds |
| Splatter/straw blow | Medium | 30 min | Organic, abstract bursts |
| Chrome powder paint | Advanced | 60 min+ | Luxurious metallic finish |
| Stickers/decals | Beginner | 15 min | Speed and symmetry |
| Stamping | Medium | 30 min | Repeatable detail |
Tutorial 1: Classic Black-Base Freehand Firework Nails
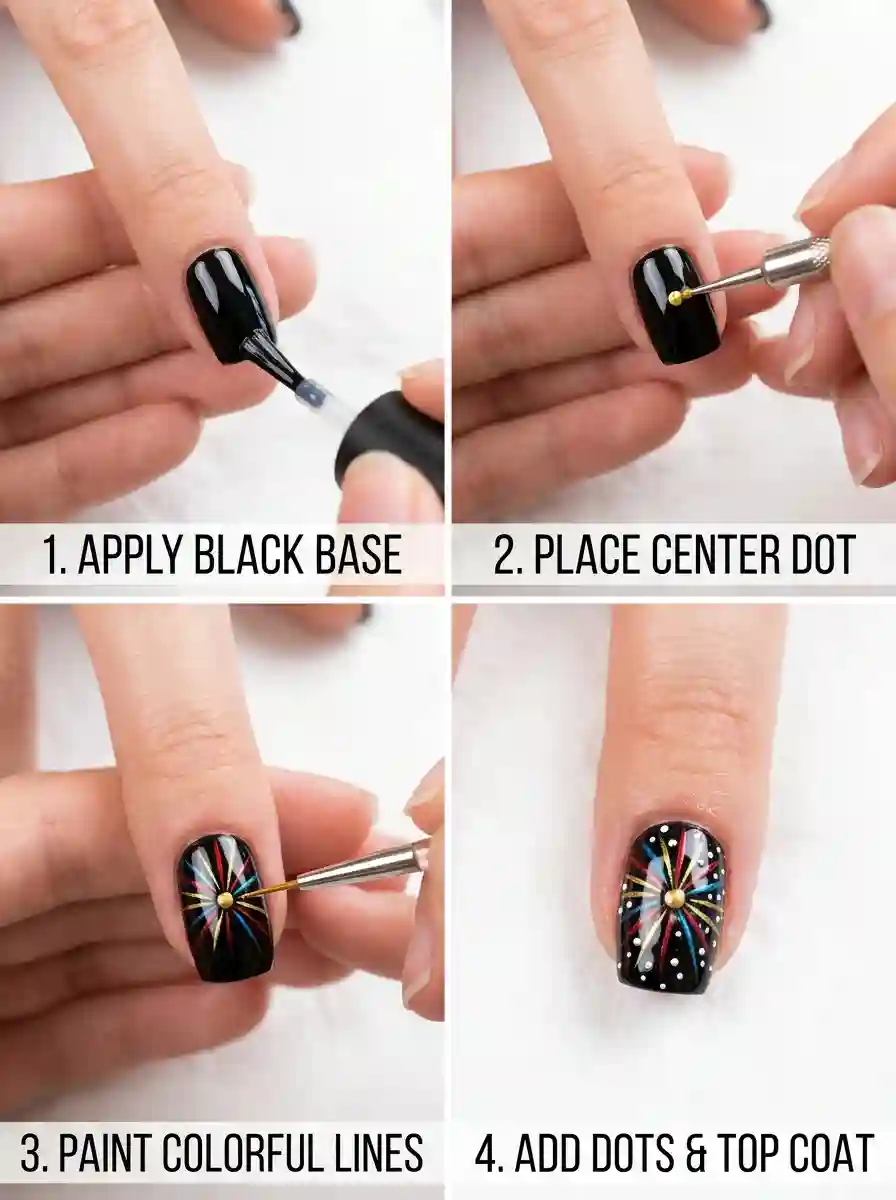
This is the look most people picture when they hear “firework nail design,” and it’s a fantastic starting point.
What you’ll need: base coat, black polish or gel, a sparkly dark blue or black topper (optional), a thin striping brush, two or three bright polishes, a dotting tool, white polish, top coat.
Step 1: Prep and base. Complete your nail prep and apply a thin layer of base coat. Let it dry (or cure it if you’re using gel).
Step 2: Black color. Apply two thin coats of black. You want it opaque and deep so your colors really stand out. Make sure each coat is fully dry before the next.
Step 3: Add depth (optional). One light coat of a semi-transparent sparkly navy gives the base a night-sky feel. Let it dry thoroughly.
Step 4: Choose your burst center. Decide where each firework will “explode” on the nail. Off-center usually looks more natural than dead center. Place a small dot there with your dotting tool.
Step 5: Draw the lines. Load your striping brush with a bright color, wipe off excess on the bottle neck, and draw short lines radiating outward from your center dot. Start from the center and flick outward so the line tapers at the end. Vary the length of the lines; real fireworks aren’t perfectly even.
Step 6: Add a second burst. Use a different color and make this one smaller. Overlap slightly with the first, or place it near the nail edge so it feels like a background burst.
Step 7: Add sparks. With your smallest dotting tool, scatter tiny white and gold dots around the bursts. Add a few small lines or dashes as falling sparks.
Step 8: Seal. Apply a thin layer of glossy top coat, being careful not to drag the wet details. If you’re using regular polish, let the design dry completely first (about 10–15 minutes) to avoid smearing.
Pro tip: Work on one or two nails at a time. If you’re using regular polish, the details can smudge when you handle other nails, so patience pays off.
Tutorial 2: Chrome Powder Firework Nails (Gel Method)
For a metallic, show-stopping version, chrome gives you the glow of real fireworks. This approach is inspired by techniques professionals use for high-shine gel designs.
What you’ll need: gel base coat, black gel color, sparkle or glossy gel top coat, chrome powders (gold, silver, holographic, pink), clear gel base for mixing, striping brush, dotting tool, white gel, no-wipe top coat, LED lamp.
Step 1: Apply gel base coat and cure. Add two thin coats of black gel, curing each.
Step 2: Apply a no-wipe gel top coat and cure. A glossy surface helps the final design look crisp.
Step 3: Mix your chrome paint. On a palette, mix a tiny pinch of chrome powder with a small drop of clear gel base. You’re aiming for a thick, paint-like consistency. Make a few colors.
Step 4: Paint the bursts. Using your striping brush, draw radiating lines with one color at a time. Flash cure each color for a few seconds to stop colors bleeding into each other.
Step 5: Add accents. Finish with gold and silver lines in between for dimension. Flash cure, then fully cure once you’re happy.
Step 6: Dots and stars. Use a dotting tool and white gel to add small stars and dots. Cure.
Step 7: Seal. Apply no-wipe top coat and cure for the full time.
Why it works: Because the chrome paint is mixed with gel, it stays workable and won’t dry until you cure it. That gives you plenty of time to adjust lines and fix mistakes.
Tutorial 3: Easy Glitter Gradient Fireworks (Beginner Friendly)
If freehand sounds scary, start here. This look takes about 20 minutes and requires almost no artistic skill.
What you’ll need: base coat, deep blue or black polish, red/gold/silver chunky glitter polish, top coat.
Step 1: Apply base coat, then two coats of your dark color. Let dry fully.
Step 2: Take your glitter polish and apply a line across the tip of the nail, working one nail at a time.
Step 3: With a nearly dry brush, use small upward strokes to sweep the glitter toward the cuticle. Stop around halfway or two-thirds up the nail. Because the brush is running dry, the glitter thins out naturally as you move up.
Step 4: If you want more sparkle, dab extra glitter on the tip with the brush.
Step 5: Apply a thick layer of top coat to smooth out the glitter texture. You may need two layers.
Pro tip: Glitter polish can feel gritty. Apply top coat generously and use a fresh coat the next day to keep it smooth.
Read Must : Navy Blue Nail Inspo: 45+ Gorgeous Ideas for Every Shape, Season & Style
Tutorial 4: Dotting Tool Firework Nails (Quickest Freehand Look)
What you’ll need: base coat, dark base color, three or four bright polishes, dotting tool set, top coat.
Step 1: Prep, base coat and two coats of your dark color. Dry completely.
Step 2: Pour small drops of your bright polishes on a palette.
Step 3: Using your largest dotting tool, place one dot where you want your firework center.
Step 4: Switch to a medium tool and place five to eight dots in a circle around it, spaced evenly.
Step 5: Use the smallest tool to add tiny dots between and beyond the circle for sparkle.
Step 6: Repeat with a second color, making this burst smaller and placed off to one side.
Step 7: Let dry, then seal with top coat.
You can finish this look in under half an hour, and it looks surprisingly polished.
25 Firework Nail Design Ideas to Try
Now for the fun part. Here are 25 design directions, grouped so you can find your style fast.
Classic Looks
1. Midnight Sky Burst. Black base with three bursts in pink, gold and blue. It’s the definitive firework manicure and works on every length.
2. Gold on Navy. A deep navy base with fine gold lines radiating from a tiny rhinestone center. Elegant enough for a wedding or a New Year’s Eve dinner.
3. Neon Pop. A matte black base with neon green, neon orange and hot pink bursts. The matte finish makes neon glow harder.
4. Single Accent Firework. Keep nine nails in a simple nude or sheer pink and paint one dramatic firework on the ring finger. Subtle and chic.
5. Silver Sparkle Minimal. A clear or milky base with tiny silver burst lines near the tips. Perfect for short nails and office-friendly.
Patriotic Looks
6. Red, White and Blue Bursts. A dark blue base with red and white sparks and a few gold stars. A modern take on the traditional 4th of July look.
7. Flag and Firework Combo. Paint a half-flag on a couple of nails and fireworks on the rest. It reads as patriotic without being overly literal.
8. Stars and Stripes Tape Fireworks. Use red and blue striping tape to build a cross shape on a white base, then add gold glitter around it. It’s a clean, graphic option.
9. Green and White Independence Day Bursts. For August 14th in Pakistan: a deep green base with white bursts and a crescent-and-star accent on one nail.
10. Maple Leaf Fireworks. A Canada Day idea: white base, red bursts and one tiny maple leaf accent.
Glam and Metallic Looks
11. Chrome Gold Explosion. Gold chrome paint on jet black with a mirror-glossy top coat.
12. Holographic Burst. A holographic powder rubbed over a dark gel base shifts colors with the light.
13. Rose Gold Sparkler. A deep burgundy base with rose gold lines and a scattering of tiny crystals.
14. Silver and Black Monochrome. Entirely black, white and silver. Sharp, graphic and stylish.
15. Champagne Cascade. A sheer champagne shimmer base with gold and cream bursts, ideal for bridal or engagement events.
Soft and Pastel Looks
16. Pastel Firework. A soft lilac or baby blue base with pastel pink, mint and yellow bursts. Playful and fresh for daytime.
17. Cotton Candy Sky. A sponge gradient of pink to lavender with white sparkle dots.
18. Sunset Burst. An orange-to-pink gradient with tiny gold lines. Lovely for summer evenings.
Artistic and Unusual Looks

19. Negative Space Fireworks. Leave parts of the nail bare and paint thin burst lines directly onto the natural nail or a sheer base.
20. Galaxy Fireworks. A sponge-blended galaxy background (purple, blue, black) with bursts overlaid and tiny white stars.
21. Splatter Burst. Use the straw-blow method for organic, branching bursts on a dark base.
22. 3D Rhinestone Fireworks. Create a burst outline in gel, then add tiny rhinestones along the lines for texture.
23. French Tip Fireworks. A classic French tip in black or navy with a single tiny burst above the smile line.
24. Reverse Firework. A light or white base with dark bursts. It flips the traditional palette and looks surprisingly modern.
25. Sparkler Trail. Long, thin gold lines curving across the nail like a sparkler being waved, rather than a round burst.
Also Read : Gothic Black and Purple Nails: 25 Dark Ideas, Shade Guide & Step-by-Step How-To
Best Color Combinations for Firework Nail Design
Color choice makes or breaks the effect. Here are palettes that consistently work.
The Classic Celebration: black + gold + hot pink + electric blue. Bold, vibrant and the most recognizable.
Patriotic Pop: navy + red + white + gold. Timeless for national holidays.
Midnight Glam: black + silver + white + a touch of purple. Sophisticated and formal.
Neon Night: black matte + neon green + neon pink + neon orange. Great for festivals and summer parties.
Warm Bonfire: charcoal + burnt orange + deep red + gold. Perfect for autumn and Bonfire Night.
Diwali Gold: deep maroon or emerald + gold + saffron + cream. Rich, festive and traditional.
Soft Daylight: pastel lilac + baby blue + peach + white. A gentler, daytime-friendly approach.
Monochrome Chic: black, white and silver only. Minimal and modern.
A few color rules to remember:
- Use two to four bright colors per set. More than that can look messy.
- Always include white or gold as a “spark” color. It makes everything look lit from within.
- Keep the base darker than the bursts unless you’re deliberately doing a reverse design.
- If you’re nervous, choose colors that sit next to each other on the color wheel, like pink and orange or blue and purple.
Firework Nail Design Ideas by Occasion
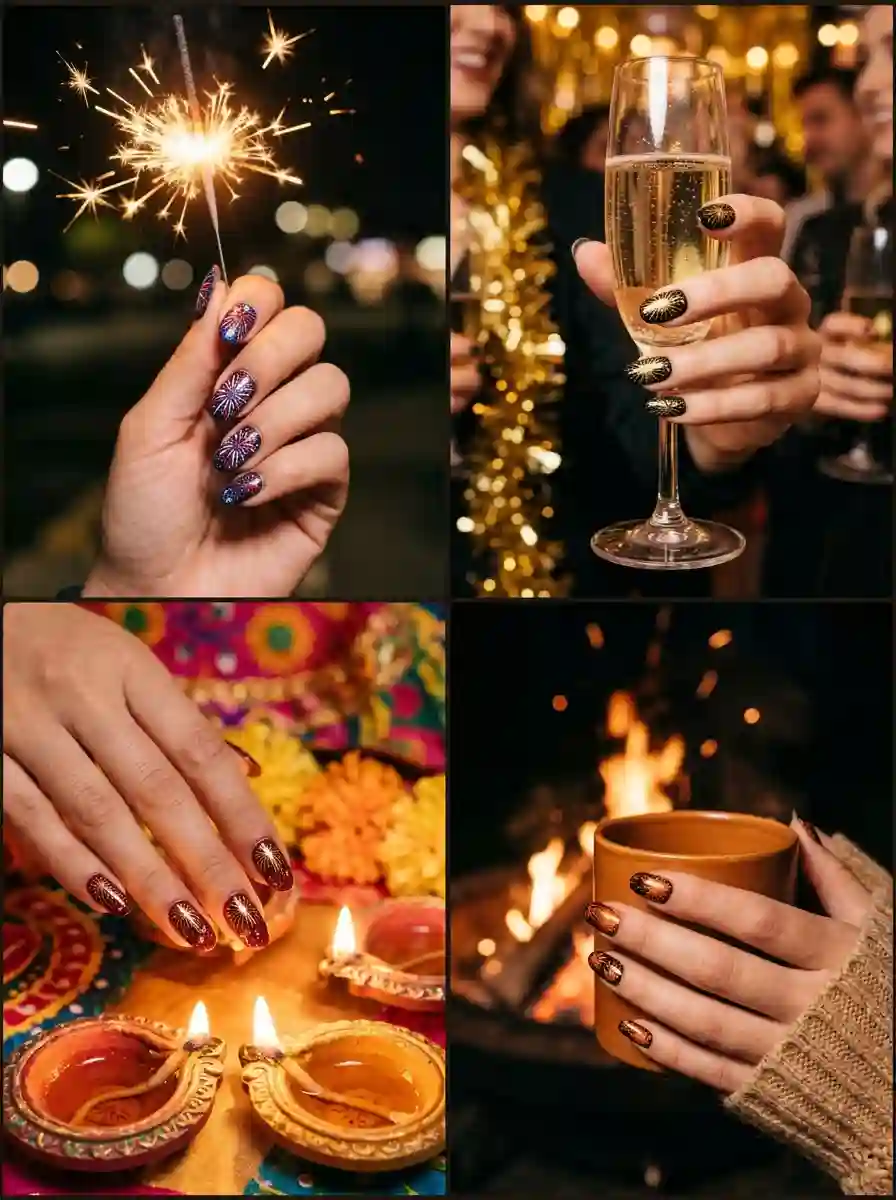
4th of July and Independence Days
Go for classic red, white and blue but add modern touches: chrome stars, a single flag accent nail or sparkler trails. If you’re in another country, swap in your national colors. Green and white for Pakistan, red and white for Canada, blue, white and red for France.
New Year’s Eve
Gold, silver, champagne and black. This is the best time for heavy glitter, chrome and rhinestones. Consider a countdown clock accent on one nail if you’re feeling playful.
Diwali
Deep jewel tones with gold bursts. A tiny diya or rangoli-inspired accent on the ring finger ties the look together beautifully.
Bonfire Night
Moody and warm. Black bases with orange, red and gold bursts, perhaps with a bit of smoky gradient at the cuticle to suggest bonfire haze.
Weddings and Engagements
Soft champagne, blush and gold. Keep it delicate: thin lines, small bursts and a glossy finish.
Birthdays and Parties
Anything goes. Match your outfit, pick your favorite colors and add as much sparkle as you like.
Everyday Wear
Choose one accent nail with a tiny burst on a neutral base. It’s subtle enough for the office and still feels special.
Firework Nails on Toes
Firework nail design isn’t just for hands. Toes give you a fun, summery canvas, especially for beach days and sandal season.
Keep it simple. Toenails are small, so one burst per nail with three or four lines is plenty. Dotting tool designs work especially well.
Go bolder with color. Because toes are small, bright polish and glitter stand out beautifully. A black base with neon dots looks great against sandals.
Mix and match. Paint fireworks on the big toes and a solid or glitter color on the rest for a balanced look.
Make sure to seal well. Toes get friction from shoes, so use a thick top coat and reapply every few days to prevent chipping.
Gel, Acrylic, Dip Powder, Polish or Press-Ons: Which Is Best?
The right base for your firework nail design depends on how long you want it to last and how much time you have.
Regular polish. Cheapest and easiest to remove. Great for beginners, though it chips faster and lasts about four to seven days. The slower drying time can make fine details harder to keep clean.
Gel polish. Cured under an LED lamp, so you can work on details without anything drying prematurely. Typically lasts about two to three weeks and gives a glossy, strong finish. This is the best option for chrome and intricate designs.
Acrylic. Ideal if you want extra length or strength. Fireworks look stunning on long acrylic sets because there’s so much room for the design, but you’ll almost always want a professional for application.
Dip powder. Durable and lightweight, though the design is usually added over or under the powder layers. It’s a good option if your nails tend to break.
Press-on nails. The fastest way to try a firework look. You can buy pre-designed sets or paint your own on blank press-ons, which is a brilliant trick: paint at your own pace, then apply when ready. A great option for events when you don’t have time for a salon.
Read Also : Rose Nail Ideas: 60+ Gorgeous Designs, Shapes and Easy How-Tos for 2026
Common Firework Nail Design Mistakes (and How to Fix Them)
Even experienced nail artists make these slips. Here are the usual culprits and what to do.
Mistake 1: Colors look dull on the base. This usually means the bright polish is sheer. Apply a thin layer of white underneath your color for a bolder result, or choose a more opaque formula.
Mistake 2: Lines come out thick and clumsy. Too much polish on the brush is almost always the cause. Wipe the brush on the bottle edge until it’s almost dry, and use the very tip.
Mistake 3: The design smudges when you apply top coat. Wait until the design is completely dry if you’re using regular polish. With gel, flash cure the design first. When applying top coat, float it on without pressing hard.
Mistake 4: Colors bleed together. This happens when layers go on wet. Allow each color to dry or flash cure between layers.
Mistake 5: Too many bursts on one nail. Crowding makes the nail look messy rather than magical. Give each burst room to breathe, and use one or two bursts per nail.
Mistake 6: Perfectly symmetrical bursts. Fireworks aren’t geometrical. Vary the line length, the angle and the spacing for a natural look.
Mistake 7: Skipping the top coat. The design will chip fast and look flat. Always seal with a glossy top coat, and cap the free edge by running the brush along the tip of the nail.
Mistake 8: Rushed prep. If the polish peels after a day or two, prep is probably the issue. Remove oils, buff lightly and use a good base coat.
Pro Tips for a Better Firework Nail Design
These are small habits that make a big difference.
- Practice on a swatch. Paint a few bursts on a plastic practice tip or even a piece of paper before touching your actual nails.
- Use a nail art palette. Don’t paint straight from the bottle. Pour out a small amount so you can control the quantity.
- Support your hand. Rest your wrist on a table, and brace the painting hand’s pinky against the other hand for steady lines.
- Work from the center outward. Starting at the center and flicking outward gives tapered, natural-looking lines.
- Vary your line lengths. Mix long, medium and short lines in each burst for realism.
- Add a few “falling sparks.” Tiny dots or short dashes trailing downward make the design feel dynamic.
- Layer light over dark. Always paint lighter colors on top of darker ones for the strongest contrast.
- Use a cleanup brush. A small flat brush dipped in acetone fixes mistakes around the edges instantly.
- Take a break. If your hand gets tired or the design starts looking off, step away for a few minutes and come back.
- Finish with a glossy top coat. The extra shine intensifies color and makes metallic details glow.
How to Make Your Firework Nails Last Longer
A beautiful design deserves some care. Here’s how to extend its life.
Cap the free edge. When you apply base coat, color and top coat, run the brush along the very tip of the nail. This seals the edge and helps prevent chipping.
Reapply top coat. If you’re using regular polish, add a fresh layer of top coat every two or three days. It refreshes the shine and adds protection.
Wear gloves for chores. Hot water, detergent and cleaning products weaken polish and gel. Rubber gloves make a real difference.
Moisturize your cuticles. Cuticle oil keeps the skin healthy and nails flexible, which helps prevent lifting. Apply it daily.
Avoid using your nails as tools. Opening cans and scraping labels are classic ways to chip a manicure.
Keep hand sanitizer off fresh polish. Alcohol-based products can dull top coat, especially in the first few days.
How to Remove Firework Nail Designs Safely
When it’s time to take your design off, do it gently to protect your natural nails.
Regular polish: Soak a cotton pad in acetone-based or non-acetone remover, hold it on the nail for about 10 seconds and wipe away. Glitter polish may need a little longer.
Gel polish: Lightly buff the top coat, soak cotton pads in acetone, place them on each nail and wrap with foil. Wait 10 to 15 minutes, then gently push off the softened gel with a wooden stick. Never peel or pick it off, as this pulls away layers of your natural nail.
Press-ons and acrylics: These are best removed professionally or by following the product’s specific instructions.
After removal, wash your hands, apply cuticle oil and use a nourishing hand cream. Consider giving your nails a short break between sets if they feel thin or dry.
Visiting a Salon: How to Ask for the Firework Nail Design You Want
If you’re not doing the design yourself, clear communication helps you get exactly what you picture.
Bring reference photos. Pictures of the colors, burst size and overall mood are the most useful thing you can show your nail technician.
Be specific about the base. Say whether you want black, navy, nude or something else, and whether you want matte or glossy.
Say how many nails. Do you want fireworks on all ten, or an accent on one or two?
Mention your lifestyle. If you type all day or wash dishes a lot, ask about durable options.
Ask about timing. Detailed freehand and chrome designs take longer than a standard manicure, so book extra time. Pricing varies by salon and region, and detailed nail art usually costs more than a plain set, so it’s worth asking for a quote before you start.
Trust the artist. Many nail technicians have a signature burst style. If you love their portfolio, give them some creative freedom.
Also Read : Gorgeous Gray Nail Ideas That Will Instantly Upgrade Your Manicure Game
Mixing Firework Nails with Other Trends
Firework nail design pairs well with other styles if you want something more personal.
With chrome: Mirror-finish chrome over a black base, then add colorful bursts for depth.
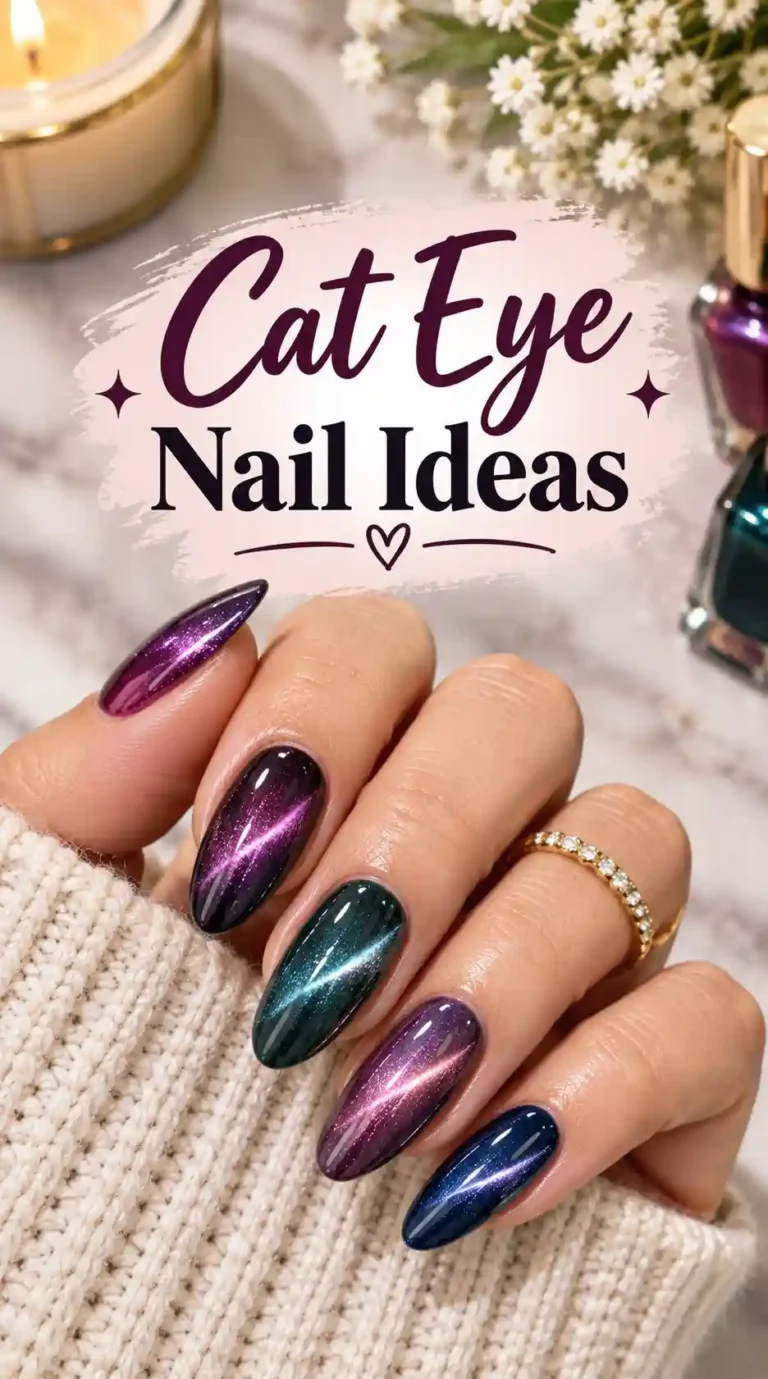
With cat-eye gel: A magnetic cat-eye base creates a shimmering sky effect that makes a firework look like it’s glowing from within.
With French tips: A black or navy French tip with tiny bursts above the smile line.
With glitter ombre: A glitter gradient at the tip adds a “falling sparks” effect that complements any burst.
With negative space: Clear patches with tiny bursts feel airy and modern.
With 3D elements: Gel flowers, gems or small charms add texture and a luxe look.
With minimalist nail art: Keep one accent nail as a firework and the rest in sheer or milky shades.
Frequently Asked Questions
1. What is the easiest way to create a firework nail design at home?
The easiest method is the dotting tool technique. Paint your nails with a dark base, place a large dot where you want the center, then circle it with smaller dots and a few tiny sparks. If you want something even faster, a glitter gradient at the tips takes about 20 minutes and needs almost no skill. Stickers and decals are another quick option.
2. What colors work best for firework nails?
Dark bases like black, navy, deep purple and charcoal make bright bursts stand out the most. For the bursts themselves, gold, hot pink, electric blue, orange, white and neon green are popular. Choose two to four colors and add white or gold as a spark accent for the best effect.
3. Can I do firework nail design on short nails?
Yes. Short nails suit compact, minimal designs. Try one small burst per nail, or place a firework on a single accent nail. Keep lines short and avoid crowding. A dark base on short nails also looks sleek and modern.
4. How long does a firework nail design last?
It depends on the product. Regular polish typically lasts about four to seven days, gel polish usually lasts two to three weeks, and acrylic or dip powder can last longer with proper care. Good prep, capping the free edge and a quality top coat all help extend wear.
5. What tools do I need for firework nail art?
At minimum, you’ll want a base coat, a dark polish, a few bright colors, a thin striping brush or dotting tool and a top coat. Nice extras include nail art pens, chrome powder, glitter, rhinestones, a makeup sponge and a cleanup brush.
6. How do I stop my firework design from smudging?
Allow the design to dry completely before applying top coat if you’re using regular polish. With gel, flash cure each color briefly. When applying top coat, use a light, floating motion rather than pressing, and avoid dragging the brush through wet details.
7. Can I wear firework nails outside of the 4th of July?
Absolutely. Firework nail design suits New Year’s Eve, Diwali, Bonfire Night, weddings, birthdays, festivals and everyday wear. Swap the colors to suit the occasion: gold and champagne for New Year’s, deep jewel tones for Diwali and warm oranges for Bonfire Night.
8. Are firework nail designs suitable for beginners?
Yes, many techniques are beginner-friendly. Dotting tool bursts, glitter gradients, nail art pens and stickers are all easy to learn.
Final Thoughts
A firework nail design is one of those rare trends that feels special whether you’re getting dressed for a big party or just want your hands to look beautiful on an ordinary Tuesday. It’s flexible, forgiving and endlessly customizable. You can keep it quiet with a single tiny burst or go all-out with chrome, glitter and rhinestones.
Start with what feels comfortable. If you’ve never held a striping brush, try the dotting tool method or a glitter gradient. Once you’re confident, move on to freehand lines, then chrome and layered scenes. Remember that fireworks are not meant to be perfect. The magic comes from movement, color and a little bit of chaos

3 Comments