
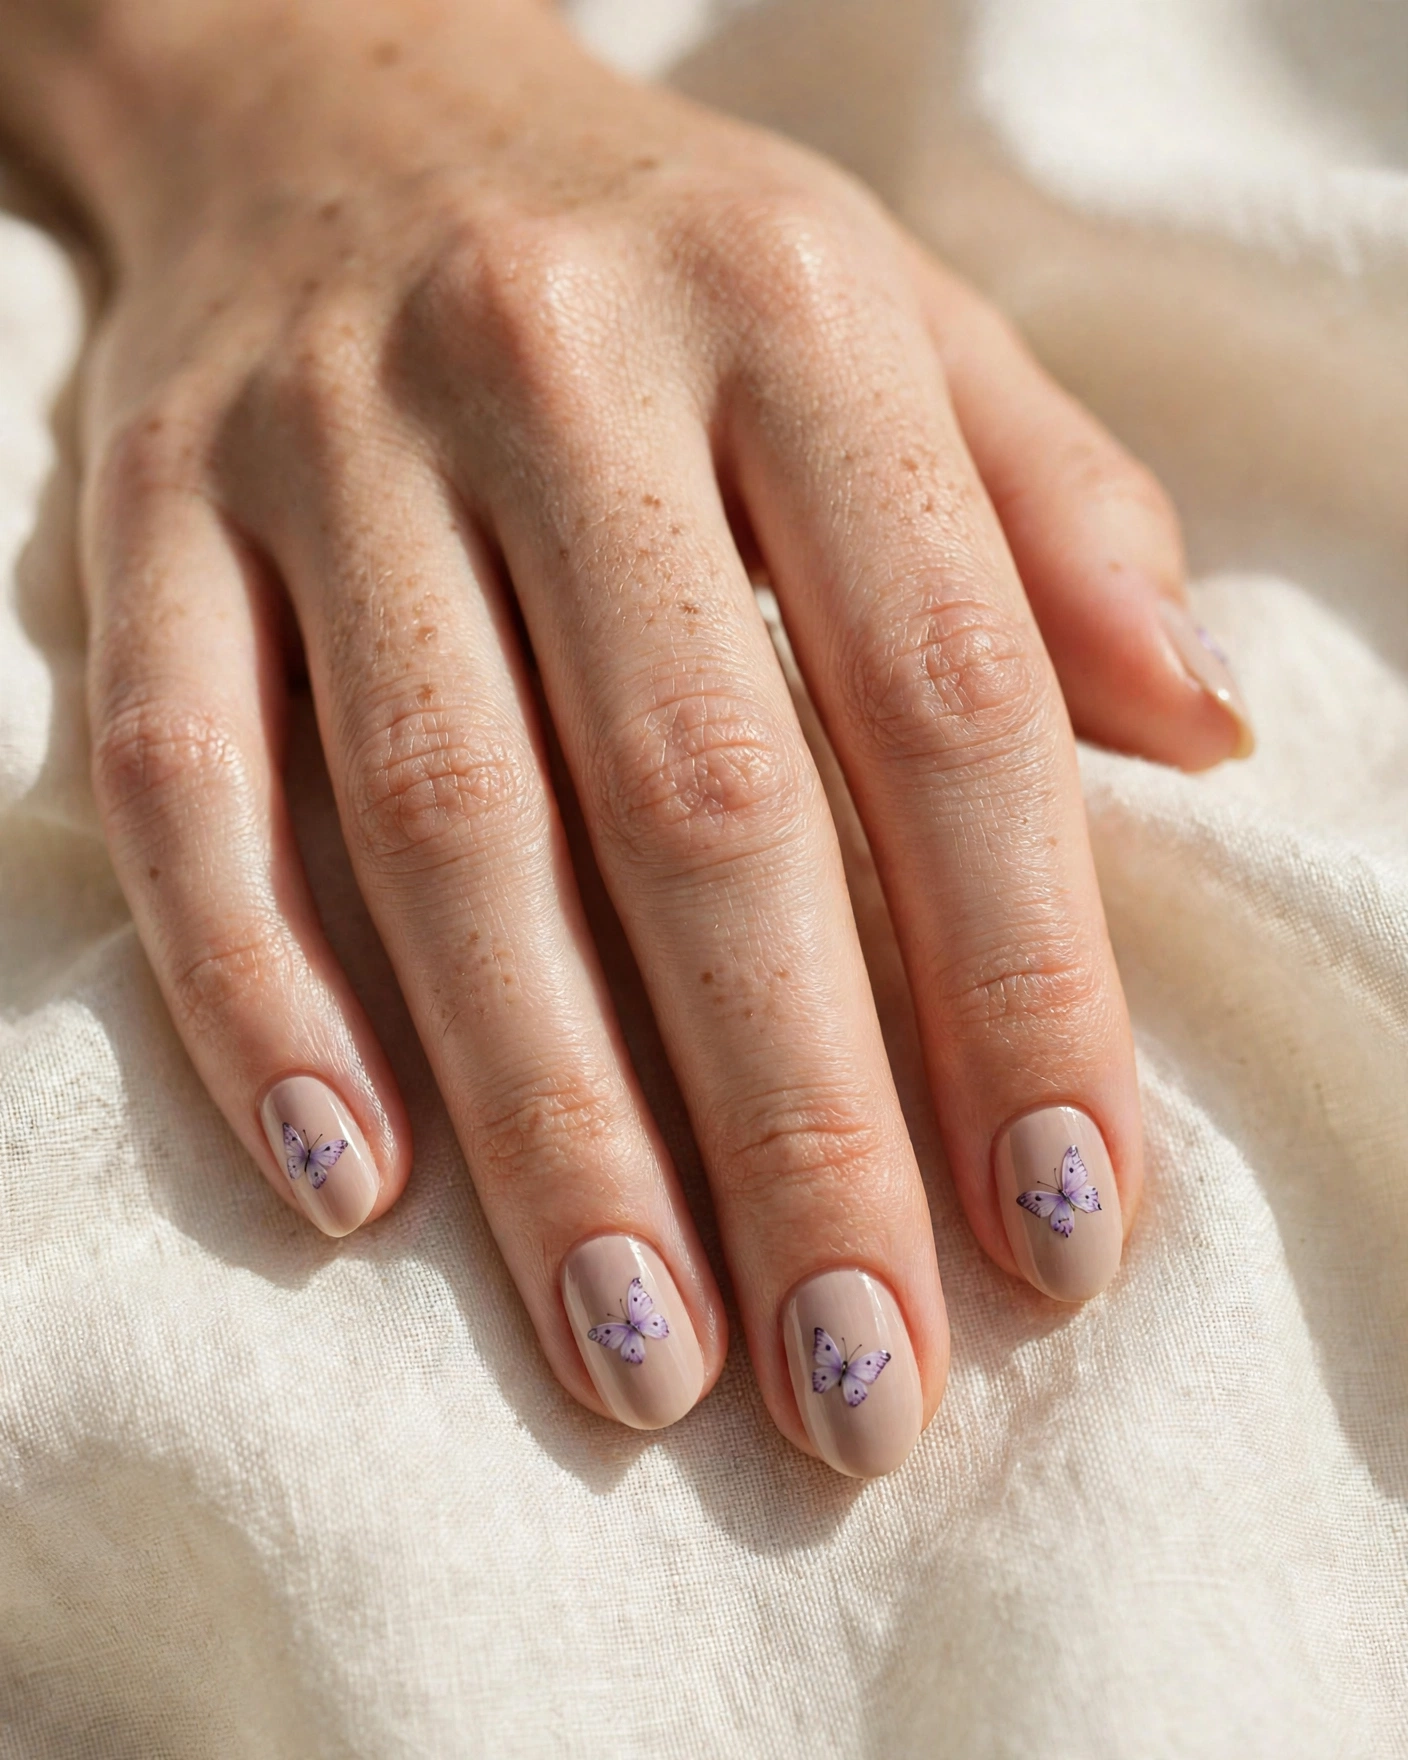
Simple Butterfly Nail Art: 40+ Easy Designs and a Beginner Tutorial
Butterflies and nails make a good pair. A butterfly is small, symmetrical and pretty without trying too hard, which is what a good manicure should be. You also don’t need to be an artist to pull it off.
If you’ve scrolled through butterfly nail photos and thought “I could never do that,” this guide is for you. Simple butterfly nail art is nothing like the intricate, hand-painted masterpieces you see on social media. It’s built from a few dots, a few curved lines and a steady hand. Some of the best designs are just two tiny wings and a thin body on a single accent nail.
In this guide, I’ll walk you through everything: the tools worth buying, how to prep your nails, a foolproof method to paint your first butterfly, more than 40 easy design ideas, color combinations that work, how to fix mistakes, and how to make your manicure last. Whether you use regular polish, gel or press-on stickers, you’ll find a route that suits your skill level.
Let’s start with why this design keeps coming back season after season.
Also Read : Cute Star Nail Design Ideas That Will Instantly Steal The Spotlight
Why Butterfly Nail Art Never Goes Out of Style
Trends in nail art move quickly. Chrome, glazed donut, jelly and aura nails each had their moment. Butterflies, though, keep returning because they sit comfortably in several categories at once.
They’re symbolic. Butterflies are often linked with change, growth and fresh starts. Many people choose butterfly nails when they’re starting a new job, moving to a new city, graduating, or just feeling like a new chapter has begun. You don’t need a deep reason, but it’s a nice bonus.
They’re flexible. A butterfly can be tiny and delicate or big and bold. It can be pastel and dreamy, black and edgy, or glittery and festive. The same shape works for a wedding, a beach holiday or an ordinary Tuesday.
They’re forgiving. Butterfly wings don’t need to be perfect. Real wings are slightly uneven, and a slightly imperfect wing looks natural rather than wrong. That’s very comforting for beginners.
They work on every nail length. Short nails, long nails, square, almond, coffin: a butterfly can be scaled to fit. We’ll cover this in more detail later.
What You’ll Need: A Simple Butterfly Nail Art Toolkit
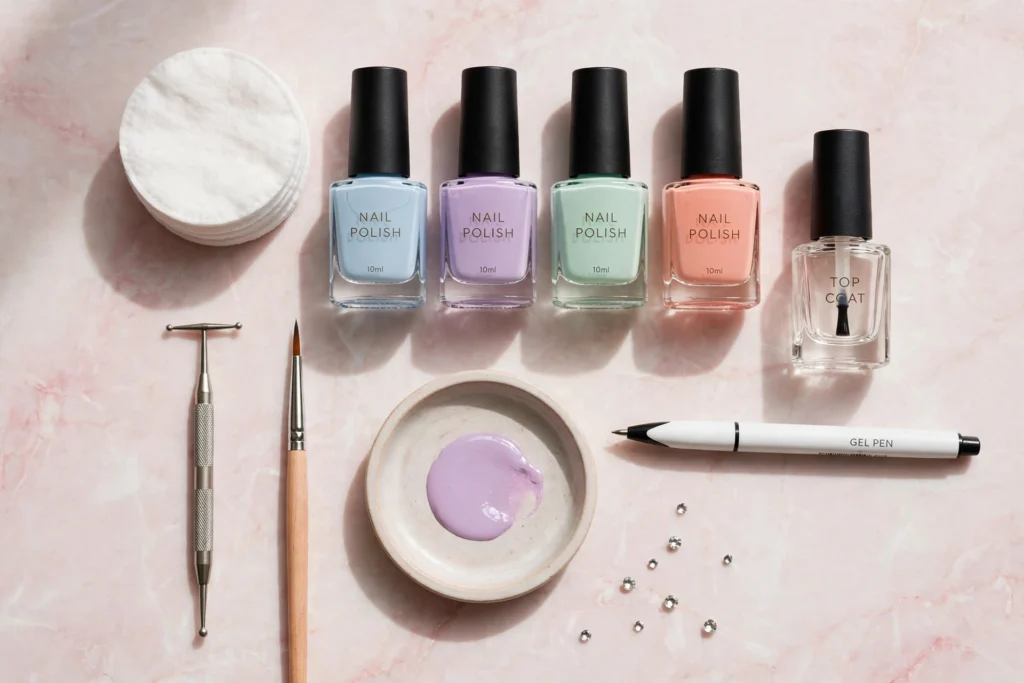
You don’t need a professional kit. Here’s what actually matters.
The essentials
Base coat. It protects the natural nail from staining and helps polish stick. Skipping it is one of the quickest ways to end up with yellowed nails and early chipping.
Two or three polish colors. One for the base, one for the wings, and one for details. White or black is useful for outlines, but you can get away with any two contrasting colors.
A dotting tool. This is the true star for beginners. A dotting tool is a stick with a small metal ball at the end, and it lets you create neat, round dots. Butterfly wings can be built almost entirely from dots. If you don’t have one, a toothpick or the rounded end of a bobby pin works fine.
A thin nail art brush. Sometimes called a liner brush, this one draws the body, antennae and wing outlines. Look for a brush with long, fine bristles. Long bristles hold more polish and let you draw smooth curves instead of shaky lines.
Top coat. It seals the design, adds shine and smooths out the little bumps made by the dots. A good top coat is the difference between a manicure that looks homemade and one that looks salon-finished.
Nice to have
A white or black gel pen or nail art pen. For absolute beginners, a pen can be easier to control than a brush. It’s great for body lines and antennae.
Small rhinestones or pearls. They add sparkle and can be placed at the center of a butterfly.
Nail stickers or decals. If you’re short on time or confidence, these are a smart shortcut. We’ll talk about them below.
Stencils or vinyl guides. Butterfly stencils help you place sponge colors or glitter in a clean shape.
Cotton swabs and acetone or nail polish remover. For cleaning edges and fixing mistakes. A small flat brush dipped in remover is even better for precise clean-up.
A makeshift palette. A piece of foil, a plastic lid or the back of a sticker sheet. Put a drop of polish on it and pick up paint from there instead of from the bottle, which gives you much more control.
If you’re using gel
You’ll also need a UV or LED lamp, gel base and top coat, and gel polish. Gel is more forgiving for art because it stays wet until you cure it, which gives you time to fix mistakes. We’ll look at the pros and cons of gel versus regular polish in a later section.
Prep Your Nails Like a Pro (It Matters More Than You Think)
Nail art can only look as good as the canvas underneath it. A few extra minutes of prep makes your butterflies look neater and last longer.
- Remove old polish completely. Any leftover polish will make your new base streaky.
- Shape your nails. File them all to the same shape and length. Uneven nails make symmetrical designs look off.
- Push back your cuticles gently. Use a cuticle pusher or orange stick after a warm wash. Don’t cut them unless you really know what you’re doing.
- Buff lightly. A very gentle buff removes shine so polish grips better. Don’t overdo it, or you’ll thin your nails.
- Wipe with alcohol or remover. This clears away oils and dust. Oil is the main enemy of a long-lasting manicure.
- Apply a thin base coat. Let it dry fully.
A tip that makes a difference: wash your hands and avoid hand cream right before painting. Moisturizer creates a greasy film that polish simply won’t stick to.
The Easiest Butterfly Nail Art Tutorial for Beginners
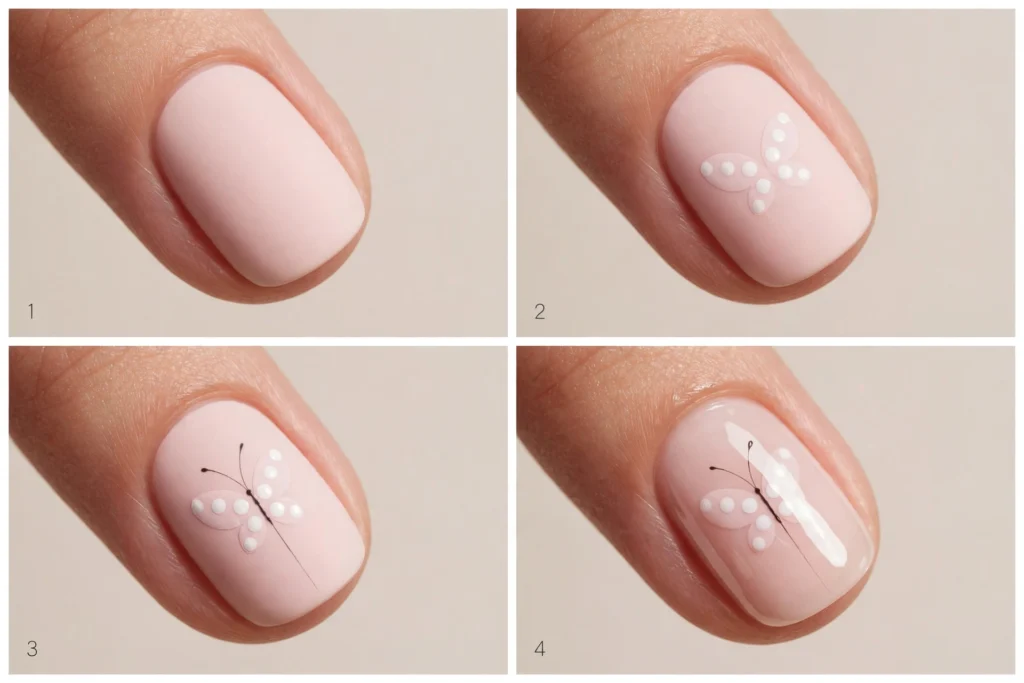
This is the method I recommend to anyone who has never done nail art. It uses only dots and one thin line. I call it the four-dot butterfly, and once you’ve done it once, you’ll understand how every other butterfly design is built.
Step 1: Paint your base
Apply two thin coats of your base color and let them dry completely. Light shades like nude, pale pink, baby blue and cream make the butterflies pop. A dark base works too, but use a lighter wing color.
Step 2: Make the upper wings
Put a drop of wing color on your palette. Dip the dotting tool and press it gently onto the nail to make one dot. Make a second dot beside it, slightly touching. These two dots are the upper wings. Make them a little bigger than the lower ones.
Tip: tilt the nail and place the dots slightly off-center to the side, and the butterfly will look like it’s resting naturally. Placing it dead center can look stiff.
Must Read : Square Nail Designs: 60+ Fresh Ideas, Colors and Pro Tips
Step 3: Make the lower wings
Use a smaller dot size, or just dip the tool lightly, and place one dot below each upper wing. They should touch or slightly overlap the upper dots. You now have a simple four-dot butterfly shape.
Don’t worry if it looks like a cluster of blobs at this stage. It becomes a butterfly in the next step.
Step 4: Draw the body
Dip your thin brush in black or dark brown polish and wipe off the excess on your palette. Draw a short vertical line down the center, where the four dots meet. This body is what turns a set of dots into a butterfly.
Step 5: Add antennae
From the top of the body line, draw two tiny curved lines, like a gentle V. Keep them thin and short. If your hand shakes, rest your pinky on the table to steady it.
Step 6: Add details (optional)
Add a tiny white dot in each wing for a soft highlight. Or draw a thin outline around the wings. Or leave it as it is. Simple is the whole point.
Step 7: Seal with top coat
Wait at least two minutes, then apply a generous layer of top coat. Float the brush over the nail instead of dragging it, so you don’t smear the design. Cap the free edge by running the brush along the tip, which helps prevent chipping.
That’s all there is to it. If you can make dots, you can make butterfly nails.
A Second Method: The Outline Butterfly
If you’re more comfortable with a brush than a dotting tool, the outline method gives a delicate, minimalist look.
- Apply your base color and top coat. Let it dry.
- With a thin brush and black or dark polish, draw a small “8” lying on its side, slightly tilted. This is the outline of the two wings.
- Add a small second loop below it for the lower wings, or a single vertical line down the middle for the body.
- Finish with antennae and a top coat.
The outline method is quick, looks modern, and works on any nail length. It’s also easier to correct. If a line goes wrong, wipe it away with a swab and try again.
40+ Simple Butterfly Nail Art Ideas
Now for the fun part. These ideas are grouped by style, and every one of them can be done with the tools above. I’ve kept them realistic, so you won’t find anything here that needs a professional’s skill.
Minimalist Butterfly Nails
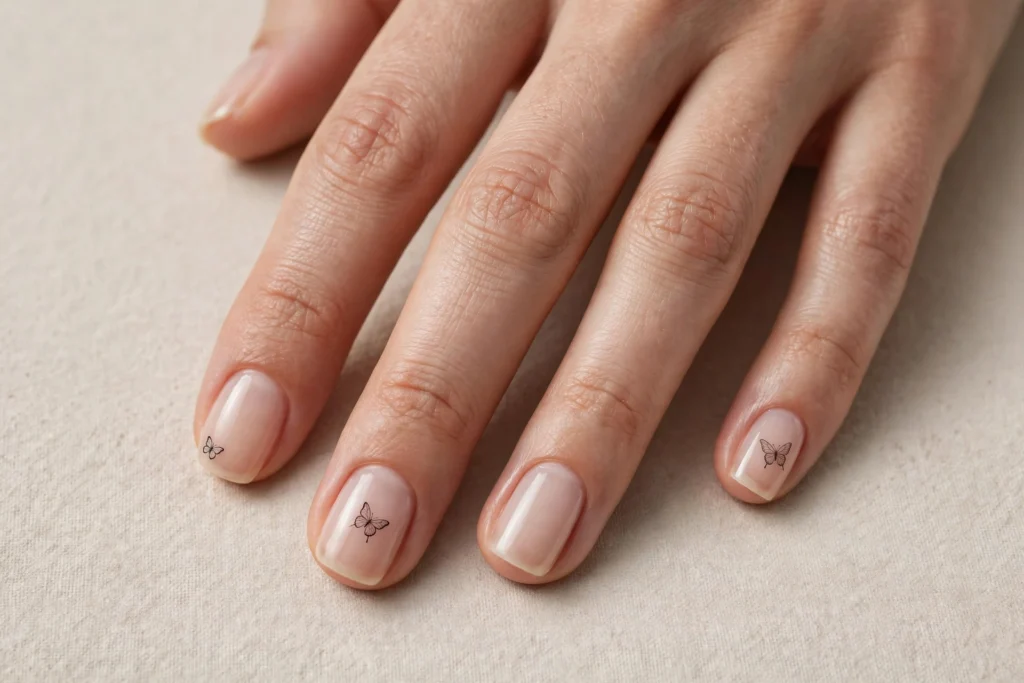
Minimalist butterflies are perfect for everyday wear and for anyone who wants nail art that doesn’t shout.
1. Single accent butterfly. Paint all nails in one color and add one small butterfly to the ring finger. It’s the lowest-effort, highest-impact option.
2. Tiny cuticle butterflies. Place a very small butterfly near the cuticle instead of in the middle of the nail. This looks fresh and lets you keep your nail length visible.
3. Black outline butterflies. A thin black outline on a sheer nude base looks graphic and chic. No filling needed.
4. Side-edge butterfly. Draw half a butterfly along the side of the nail, as if it’s landing on the edge. It’s a subtle design that gets noticed.
5. Negative space butterfly. Leave a butterfly shape unpainted on a sheer base while polishing around it. You can draw this with a thin brush and a clear outline.
6. Single-line butterfly. Draw the whole butterfly in one continuous line, like a sketch. It looks like fine jewelry for your nails.
7. Mismatched mini butterflies. Put a tiny butterfly on every nail, each in a different spot. It feels playful without being busy.
8. Butterfly with a clear base. Use a clear or milky base with a small white butterfly. It’s very soft and works for office days and formal events.
Pastel Butterfly Nails
Pastels are the classic choice for butterflies, and they’re very beginner-friendly because soft colors hide small imperfections.
9. Lilac butterflies on cream. A soft purple wing on an off-white base feels dreamy and calm.
10. Baby blue butterflies on white. Crisp, clean and perfect for spring.
11. Pink butterflies on a milky base. A romantic, slightly sweet look. Add a tiny pearl at the center for extra charm.
12. Mint and peach duo. Alternate mint and peach butterflies across different fingers for a gentle sorbet effect.
13. Pastel ombré with white butterflies. Blend two pastel shades with a sponge, then add white butterflies on top. The soft gradient provides a lovely background.
14. Lavender-to-pink gradient butterflies. Paint each wing in slightly different tones so the butterfly looks softly shaded.
French Tip Butterfly Nails
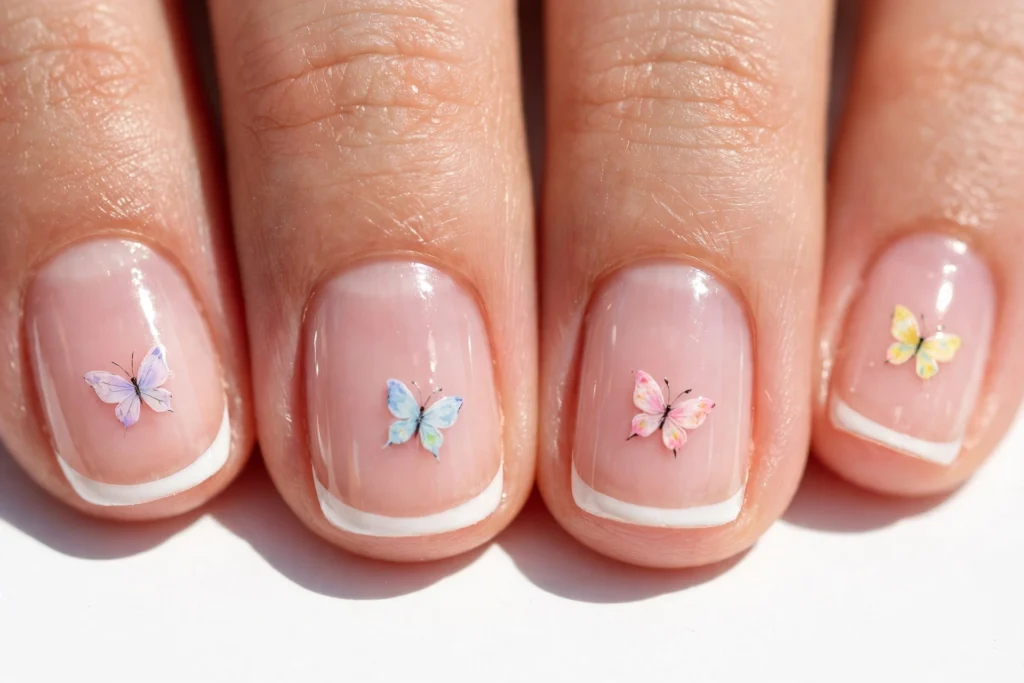
French tips are a great frame for butterflies. They add polish and structure.
17. Classic French with an accent butterfly. Do a regular white French tip on every nail, then paint a tiny butterfly above the tip on one finger.
18. Colored French tips. Use pastel tips such as lilac, sky blue or butter yellow, and match your butterfly to the tip color.
19. Double French with butterflies. Add a second thin line above the first tip and place a butterfly between them.
20. Reverse French butterflies. Paint a thin curve at the base of the nail, near the cuticle, and place a butterfly at its center.
21. Skinny French with micro butterflies. A hairline tip with tiny butterflies scattered above it. It feels very refined.
22. Ombré French with wing details. Soften the tip with a gradient and add a delicate butterfly in a matching shade.
Also Read : 60 Nashville Nail Ideas for Every Season, Occasion and Mood
Bold and Colorful Butterfly Nails
For people who like color, these are bright but still simple.
23. Monarch orange butterflies. Orange wings with a black outline and white dots on the edges are instantly recognizable, even on a tiny scale.
24. Rainbow wing butterflies. Paint each side of the wing in a different bright color. It looks complicated but is just four dots in four colors.
25. Neon butterflies on black. A black base makes neon pink, green or yellow butterflies glow.
26. Blue morpho butterflies. Use a bright blue wing with a black edge. It’s elegant and eye-catching.
27. Yellow swallowtail butterflies. Pale yellow wings with thin black lines for a sunny look.
28. Color-block butterflies. Use solid, contrasting colors: pink on green, orange on blue. Simple shapes with strong colors feel modern.
Dark and Moody Butterfly Nails
Butterflies aren’t only for pastels. A darker palette makes them feel edgy and a bit mysterious.
29. Black butterflies on a nude base. A bold silhouette on a soft background gives high contrast.
30. Burgundy butterflies on black. Rich and elegant, especially for autumn and winter.
31. Silver outline on deep navy. A thin metallic outline looks like starlight.
32. Gothic lace butterflies. Draw simple wing shapes with a few thin lines to suggest lace. Use black on a gray or white base.
33. Smoky gray butterflies. Soft charcoal wings on a light gray base for a subtle, modern effect.
Glitter, Chrome and Sparkle Butterflies
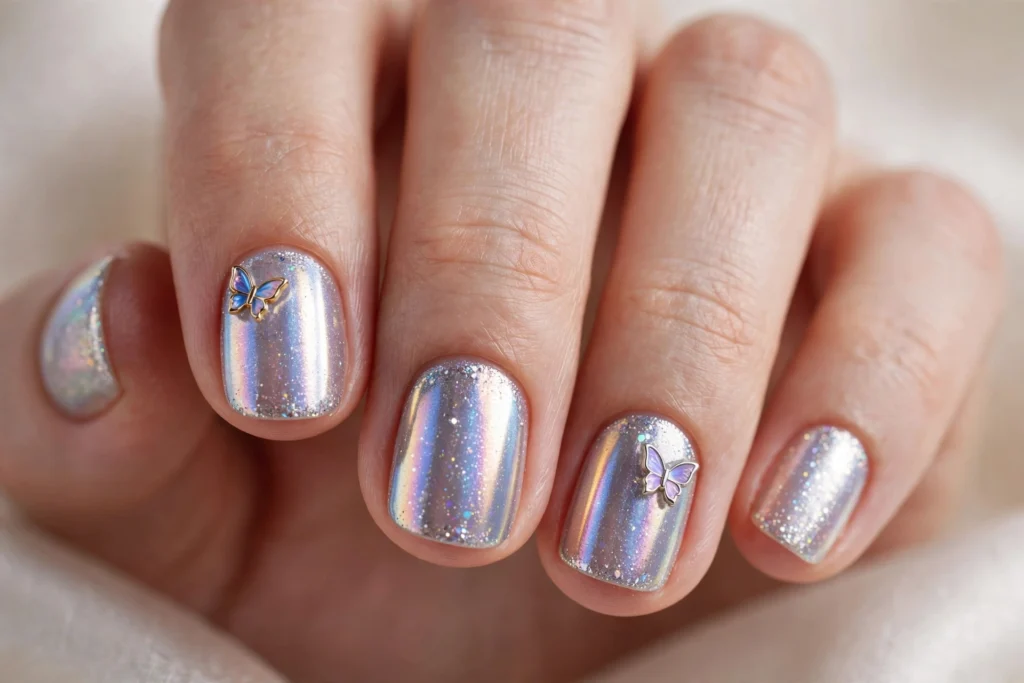
A little sparkle goes a long way. These ideas look glamorous but are still easy.
34. Glitter wing butterflies. Paint a butterfly in clear polish and dab fine glitter onto the wings while it’s wet.
35. Chrome butterflies. Apply chrome powder over a gel butterfly for a mirror-metallic shine.
36. Rhinestone center butterflies. Place a single tiny gem where the body would be.
37. Holographic butterflies. Use holographic polish for the wings and a plain base. The color shifts in the light.
38. Pearl body butterflies. Place a small pearl as the body and paint the wings around it.
39. Glitter gradient with a butterfly. A glitter fade from the tip, with a small butterfly sitting just above it.
Seasonal Butterfly Nails
40. Spring florals and butterflies. Pair butterflies with tiny daisies or dots of green for a garden look.
41. Summer beach butterflies. Turquoise and coral butterflies on a sandy base.
42. Autumn butterflies. Use rust, mustard and olive wings on a cream base. It’s a gentle way to wear butterflies in cooler months.
43. Winter frost butterflies. Icy blue and silver butterflies on a white or pale gray base, with a hint of glitter.
44. Holiday butterflies. Red and gold wings on a deep green base, or white butterflies on red.
Butterfly Nails for Short Nails
45. Tiny center butterfly. On short nails, one small butterfly in the center of the nail looks neat and balanced.
46. Vertical butterfly. Elongate the wings slightly upward to make the nail look longer.
47. Cuticle-line butterfly. Place butterflies at the base to keep the nail tip clean.
Using Stickers, Decals and Stamping
Not every manicure has to be hand-painted. Shortcuts are fine, and they’re often smarter.
Nail stickers and decals
Stickers are the fastest route. Apply your base color, let it dry, place the sticker using tweezers, press gently, and seal with top coat. The top coat is the step people skip, and it’s the one that makes the sticker look like part of the nail rather than something stuck on.
Water-slide decals work similarly: soak, slide and seal. They look more like real paint and can be tiny and detailed.
Stamping
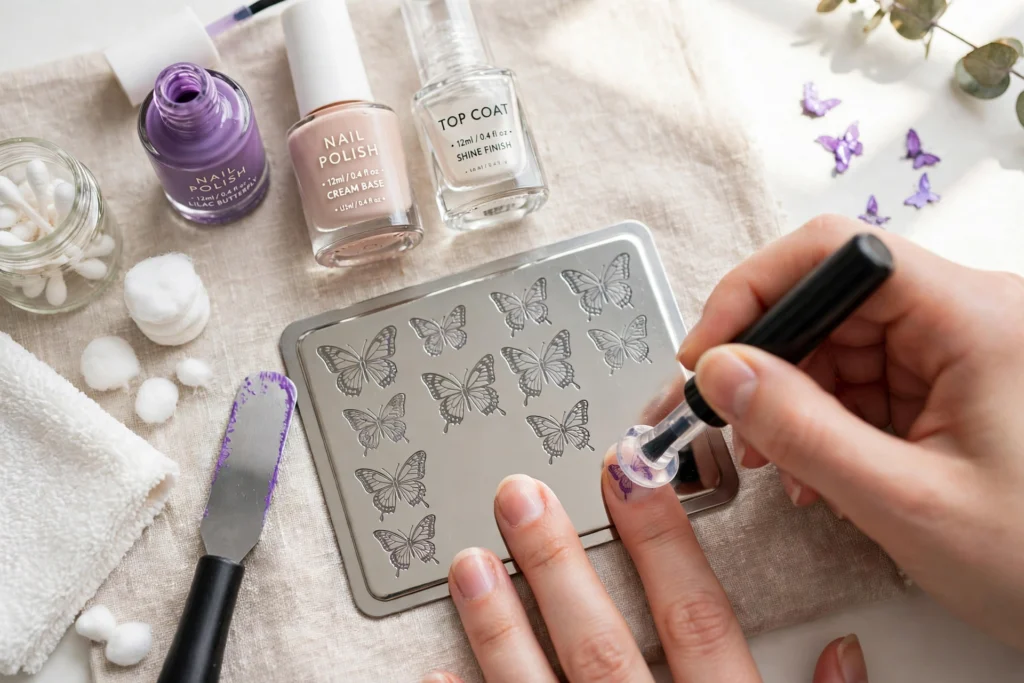
Stamping uses a metal plate with butterfly patterns engraved on it. You spread special polish over the design, scrape off the excess, pick up the pattern with a silicone stamper and press it onto your nail. It takes some practice, but you can create very detailed butterflies that look hand-painted.
Beginner tips for stamping: work quickly, because the polish dries fast; use a firm, rolling motion instead of pressing straight down; and clean the plate between nails.
Stencils and vinyl guides
Place a butterfly-shaped vinyl on your dry base color, paint over it with a second color, and peel it away before the polish completely dries. You’re left with a clean, sharp butterfly shape.
When to use which
If you want speed, use stickers. If you want a hand-painted look without the skill, use stamping. If you enjoy the process, paint it yourself. All three are valid.
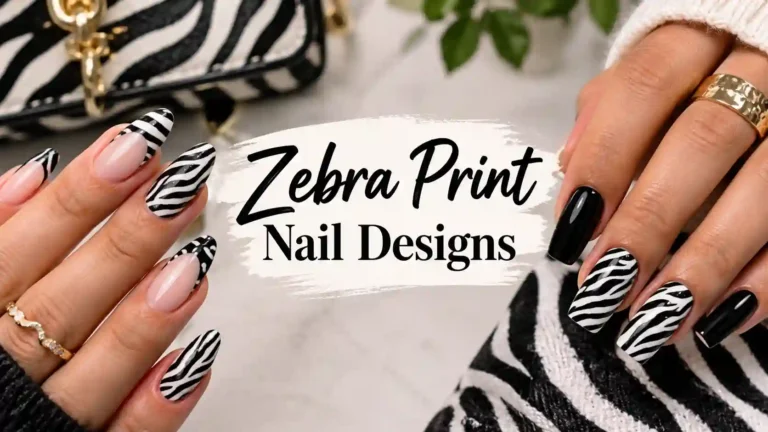
Read Also: Zebra Print Nail Designs: 22 Bold Ideas, Easy Tutorials and Styling Tips
Regular Polish vs Gel for Butterfly Nail Art
Both work. The best choice depends on your goals.
Regular polish
Pros: Cheaper, easy to remove, no lamp needed, and there’s no pressure to commit to a design for weeks.
Cons: It dries quickly, so you have to work fast. It chips sooner, usually within three to seven days.
Regular polish is great for beginners because mistakes cost almost nothing.
Gel polish
Pros: Stays wet until cured, so you can adjust your butterfly as much as you like. Lasts two to three weeks. Very glossy.
Cons: Needs a lamp, costs more, and removal requires soaking in acetone. Done improperly, removal can weaken nails.
For gel, cure each layer according to the polish instructions. Cure the butterfly for a short time (flash cure) to lock it in place before sealing with top coat.
A middle option: press-ons and gel strips
If you don’t want to paint at all, butterfly press-on nails and semi-cured gel strips give a salon look in minutes. They’re also helpful if your nails are weak and can’t hold polish well.
Color Combinations That Always Work
Choosing colors is half the design. Here are combinations that look good without much thought.
| Base color | Butterfly color | Mood |
|---|---|---|
| Nude / sheer pink | White or black | Clean and minimal |
| Cream | Lilac or baby blue | Soft and dreamy |
| Pale blue | White and silver | Fresh and airy |
| Black | Neon pink or silver | Bold and edgy |
| Sage green | Cream and gold | Earthy and elegant |
| Burgundy | Gold or rose gold | Rich and cozy |
| Peach | Coral and white | Warm summer glow |
Simple color rules
Contrast is your friend. If the base and the butterfly are too similar, the design disappears. Light on dark or dark on light always reads clearly.
Limit your palette. Two or three colors is enough. More than four can make small butterflies look messy.
Use one dark color for the body. Black, dark brown or deep navy for the body and antennae will anchor any wing color.
Choosing the Right Style for Your Nail Shape and Length
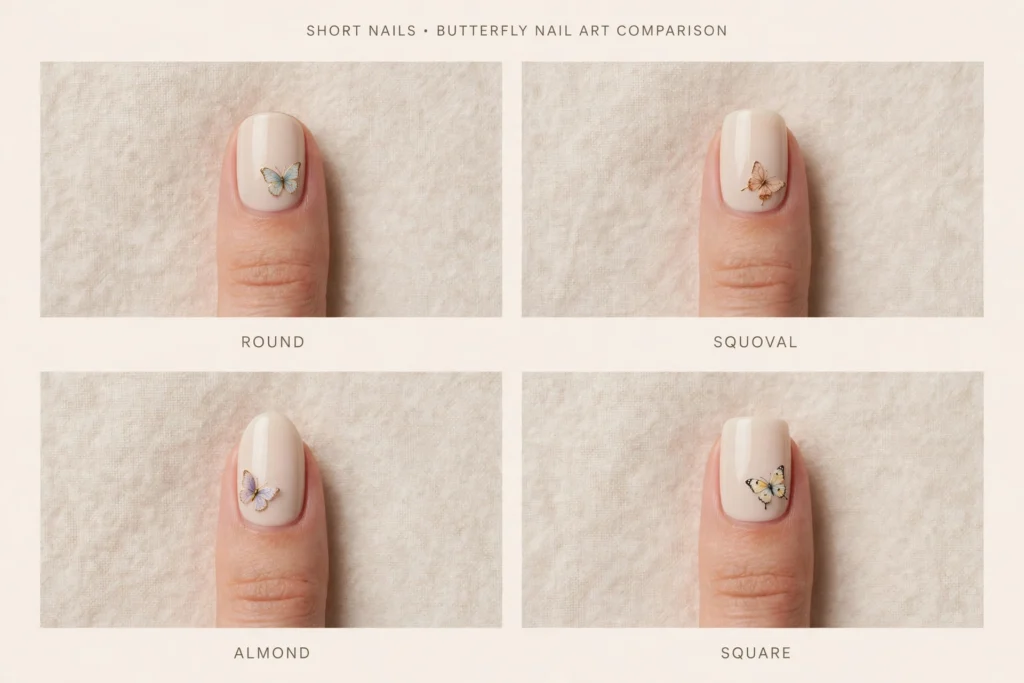
Short nails
Keep butterflies small and place them in the center or near the cuticle. A single butterfly on one or two nails often looks better than butterflies on all ten. Negative space designs and sheer bases keep short nails looking neat.
Medium nails
This is the easiest length to work with. You have enough room for a medium butterfly in the center or a small one paired with a French tip.
Long nails
Long nails give you a larger canvas. You can draw bigger wings, add chrome or glitter, or place butterflies near the tips. Just keep the design balanced, so the nail doesn’t feel overcrowded.
By shape
Square: A centered butterfly looks neat and graphic.
Round or squoval: Soft, rounded wings match the curve of the nail.
Almond: Slightly tilted butterflies follow the tapered shape.
Coffin and ballerina: Wide nail surface for larger designs or butterflies near the tip.
Stiletto: Elongated wings and vertical placements look best.
Common Butterfly Nail Art Mistakes (and How to Fix Them)
Everyone makes mistakes. Here are the usual ones and what to do about them.
The wings look like blobs. Your dots are probably too wet or too big. Pick up less polish and press lightly. Let each dot set for a few seconds before adding the next one.
The lines are shaky. Wipe excess polish off your brush, rest your hand on a steady surface, and draw with your whole finger instead of just your wrist. Shorter strokes are steadier than long ones.
The design smears under top coat. You didn’t wait long enough. Give it two to three minutes, and apply the top coat with a light touch. Some polish brands also drag; a quick-dry drop can help.
Colors bleed together. Wet polish touching wet polish will merge. Let the wings dry before adding detail lines, or use a gel pen for crisp lines.
The butterfly is lopsided. Use the first dots as a guide, and keep sizes consistent. If one side is much bigger, wipe it off with a swab and redo it. A tiny bit of asymmetry is fine, but an obvious difference looks accidental.
The polish is bumpy. Dots create tiny ridges. A thick layer of top coat will level them out. Apply two coats if needed.
It chips within a couple of days. Check your prep. Oils on the nail and skipped base coats are the usual culprits. Also, cap the free edge when sealing.
How to Make Your Butterfly Nails Last Longer
- Prep properly. It cannot be said enough.
- Use thin coats. Thick polish stays soft underneath and peels off.
- Let each layer dry. Patience is cheap insurance.
- Seal the edges. Run the top coat brush along the free edge.
- Reapply top coat every two to three days. This refreshes the shine and adds protection.
- Wear gloves for chores. Hot water, cleaning products and dishwashing liquid shorten the life of any manicure.
- Use cuticle oil daily. It keeps the skin around the nail supple and prevents lifting at the edges.
- Don’t use your nails as tools. Opening cans and scraping labels is how many manicures end.
Removing Butterfly Nail Art Safely
For regular polish: Use an acetone-free or standard remover on a cotton pad, press it on the nail for about 10 seconds and wipe. Glitter and chrome may need longer.
For gel polish: Gently file off the shiny top layer, wrap cotton soaked in acetone around each nail with foil, wait 10 to 15 minutes, then slide the softened polish off with a wooden stick. Never peel or scrape forcefully, as it takes layers of your nail with it.
After removal: Wash your hands, apply cuticle oil, and use a rich hand cream. If your nails feel weak, give them a few days of rest with just a strengthening treatment before your next set.
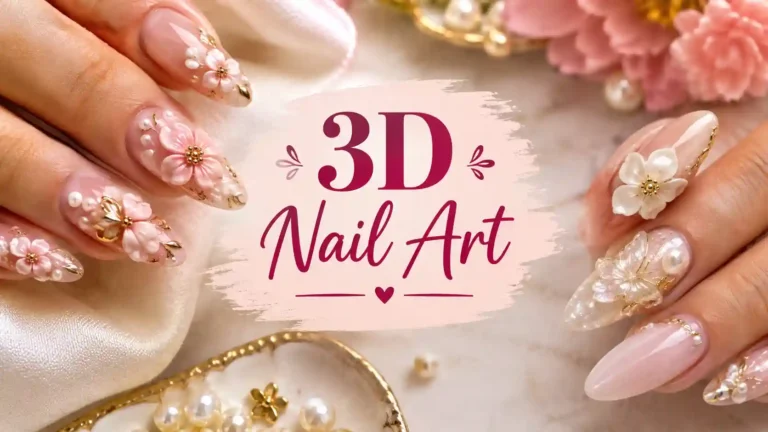
Read Also : 3D Nail Art Secrets That Will Turn Your Manicure Into A Tiny Sculpture
Nail Care Between Manicures
Beautiful nail art looks best on healthy nails. A few small habits go a long way.
- Moisturize hands and cuticles every day.
- Eat enough protein and stay hydrated, as nail growth reflects general health.
- Keep nails at a manageable length to avoid breakage.
- Take occasional breaks from polish, especially if your nails are peeling or yellowing.
- Use a gentle, non-aggressive file, and file in one direction.
Butterfly Nail Art for Every Occasion
Everyday and work: Go with a single accent butterfly, a sheer base and thin lines. It’s polished and subtle.
Weddings and formal events: Soft pastel or white butterflies with a French tip, a pearl or a bit of shimmer.
Parties and festivals: Neon, glitter, chrome or rainbow butterflies.
Vacations: Bright wings on sandy, aqua or coral bases.
Birthdays: A butterfly in your favorite color on every nail, perhaps with a rhinestone.
School and college: Colorful, playful designs that don’t need to be perfect.
Final Thoughts
Simple butterfly nail art proves you don’t need advanced skills to have a manicure that feels special. Four dots, one line, a bit of patience and a good top coat are enough for a design that looks intentional and pretty.
Start small. Try one accent nail, practice the four-dot method on a piece of paper or a nail tip, and build from there. Experiment with colors, try stickers if you’re in a rush, and don’t worry about perfection. The charm of a butterfly lies in its softness, not its precision.
Pick one idea from this list, gather your tools and give it a go this weekend. Your first butterfly might be a little wonky, but I promise your second will be much better.
Frequently Asked Questions
What is the easiest way to do butterfly nail art for beginners?
The easiest method is the four-dot butterfly. Use a dotting tool to place two larger dots for the upper wings and two smaller dots for the lower wings, then draw a thin line down the middle for the body and two small antennae. It takes only a few minutes and needs no drawing skill. Seal it with a clear top coat.
What tools do I need for simple butterfly nail art?
At minimum you need a base coat, two polish colors, a dotting tool (or a toothpick), a thin brush or nail pen, and a top coat. A makeshift palette and cotton swabs for clean-up help a lot. If you’re using gel, you’ll also need a UV or LED lamp.
Can I do butterfly nail art on short nails?
Yes. Keep the butterflies small and place them in the center of the nail or near the cuticle. Using fewer butterflies, such as one or two accent nails, also helps short nails look clean rather than crowded.
Do I need gel polish to do butterfly nail designs?
No. Regular polish works perfectly well, especially for beginners. Gel gives you more working time and lasts longer, but it also costs more and requires a lamp. Start with regular polish if you’re still learning.
How do I make butterfly nail art last longer?
Prep your nails well, use a base coat, apply thin layers of polish, and seal everything with a good top coat, capping the free edge. Reapply top coat every few days and wear gloves for cleaning. Cuticle oil also helps polish stay on.
What colors look best for simple butterfly nails?
Soft pastels on neutral bases look classic: lilac on cream, baby blue on white or pink on a milky base. For bold looks, try black with neon, burgundy with gold, or orange monarch wings. Always keep strong contrast between the base and the butterfly.
How can I draw a butterfly if I’m not good at art?
Skip freehand drawing. Use dots, stickers, decals, stencils or stamping. A gel pen is easier to control than a brush for thin lines. You can also practice on paper or a plastic nail tip before moving to your real nails.
What should I do if I make a mistake while painting?
If the polish is still wet, wipe the area with a cotton swab or small brush dipped in remover and try again. If it’s dry, you can often paint over it with the base color, then redo the butterfly. Gel makes this easier because it doesn’t dry until cured.
Are butterfly nails suitable for formal events?
Absolutely. Choose subtle designs like a white butterfly on a sheer pink base, a French tip with a tiny butterfly, or soft pearl and shimmer accents. Keeping the palette neutral makes them suitable for weddings, interviews and work.
How long does a simple butterfly manicure last?
With regular polish, expect about five to seven days with good prep and top coat refreshes. Gel polish typically lasts two to three weeks. Press-on butterfly nails can last one to two weeks depending on how they’re applied.


One Comment