
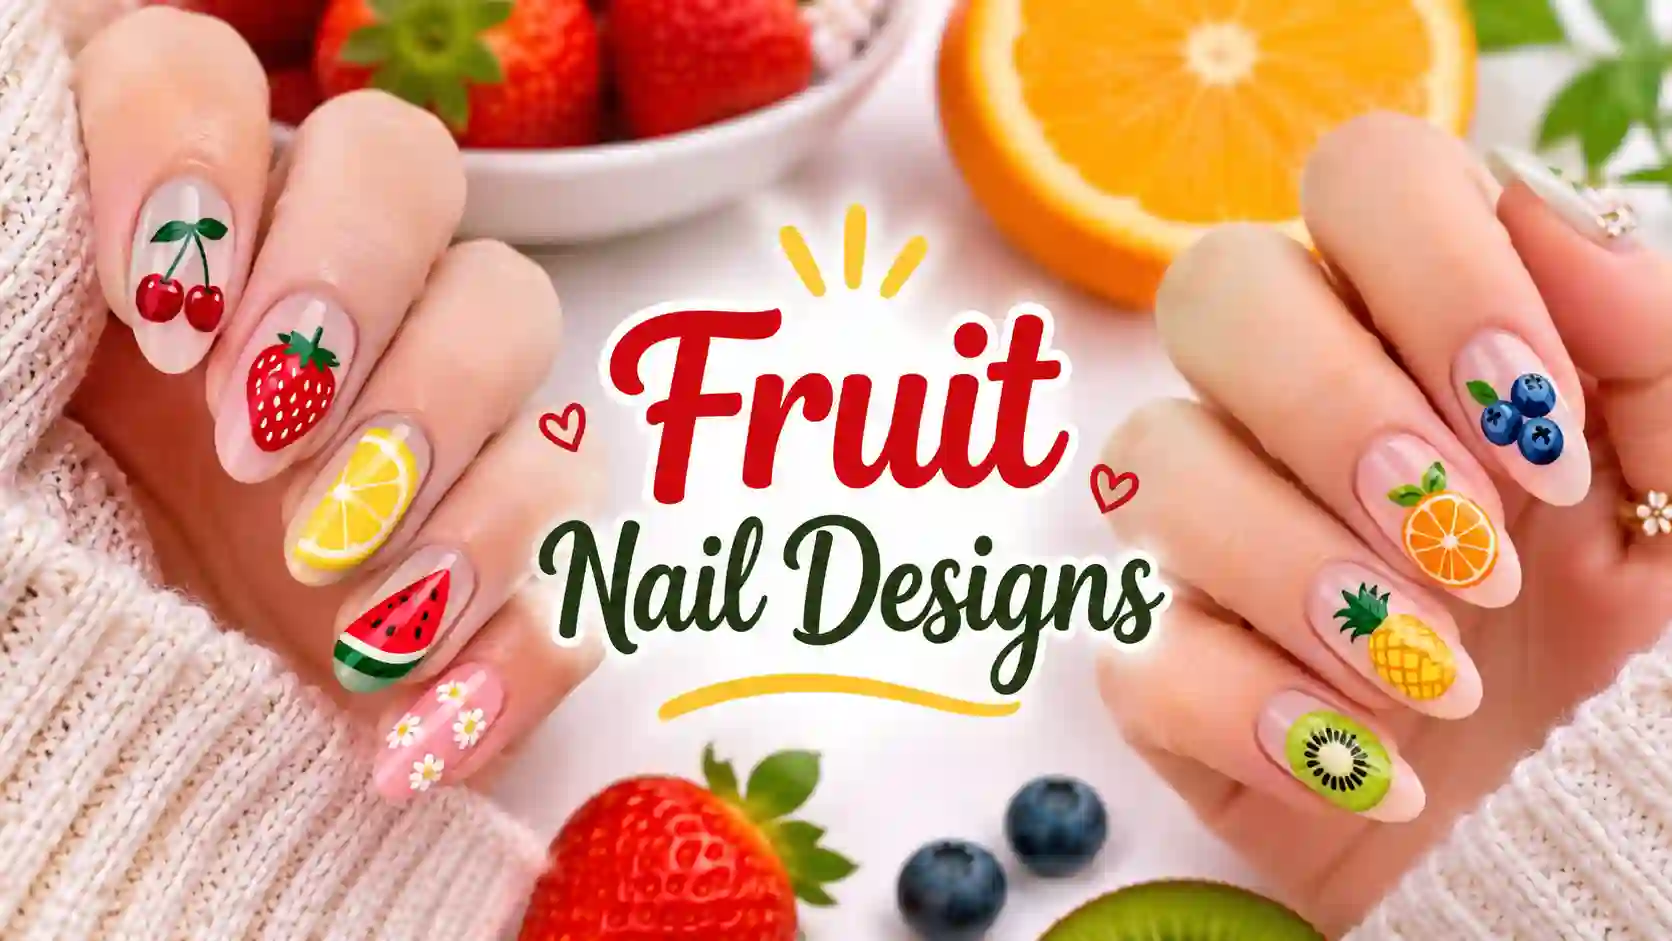
Fruit Nail Designs: 40 Juicy Ideas, Easy Tutorials and Pro Tips
There’s a reason fruit nail designs keep sneaking back onto our feeds every year. They’re cheerful. They’re forgiving if your hand wobbles. And honestly, there is something deeply satisfying about glancing down mid-meeting and spotting a tiny strawberry looking back at you.
If you’ve been searching for fruit nail designs, you’ve probably noticed that most roundups lean hard on summer, show you a pile of photos and leave you to work out how to actually do it. This guide does it differently. You’ll get 40 ideas sorted by fruit family, five beginner-friendly tutorials, advice on matching a design to your nail shape and skin tone, a straight comparison of polish, gel, stickers, press-ons and 3D art, and care tips so your manicure survives longer than a long weekend.
Also Read: Aura Nails: 40+ Dreamy Designs, Colors & Step-by-Step Guide
And because fruit isn’t only a July thing, there are apple, pear, fig, pomegranate and cranberry ideas in here too, so you can wear fruit on your nails in any season.
What Are Fruit Nail Designs (and Why Are They Everywhere)?
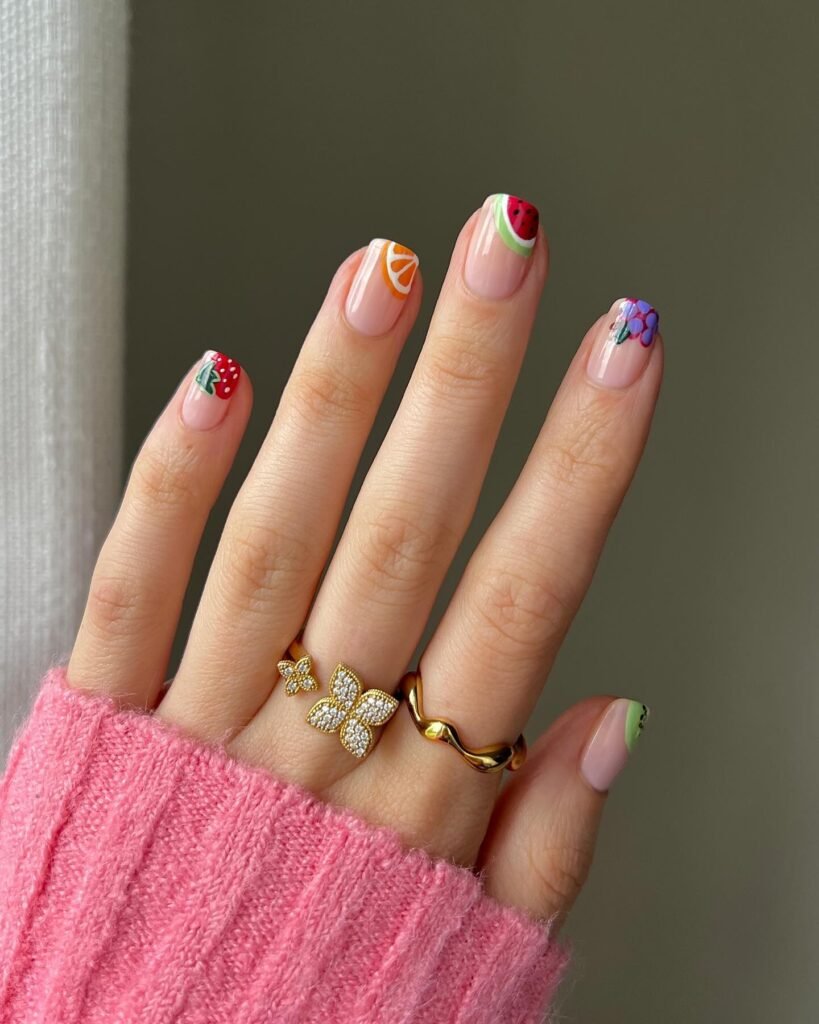
Fruit nail designs are exactly what they sound like: manicures that borrow from the fruit bowl. That might mean a painted strawberry on one fingertip, a sculpted 3D cherry, a watermelon-pink French tip, or simply a lemon-yellow polish with no drawing at all. The theme is loose on purpose, and that’s a big part of its staying power.
The numbers back up what your feed has been telling you. Fresha, the booking platform, reported watermelon nails as its number one summer nail trend for 2026, with searches up 767 percent over three months, according to NewBeauty. Beauty Bay’s 2026 summer roundup singles out microfruit nails, those teeny strawberries and citrus slices, as a standout look. And celebrity manicurist Sarah Chue told Marie Claire that fruit nails peak in summer because the colours are bright and playful, and fruit itself feels fresh and hydrating.
What has changed is the style. Early fruit nail art meant one enormous fruit slice per finger. Now you’ll see single tiny fruits, mismatched fruit salads, translucent fruit water nails and chunky sculpted 3D pieces. Silcare’s summer guide makes a point worth remembering: a fruit manicure doesn’t have to be literal. A pink base with green tips already says watermelon. That flexibility means there’s a version for the minimalist, the maximalist and everyone in between.
Tools and Prep: What You Need Before You Paint Fruit Nail Art
Good fruit nail art is about 30 percent skill and 70 percent having the right brush. You don’t need a professional kit, but a few basics make a visible difference.
- Base coat and top coat. Fruit designs are full of small details, and those details chip first. A base coat helps colour grip, and a top coat seals it all in.
- A fine detail brush (size 0 or 00). This is what draws leaves, stems, seeds and thin white highlights. If you buy only one extra tool, make it this.
- Dotting tools in two sizes. Cherries, blueberries, grapes and seeds are all just dots. The end of a bobby pin or a toothpick works in a pinch.
- Core colours. Red, green, yellow, orange, pink, white and black will cover about 90 percent of fruit designs. Add a lime green and a coral if you’re feeling fancy.
- A mixing palette. A scrap of foil or a plastic lid is fine. You’ll want to put small blobs of polish there rather than painting straight from the bottle.
- A cleanup brush and acetone. One angled brush dipped in remover tidies wobbly edges in seconds.
- Optional extras. Stamping plates, fruit decals, 3D gel, rhinestones and chrome powder if you want to level up later.
Prep matters just as much. Shape your nails, gently push back the cuticles, wipe each nail with a lint-free pad so there’s no oil left, then apply your base coat and let it dry fully. Build colour in thin layers instead of one thick coat. Thin layers dry faster, look smoother and give fruit shapes crisp edges.
Five Easy Fruit Nail Designs You Can Paint Today
These five are the friendliest starting points. Each one builds on basic shapes: dots, circles and simple curves. Always start with a base coat and finish with a top coat.
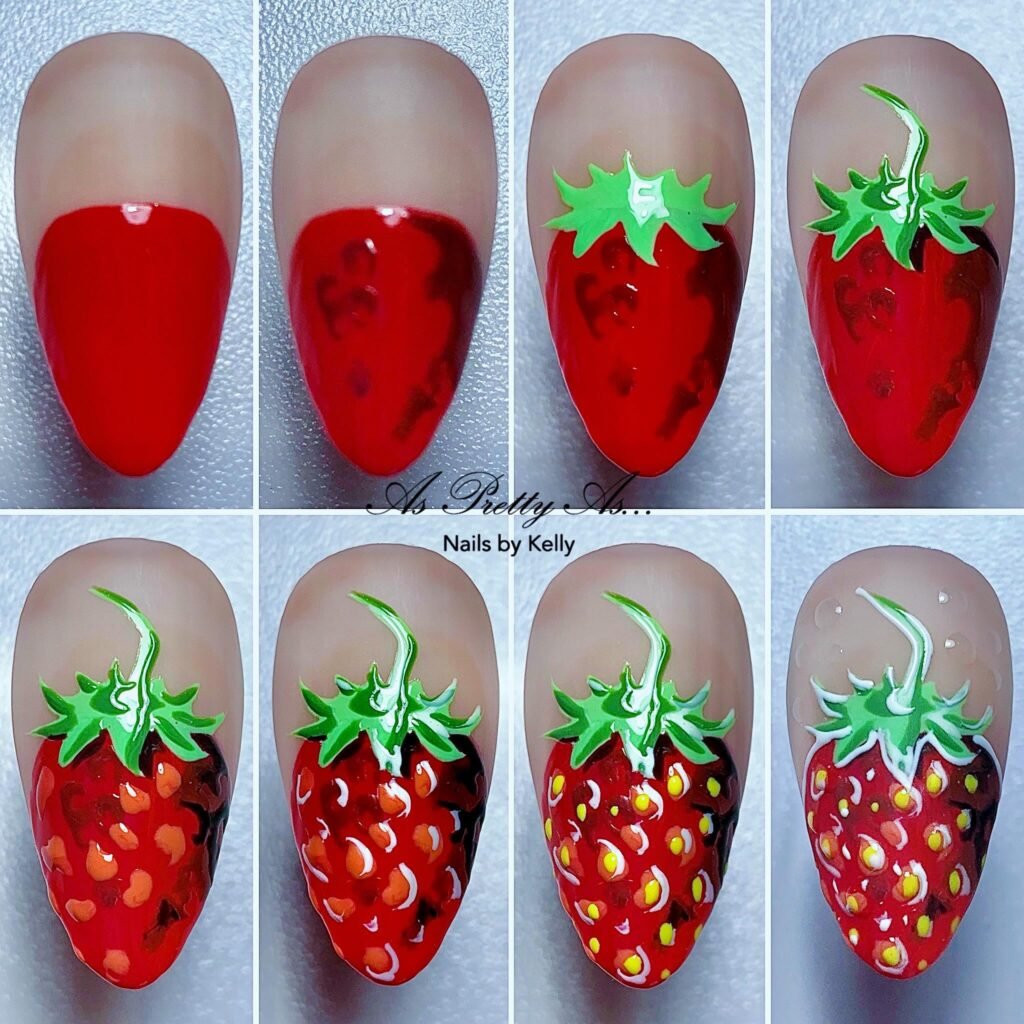
1. Strawberry
- Paint your nail a sheer pink or nude and let it dry.
- With a fine brush, paint a rounded heart shape in red, then fill it in with two thin coats.
- Add a small green leafy crown across the top.
- Dot tiny yellow seeds in staggered rows with a toothpick.
- Finish with one white dot of highlight, then top coat.
2. Cherry
- Choose a pale base such as milky white, beige or baby blue.
- Press two red dots side by side with a dotting tool, close but not touching, and build them up in two layers.
- Draw two thin green stems that curve up and meet at a point.
- Add one small green leaf and a tiny white glint on each cherry.
3. Watermelon
- Paint the nail a bright watermelon pink.
- Curve a green band along the free edge, like a smile.
- Draw a thin white line between the pink and the green for the rind.
- Dot small black seeds in the pink. Use fewer than you think you need, since too many makes it look like a rash.
4. Lemon or orange slice
- Paint a solid circle in yellow (or orange) on a bare or sheer nail.
- Trace a thin white ring just inside the edge.
- Draw thin white lines radiating from the centre like wheel spokes.
- Fill the segments with a slightly lighter shade for juiciness, then seal.
5. Kiwi
- Paint a lime-green circle.
- Add a smaller pale cream oval in the middle.
- Press tiny black dots in a ring around the cream centre.
- Optionally outline the whole circle in soft brown for the fuzzy skin.
Also Read : Minimalist Fall Nail Designs: 25 Quiet, Chic Ideas for Autumn 2026
If any step goes sideways, don’t panic. Let it dry, dip the cleanup brush in acetone, and redraw. Fruit is organic. A slightly wonky strawberry just looks hand-made.
40 Fruit Nail Designs to Try, Sorted by Fruit Family
Here’s the fun part. Each idea includes the look, the vibe and a note on who it suits best. Pick one to try this week, or mix a few for a fruit salad of your own.
Berries and Cherries
Berries are the easiest place to begin. Most are built from dots and soft curves, and red looks good on nearly everyone.
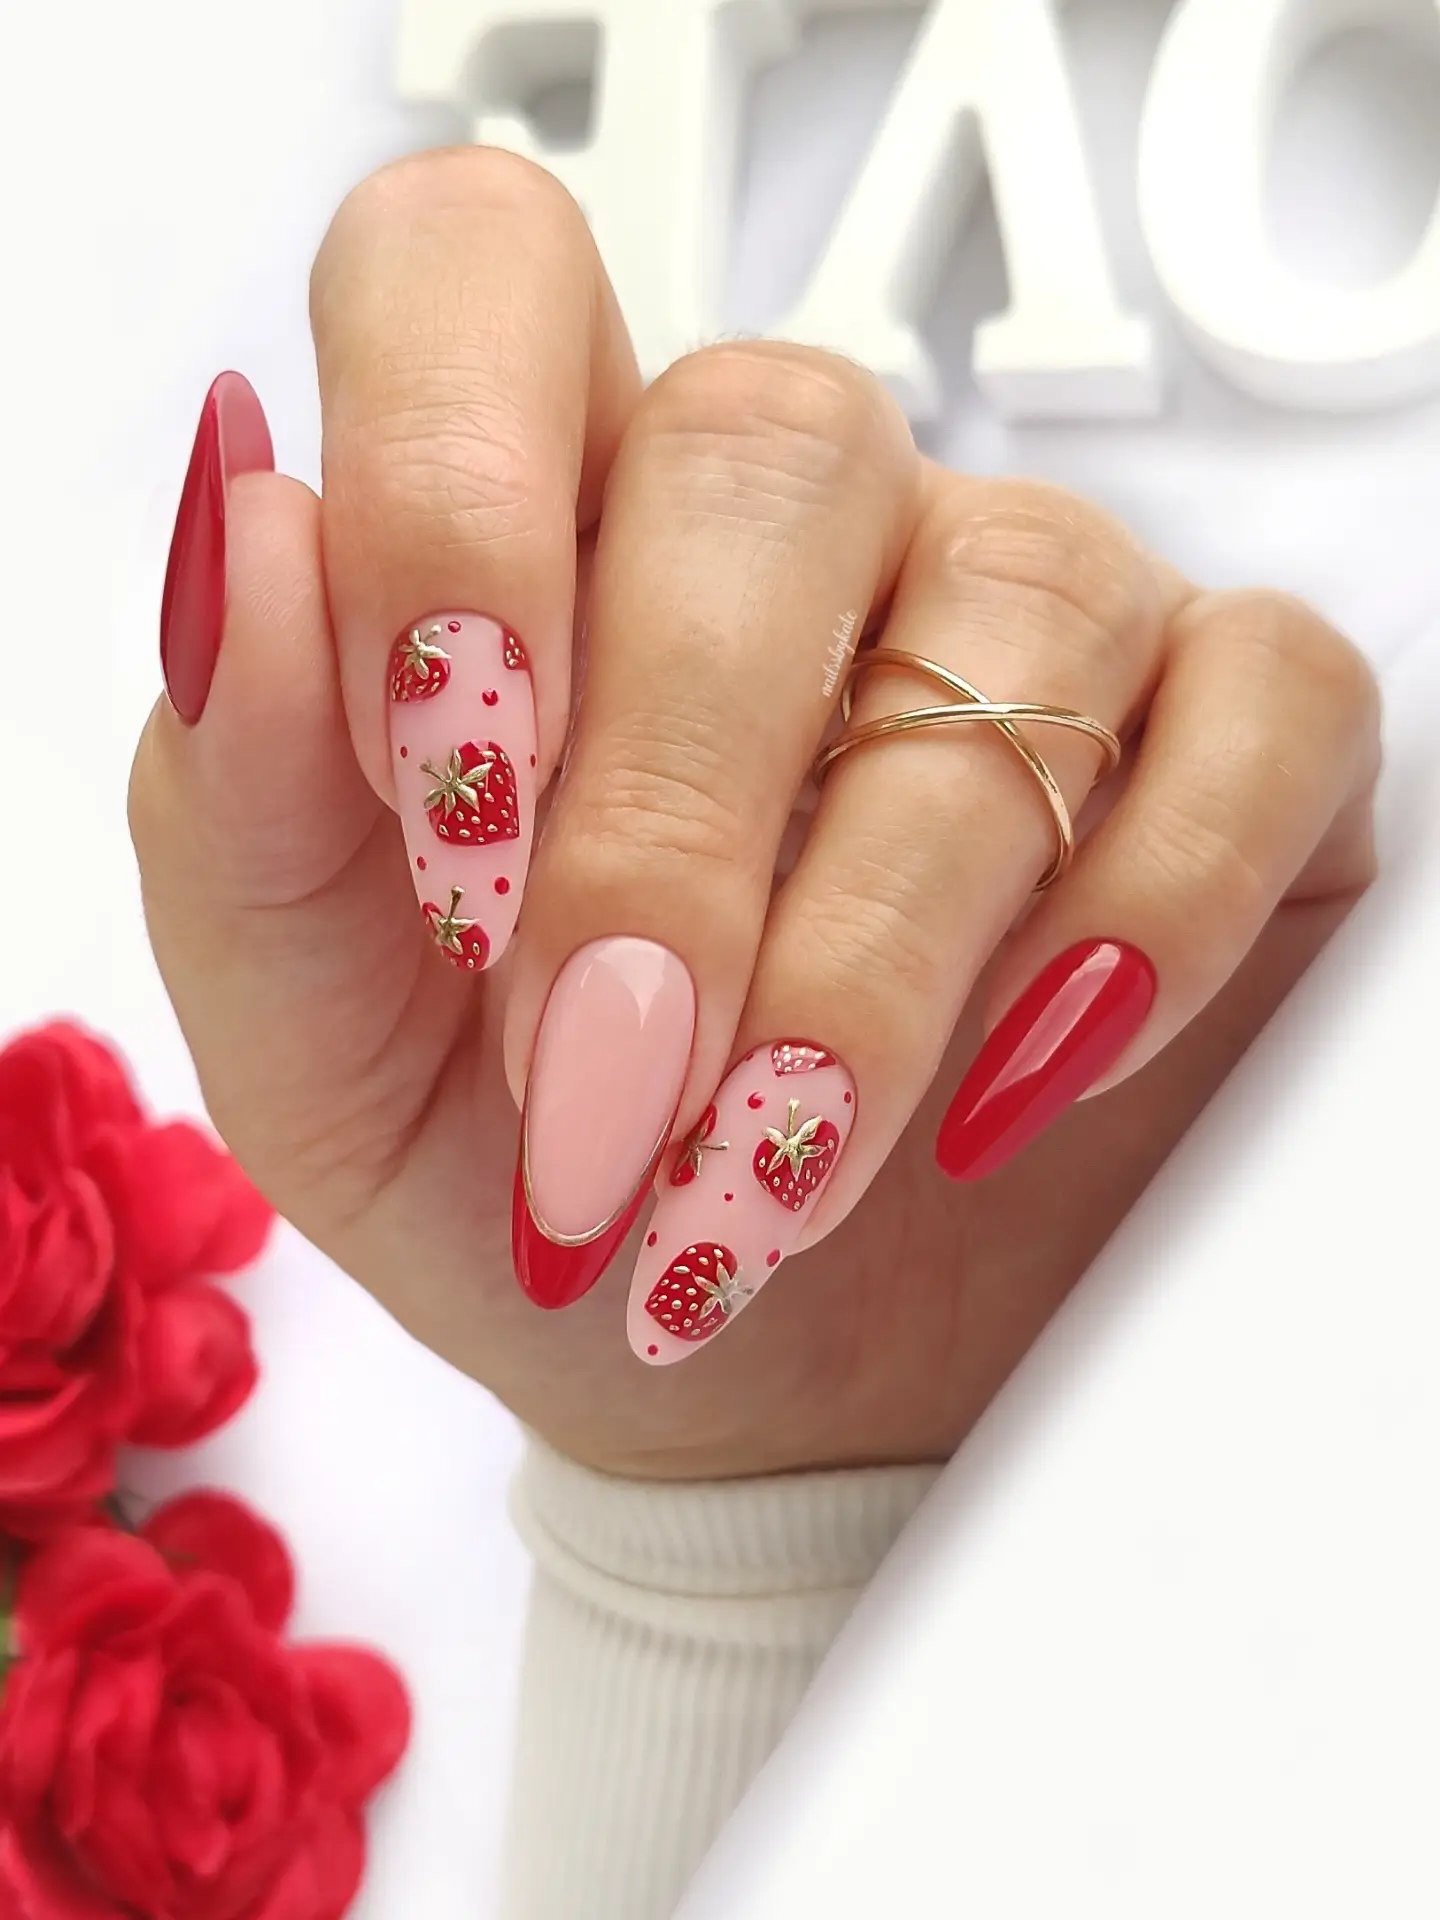
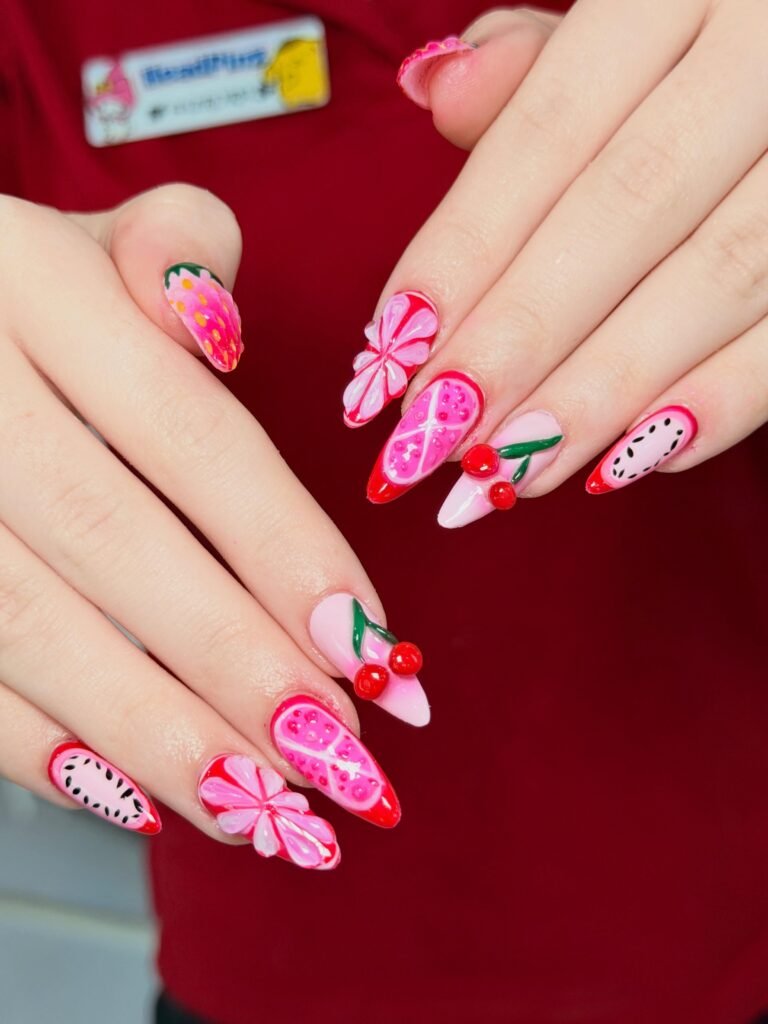
1. Classic strawberry accent nail. A red base, scattered yellow seed dots and a green leafy top make the friendliest entry-level fruit nail design. Keep the other nails sheer pink or milky white so the strawberry gets the spotlight. Sweet without being childish.
2. Strawberry blush nails. Not every fruit manicure needs a painted fruit. A soft strawberry-milk pink, glossy and slightly translucent, nods to the fruit through colour alone. Add one micro strawberry on the ring finger if you want a wink. This is the one to pick when you need office-safe nails.
3. Strawberries and cream French. White tips traced with a thin red line, with a few seed dots near the smile line. It looks like dessert, but it reads as a polished French manicure from a distance.
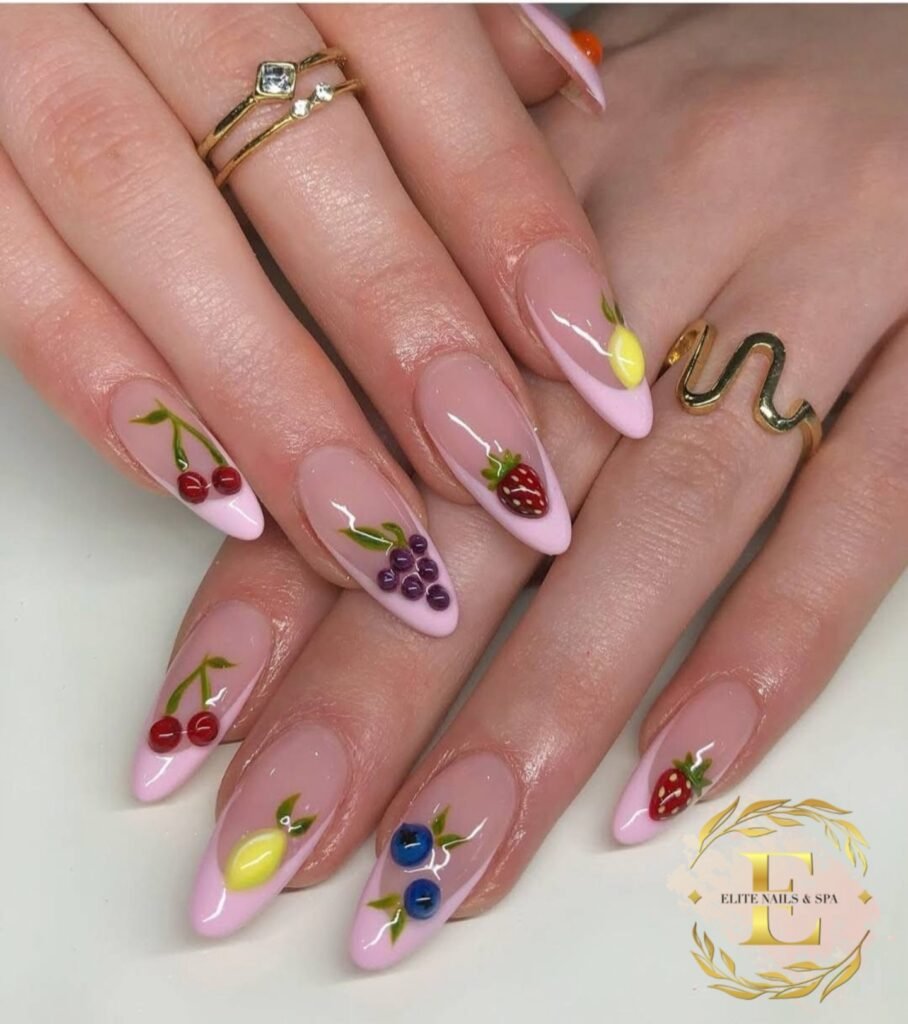
4. Twin cherries on a nude base. Two glossy red dots joined by curved green stems on a sheer beige nail. Stylists often point out that cherries are popular because they’re small enough to keep the design simple yet effective, and that’s exactly why they’re great for beginners.
5. Cherry-red 3D tips. Ask your tech to sculpt a plump 3D gel cherry on one accent nail, over a red or burgundy French. It’s chunky, tactile and very eye-catching. Best booked in a salon, and best on medium to long nails so the sculpture doesn’t snag.
6. Blueberry dots on cobalt French. Deep blue tips with a scatter of small navy-blue berries, each topped with a tiny star-shaped crown drawn with a pin dot. Short nails wear this one well, and it feels unexpected next to all that red.
7. Raspberry jelly nails. A sheer raspberry-pink jelly polish with a cluster of tiny, slightly deeper pink dots on one nail to mimic the bumpy texture of the fruit. Glossy, juicy and low effort.
Citrus
Citrus is bright, graphic and flattering on short nails because the circles scale down beautifully.
8. Lemon slice accent. A yellow circle with a white inner ring and thin white spokes, painted on a sheer or white base. Add a pale yellow fill between the segments to make it look juicy rather than flat.
9. Lemonade gradient. Sponge a pale yellow into milky white for a soft ombre, then add a tiny lemon wedge on the ring finger. Looks like a glass of cold lemonade, and works with almost any outfit.
10. Orange segments on short nails. A single orange circle with white segment lines on a bare nail. It’s one of the simplest short-nail fruit designs, and it adds warmth against pale skin or a tan alike.
11. Blood orange chrome. A deep red-orange polish topped with a gold or copper chrome powder for a glazed, almost molten effect. A good one for people who want fruit energy without any literal fruit.
12. Lime and mint minimal. A reverse French at the base of the nail in lime green, with one tiny lime slice on the accent finger. Cool, fresh and surprisingly calming.
13. Grapefruit half. A coral-pink circle with a thin white membrane pattern and a paler centre. Looks fantastic against a clear or peach base.
Watermelon and Melon
Watermelon is the headline act right now, and it’s easy to see why. Pink and green are a natural pairing, and the shapes are bold enough to read from across the room.
14. Watermelon French. Pink base, green tips, a thin white line between them, and a few black seeds. It’s simple, it’s cute and it’s exactly the kind of fruit manicure that doesn’t need a big commitment. A square nail shape makes the green tip look especially clean.
15. Full-nail watermelon slice. Treat the whole nail as a slice: pink body, white rind line and green edge at the tip. Do this on one or two accent nails and keep the rest solid pink.
16. Watermelon pop art. Neon green and hot pink with crisp black outlines, almost like a comic panel. Short almond nails are enough room for a statement, so you don’t need length to pull it off.
17. 3D watermelon wedge. A sculpted gel wedge with raised seeds on an accent nail, paired with a few other small sculpted fruits. Fruit manicures are practically made for 3D nail art, so if you’re ever going to splurge on sculpting, this is it.
18. Chrome or cat-eye watermelon. A pink watermelon base finished with a shimmery cat-eye or chrome layer. It keeps the fruit theme but feels dressy enough for evenings out.
19. Honeydew and cantaloupe pastels. Soft mint green on some nails, peachy orange on others, and a faint glossy sheen. Think melon salad rather than melon slice. Subtle, fresh and easy to wear to work.
Tropical Fruits
Tropical fruit nail designs are where you can let your imagination off the leash. The colours are louder, the shapes are stranger and nobody expects them to look exactly like the real thing.
Read Also : Blue Jean Nail Designs: 25 Denim-Inspired Looks You Can Actually Recreate
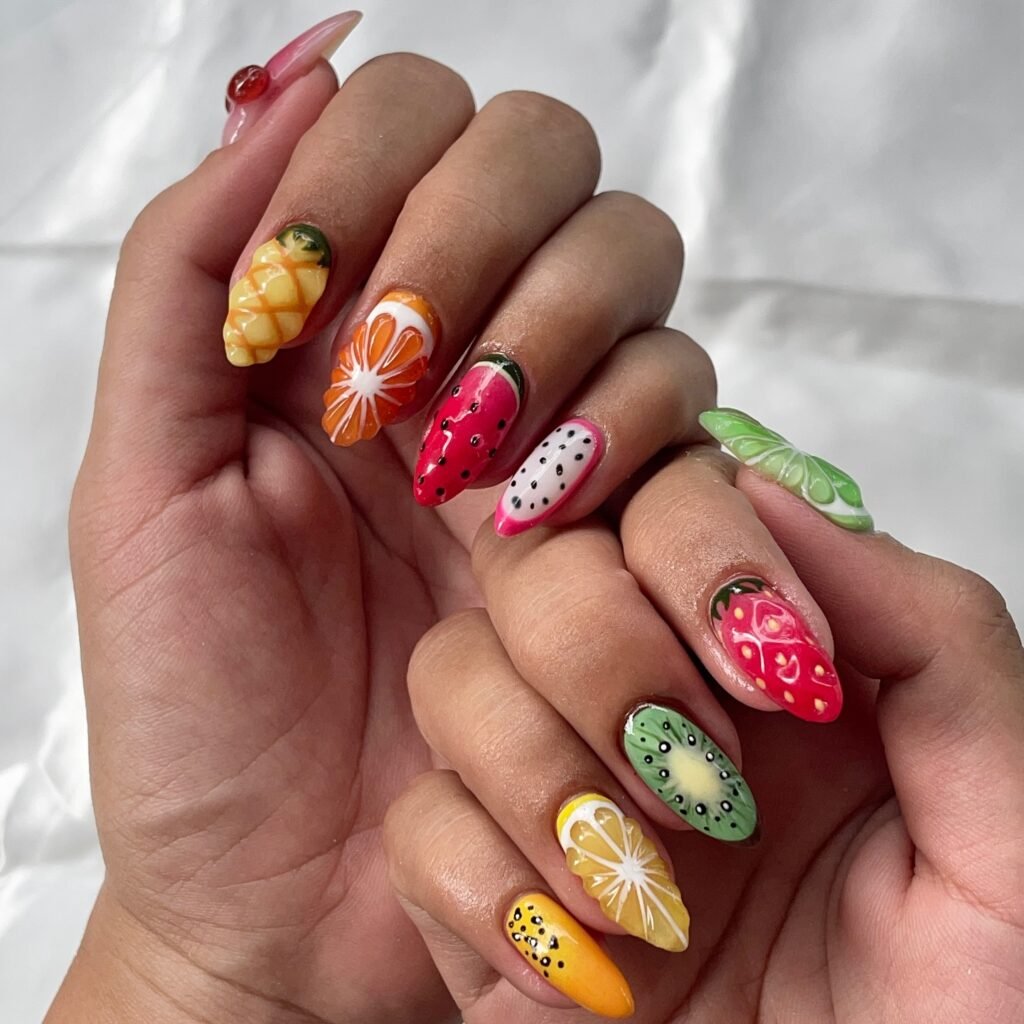
20. Pineapple texture. A yellow base with a gold crosshatch of diamond lines and a spiky green crown at the tip. Use glitter gel or a textured top coat on the grid for dimension. The skin of a pineapple is the whole personality of the fruit, so don’t skip the texture.
21. Kiwi cross-section. A lime-green circle, a pale cream centre and a ring of tiny black seeds. Kiwi is one of the coolest fruit designs because the radial pattern looks intricate but is genuinely easy. Try it on a clear base for a negative-space feel.
22. Papaya sunset. An orange-to-coral gradient with a cluster of glossy black seed dots in the middle of one nail. Papaya makes a refreshing change from the usual strawberries and gives a tropical look that stays elegant.
23. Dragon fruit. Hot magenta with fine white speckles and a few black dots, plus a tiny green scale detail at the tip. Bold, unexpected and a total conversation starter.
24. Mango gradient. Sponge yellow into orange into a blush of red at the cuticle. It looks like a ripe mango at its sweetest, and it needs no drawing at all, which makes it perfect if you hate brushes.
25. Passion fruit halves. A deep purple nail with a yellow-orange circle in the centre, dotted with dark seeds. Moody on the outside, sunny on the inside.
Orchard and Vineyard Fruits (Great for Autumn and Winter)
Here’s the gap nobody else fills. Fruit nail designs don’t have to disappear when the weather cools. Apples, pears, figs and pomegranates bring deeper, richer colours that suit sweaters and boots just as well as sundresses.
26. Peach heart. A soft heart-shaped peach painted in two shades with two tiny green leaves, set on a cream base. Gentle, romantic and ideal for early autumn when you’re not ready to let summer go.
27. Glossy red apple. A rounded apple in deep red with a small brown stem, a single leaf and a white highlight. Make it a green apple for a fresher feel. Best with short, square or squoval nails.
28. Sage pear. A pale green gradient with a tiny brown stem and a soft shadow on one side. Quiet, earthy and very easy to pair with neutrals.
29. Grape cluster. Violet and plum dots stacked in a downward triangle, with a small green leaf on top. Use two or three shades of purple so the cluster looks full rather than flat.
30. Fig and plum mauve. A dusty plum base with a halved fig on one nail, pink and red inside, flecked with tiny seeds. Rich, moody and made for October.
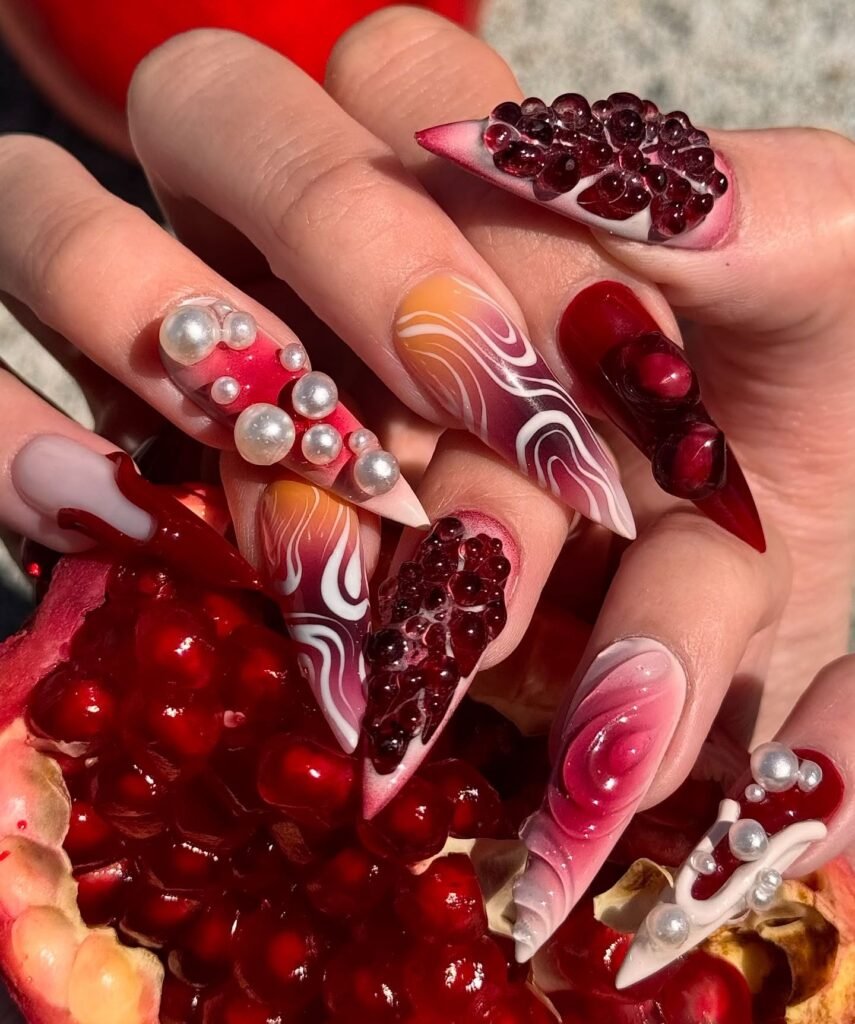
31. Pomegranate burst. A deep red base with clustered ruby dots or small rhinestones for the seeds. Dressy, festive and an easy bridge into the holiday season.
32. Cranberry and sage. A cranberry base with sage green French tips and a little sprig on the ring finger. It brings the fruit theme into winter without feeling kitschy.
Trend-Driven Fruit Looks
These last eight aren’t about a single fruit. They’re ways of wearing the theme that keep showing up in 2026 roundups.
33. Fruit salad mismatch. A different fruit on every nail, from strawberry to blueberry to lemon. The secret to making it look intentional, as Silcare points out, is to keep the base colour and the motif size consistent across all the nails.
34. Colourful fruity French tips. Multicolour tips with a tiny fruit on top of a few nails. It’s playful without being loud, and it’s one of the most wearable ways to try the trend.
35. Microfruit nails. Tiny strawberries, citrus slices or cherries placed at the cuticle, the tip or off to one side, with plenty of bare nail around them. This is the minimalist’s fruit nail design, and it looks great on short, natural nails.
36. Fruit water nails. A clear, watery wash of colour with little fruits that appear to float inside. Dreamy, light and effortlessly cool. If you want to turn it up a notch, add one 3D accent.
37. Korean jelly fruit. Translucent, glossy jelly polish in strawberry, peach or lime, finished with a super-shiny top coat. It’s fruit by colour and texture rather than drawing.
38. Fruit decal accents. Peel-and-stick fruit stickers over a solid base, sealed under top coat. Stickers are the fastest route to detailed fruit if you’re short on time or patience, and they keep the lines far cleaner than most freehand attempts.
39. Negative-space fruit. A mostly clear nail with a fruit outline filled in on only part of the shape. The bare nail becomes part of the design, so there’s less to paint and less to go wrong.
40. Gingham picnic with cherries. Red or yellow gingham checks on two or three nails, with a cherry pair on the accent finger. Retro, charming and perfect for outdoor lunches.
How to Pick Fruit Nail Designs for Your Nail Shape, Length and Skin Tone
The best fruit nail design is the one that suits the canvas you actually have.
By length and shape.
- Short nails: Choose microfruit, a single slice per nail or a fruit French tip. Small, simple shapes keep things tidy. Skip dense scenes.
- Almond: A balanced, elegant canvas for both tips and a teardrop-shaped fruit. Watermelon pop art looks great here even when the nails are short.
- Square and squoval: Ideal for watermelon French tips and full slices because the straight edge frames the green rind nicely.
- Coffin, stiletto and long nails: There’s room for fruit scenes, mismatched salads and 3D sculpting. Keep sculpted pieces low on the nail if you type or use your hands a lot.
By skin tone. Undertone matters more than depth, so treat these as starting points rather than rules.
Also Read : Hawaii Nail Inspo: 45+ Tropical Nail Ideas, Colors and Tips for Your Island Trip
- Fair to light skin: Soft pinks, pastel citrus, cherry reds and sage greens feel natural. Neon can look striking, but go for a sheer base so it doesn’t overwhelm.
- Medium and olive skin: Coral, mango, peach, lime and deep papaya shades tend to glow. Terracotta oranges and warm reds are especially flattering.
- Tan to deep skin: Hot pink watermelon, lemon yellow, cobalt blueberry, rich plum and bright lime really pop. Opaque, saturated colours look gorgeous here.
Trust your own eye. If a colour makes your hands look great in your mirror, it works.
Colour Palettes That Make Fruit Nail Art Look Intentional
One reason fruit designs sometimes look messy is too many colours with no anchor. Pick one palette and stick to it.
- Berry brights: cherry red, strawberry pink, deep blue and a touch of white.
- Citrus sorbet: lemon, tangerine, grapefruit pink and creamy white.
- Tropical punch: magenta, lime, papaya orange and a pop of teal.
- Orchard neutrals: apple red, sage, cream and soft brown.
- Winter fruit: cranberry, plum, forest green and gold.
Anchor the whole set with a single base such as milky white, nude or clear, and let the fruit be the star.
Polish, Gel, Stickers, Press-Ons or 3D? Choosing Your Method
- Regular polish: Cheapest and easiest to fix, but it usually lasts about four to seven days, and detailed art is the first thing to wear off. Great for trying a new design.
- Gel polish: Cures under a lamp, so you can paint details slowly without smudging. Expect roughly two to three weeks of wear with good aftercare. It’s the best choice for precise fruit work.
- Stamping: Plates with fruit images transfer a design in one press. Quick and consistent, though you’ll need a few practice runs.
- Stickers and decals: The easiest route to tiny, detailed fruit. Seal them under top coat so the edges don’t lift.
- Press-ons: Some brands sell pre-made fruit sets that go on in minutes. Convenient for events, and you can reuse them with care.
- 3D sculpting: Done with hard gel or builder gel and usually best left to a professional. It lasts well but adds cost and chair time.
Not sure where to begin? Start with gel for fine detail, stickers for speed and a pro for sculpting.
How to Make Fruit Nail Designs Last (and Remove Them Safely)
A little care goes a long way, especially with small, delicate designs.
- Cap the free edge of each nail with base, colour and top coat to stop chips starting at the tip.
- Refresh your top coat every two or three days if you’re using regular polish.
- Apply cuticle oil daily. Healthy cuticles keep the area around your design looking neat.
- Wear gloves for washing dishes and cleaning.
- Use your fingertips, not your nails, to open cans, peel stickers and scrape things.
When it’s time to remove everything, resist the urge to peel. Peeling lifts layers of the nail along with the polish. For regular polish, use an acetone-based remover. For gel, gently buff off the shiny top layer, wrap each nail in an acetone-soaked cotton pad and foil for ten to fifteen minutes, then slide off the softened product with a cuticle pusher. Finish with oil and a nourishing hand cream, and give your nails a day or two of rest if they feel dry.
Common Fruit Nail Art Mistakes (and Easy Fixes)
- Painting layers too thick. Thick coats stay tacky and smudge. Build colour in thin layers instead.
- Rushing the drying time. Let each coat set before the next step. A fruit design has several small stages.
- Making the fruit too big for the nail. On short nails, shrink the motif and leave breathing room.
- Too many colours at once. Pick a palette, then add one contrasting accent.
- Overdoing the seeds. A few dots look charming, a dozen look busy.
- Skipping the highlight. One tiny white dot on a cherry or strawberry makes it look glossy and three-dimensional.
- Forgetting the top coat. Without it, small details smear or chip within a day.
Read Also: Zebra Print Nail Designs: 22 Bold Ideas, Easy Tutorials and Styling Tips
Fruit Nail Designs by Occasion
- Work: Strawberry blush, lemonade gradient or a single microfruit accent.
- Weddings and parties: Chrome watermelon, pomegranate burst or cherry-red 3D tips.
- Holiday and beach trips: Tropical punch with pineapple, papaya or dragon fruit.
- Picnics and brunches: Gingham with cherries, fruit salad mismatch or fruit French tips.
- Autumn and winter: Apple, fig, plum, cranberry and sage.
Final Thoughts
Fruit nail designs work because they’re joyful, flexible and surprisingly easy to personalise. You can go tiny or bold, painted or sculpted, summery or cosy, and nobody will tell you you’ve done it wrong. Start with one accent nail, learn the basic shapes, then build up to a full fruit salad when you’re ready. Your future self, glancing at a cherry mid-meeting, will thank you.
Bookmark this guide, pick one of the 40 ideas, and enjoy the juiciest manicure of your week.
Frequently Asked Questions
What are fruit nail designs?
Fruit nail designs are manicures inspired by fruit. They can include painted, stamped, sticker or 3D fruit, or simply use fruit-inspired colours such as watermelon pink with green tips.
Are fruit nail designs only for summer?
No. They peak in summer because of the bright colours, but apple, pear, fig, plum, pomegranate and cranberry looks work beautifully in autumn and winter.
What are the easiest fruit nail designs for beginners?
Cherries, strawberries, watermelon French tips and citrus slices are the easiest. They rely on dots, circles and simple curves, and you can start with just one accent nail.
What tools do I need for fruit nail art at home?
A base coat, top coat, a fine detail brush, a dotting tool, core polish colours (red, green, yellow, orange, pink, white, black) and a small palette. A cleanup brush and acetone help tidy mistakes.
How do I make fruit nail designs look realistic?
Use two shades of the same colour for depth, add a tiny white highlight, keep seeds sparse and paint in thin layers. Adding a subtle shadow on one side gives fruit a rounded look.
How long do fruit nail designs last?
With regular polish, around four to seven days. Gel polish typically lasts two to three weeks with good aftercare. Sculpted 3D designs last about as long as gel but can snag more easily.
Can I do fruit nail designs on short nails?
Absolutely. Choose small motifs such as microfruit, one fruit per nail, or a fruit French tip. Simple circles like orange or kiwi slices look especially good on short nails.
Are stickers or hand-painted fruit better?
Stickers are faster and give cleaner lines, which suits beginners and busy days. Hand-painted fruit looks more custom and lets you adjust size and colour. Many people combine both.
What colours go best with fruit nail designs?
Sheer pink, milky white, nude and clear bases keep the focus on the fruit. For palettes, try berry brights, citrus sorbet, tropical punch or winter cranberry and sage.
How do I remove fruit nail art without damaging my nails?
Don’t peel. Use an acetone-based remover for polish. For gel, buff the top layer, then soak a cotton pad in acetone, wrap each nail in foil for ten to fifteen minutes and gently slide the product off. Follow with cuticle oil.


One Comment