

Vintage Halloween Nails: 30 Nostalgic Ideas, Color Palettes and Easy Tutorials
Some Halloween memories don’t come in neon. They come in warm, slightly faded colors: a plastic pumpkin pail the shade of a traffic cone, a cardboard black cat taped to a window, a paper skeleton with brass-pin joints that rattled whenever the door opened. That worn-in, handmade, a-little-bit-spooky feeling is exactly what vintage Halloween nails try to capture, and it’s a big reason the style returns every October.
If you’re tired of scrolling past the same slime-green drips and glow-in-the-dark ghosts, a nostalgic manicure is a refreshing way out. It’s still unmistakably Halloween, but it feels softer, a little wistful and far more personal. It’s also one of the most wearable ways to do seasonal nails, because the palette (burnt orange, cream, inky black, mustard, faded plum) looks like autumn long before and after October 31.
Also Read : Halloween Cat Eye Nails: 25+ Magnetic Nail Designs (Black, Burgundy, Plum, Gold)
In this guide, I’ll walk you through what actually makes a Halloween manicure look vintage, the exact colors worth buying, the motifs worth painting and 30 ideas sorted by era and mood. You’ll also get three beginner-friendly tutorials, advice on shapes and lengths, a script for explaining your idea to a nail tech, and answers to the questions people ask most. Whether you paint your own nails at the kitchen table or book a full set, you’ll leave with a plan.
Also Read: Black Halloween Nails
What Are Vintage Halloween Nails?
Vintage Halloween nails are manicures inspired by the look of Halloween from roughly the early 1900s through the 1970s. They borrow from old holiday postcards, paper die-cut decorations, mid-century party kitsch and the boxed costumes and blow-mold plastic pumpkins that kids carried around in the 1960s and 70s. Think of them as nostalgic Halloween manicures rather than scary ones.
The easiest way to understand the style is by what it avoids. Modern Halloween nail art tends to rely on high-contrast neon, heavy chrome, 3D charms and gore. Vintage Halloween nail art leans the other way: muted warm colors, flat illustrative motifs, simple shapes and a slightly imperfect, hand-drawn quality. A cat on a vintage-style nail looks like it was cut out of paper. A pumpkin looks friendly, not horrifying. A ghost is a bedsheet with two round eyes, not a screaming mask.
Three eras tend to inspire most of these designs:
- The postcard era (early 1900s): Jack-o’-lanterns, witches, owls, black cats and moons drawn in a storybook style, often in sepia, deep orange and dusty green. Lace borders and cameo frames fit here too.
- The mid-century era (1940s to 1960s): Party-store kitsch with checkerboards, polka dots, bold black-and-orange pairings and cheerful, big-eyed pumpkins and skeletons.
- The 1970s costume-box era: Plastic masks, vinyl smocks, avocado green, mustard yellow, chocolate brown and groovy swirls mixed in with the traditional orange and black.
You don’t have to choose just one. The best retro Halloween manicures usually borrow a color story from one era and a motif from another. What matters is that the whole set feels like it came out of the same dusty cardboard box in the attic.
The Vintage Halloween Nail Color Palette
Color does most of the heavy lifting here. If you get the palette right, even a plain set of nails reads as vintage. The big rule is to pick shades that look slightly muted, as if the sun has been shining on them for fifty years. Skip anything electric.
| Shade | What it looks like | Best used for |
|---|---|---|
| Burnt pumpkin orange | A deep, slightly brown orange | Pumpkin bodies, French tips, full-coverage base |
| Cream or antique ivory | A warm off-white, never stark white | Base color, ghosts, lace, cameo frames |
| Ink black | A solid, glossy or matte black | Cat silhouettes, bats, outlines, checkerboards |
| Mustard yellow | A golden, slightly dusty yellow | Moons, stars, stripes, 1970s accents |
| Avocado or olive green | A muted, earthy green | Witch skin, leaves, stems, retro accents |
| Chocolate brown | A rich, warm brown | Sepia gradients, 1970s swirls, tree branches |
| Dusty plum or eggplant | A faded purple | Gothic looks, backgrounds, sky gradients |
| Oxblood or brick red | A deep red-brown | Vampire tips, mid-century lip-red looks |
Two finish tips will help a lot. First, choose cream-finish polishes (the flat, opaque ones) for your main colors. They look like printed paper or painted tin, which is the vibe you want. Second, avoid heavy shimmer on your base colors. A touch of gold foil or a fine metallic on an accent nail is lovely, but a full set of glitter will push your nails toward modern glam. If you want a slightly aged look, a matte top coat does the trick, because gloss reads new and matte reads papery.
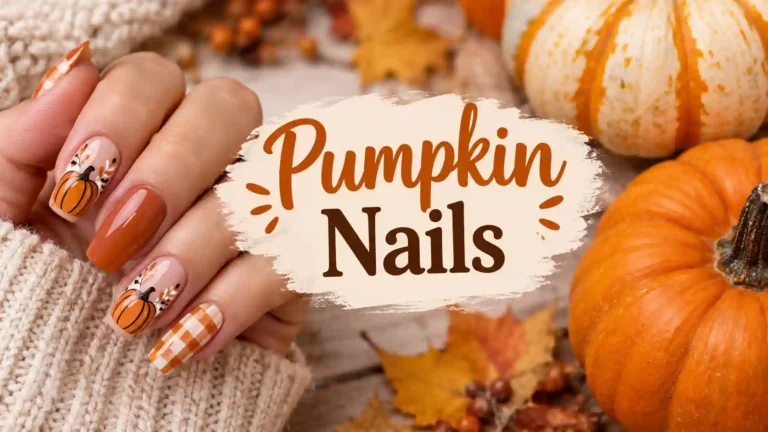
Must Read : Pumpkin Nails That Will Make Your Hands The Coziest Part Of Fall
A simple starter kit is three or four shades: a cream, a burnt orange, a black and one accent (mustard, plum or avocado). You can make at least a dozen designs from that alone.
Motifs That Say “Vintage” Instantly
Once you’ve got the colors, the motifs finish the job. The trick is to draw them simply. Vintage illustrations were made with limited inks and basic shapes, so your nail art should look the same: flat color, bold outlines, very little shading.
Here are the motifs that work best:
- Black cats with arched backs. The silhouette alone is enough. Add a tiny curl of tail and you’re done.
- Jack-o’-lanterns with simple faces. Triangle eyes, a triangle nose and a toothy grin. The goofier, the more authentic.
- Crescent moons and stars. Painted in mustard or cream, they instantly say old greeting card.
- Bedsheet ghosts. A rounded top, a wavy bottom edge and two black oval eyes.
- Bats in flight. Small, flat and slightly cartoonish, like they were cut from construction paper.
- Owls and ravens. Postcard favorites that look wonderful on a single accent nail.
- Witch hats, brooms and cauldrons. Keep the lines crisp and the shapes chunky.
- Checkerboards and polka dots. Mid-century party staples that work as backgrounds or tips.
- Lace and cameo frames. Perfect for the Victorian side of things.
- Skeletons with jointed limbs. Especially charming when drawn like a paper decoration.
A good rule is to use no more than two or three motifs per hand. Leave a couple of nails plain, or painted in a single solid color, so the art has room to breathe. Vintage designs look best when they feel curated, not crowded.
Also Read: Halloween Cat Eye Nails
30 Vintage Halloween Nail Ideas
Here are 30 ideas sorted by era and mood. Each one includes a quick note on how to get the look, so you can try it yourself or show it to your nail tech.
Retro Orange and Black Classics
These are the safest, most recognizable vintage Halloween nails. If you’re new to the style, start here.
1. Burnt Pumpkin and Cream French. Paint your nails in a warm cream, then add a curved tip in burnt orange. It’s a French manicure wearing a Halloween costume. The cream keeps it soft, the orange keeps it seasonal, and nobody will guess it’s Halloween until they look closely.
2. Blow-Mold Jack-o’-Lantern Accent. Paint one ring-finger nail glossy orange and add a simple black face: two triangle eyes, a small nose, a wide grin. Keep the other nails cream or black. That single nail gives you a whole old-school porch decoration.
3. Cardboard Black Cat and Mustard Moon. On a cream nail, paint a mustard crescent moon, then a flat black cat sitting in front of it with an arched back. Use a thin brush for the whiskers and tail. It looks like a vintage window decoration shrunk down to nail size.
4. Muted Candy Corn Stripes. Instead of the bright candy corn pattern you see everywhere, soften the shades: a cream tip, a dusty mustard middle and a burnt orange base. Paint the bands slightly curved instead of straight. The result looks like candy from an old-fashioned penny jar.
5. Matte Black and Antique Gold Stars. Start with a matte black base, then dot tiny gold stars and a crescent moon on two or three nails. Matte black feels like velvet, and gold gives it a storybook sparkle without any glitter. It’s elegant enough for the office.
6. Sepia Bat Trio. Blend a soft gradient from cream to caramel brown using a makeup sponge, then add three little black bats across your nails. The sepia gradient does the “aged paper” work, and the bats stay simple. Seal with a matte top coat for a papery finish.
Victorian Postcard and Cameo Nails
If you like your nostalgia a little more romantic, these designs borrow from antique postcards and jewelry.
7. Pumpkin Cameo Oval. Paint a small oval frame on a nail in cream or antique gold, then fill the center with a tiny jack-o’-lantern. It resembles a brooch pinned to an autumn coat. Frame it with a thin line of gold or brown for that old-jewelry look.
8. Postcard Pumpkin Patch. On one accent nail, paint a miniature landscape: a dusky sky, a row of small pumpkins along the bottom and one tilted fence post. Keep the other nails a solid autumn shade. It’s a tiny illustration on your finger, so try it on your less dominant hand first if you’re painting your own.
9. Witch on the Moon in Sepia. Draw a cream moon on a chocolate brown nail and place a thin black witch silhouette riding across it. Limit yourself to those two colors plus the brown base. The restraint is what makes it feel like an old woodcut print.
10. Lace-Edge Black and Ivory. Paint nails in ivory, then use a lace stamping plate or a lace-patterned sticker over the tips in black. Add one black bat or a tiny spider to an accent nail. It’s gothic and delicate at the same time, a good option if you like looks that feel more Victorian than playful.
11. Faded Rose and Raven. Start with a dusty rose base, then add a small black raven perched on a thin branch on one nail. Add a few dried-flower details if you’re comfortable with a fine brush. The rose softens the spooky bird and gives you a moody, antique wallpaper vibe.
12. Antique Gold Filigree on Plum. Use a deep plum polish as your base and draw fine gold scrollwork along the cuticle edge or the tips. A striping brush or a gold nail art pen makes this easy. It looks like the cover of an old spell book.
Also Read : Candy Corn Nail Ideas That Will Make Your Halloween Manicure Irresistibly Sweet
Also Read: Pumpkin Nails
1970s Costume-Box Nostalgia
This group is for anyone who remembers (or wishes they remembered) plastic masks, vinyl smocks and brown paper trick-or-treat bags.
13. Bedsheet Ghost Set. Paint cream nails, then add a simple ghost shape in white with two round black eyes on a few of them. Use a matte top coat so it feels like cotton. Pair it with a plain black accent nail for contrast. It’s sweet, simple and instantly recognizable.
14. Groovy Swirl and Tiny Ghost. Use burnt orange, mustard and chocolate brown to paint wavy, flowing swirls across your nails, like a 1970s wallpaper pattern. Add one little white ghost on the ring finger. The swirls are forgiving, which makes this a great option if you can’t draw straight lines.
15. Avocado Green Witch. Paint a nail in muted avocado green, then add a black pointed hat, a small chin and a smile. Keep the face minimal, just a hat, a long nose and two dots for eyes. The slightly retro green is the star here, and it pairs beautifully with mustard or plum accent nails.
16. Skeleton Pajamas. Paint your nails black, then add simple white bones: a vertical spine and ribs, or a cartoon hand with outlined fingers. If you want a nostalgic wink, use a glow-in-the-dark white polish for the bones. It feels like sleepwear from the era of flashlight ghost stories.
17. Candy Wrapper Dots. Paint a few nails in cream, then draw small twisted-wrap candies in orange and brown with a dotting tool. Add little black polka dots in the background. It looks like the bottom of a trick-or-treat bag, but in a cute, controlled way.
18. Mustard Sunburst Moon. Paint a mustard circle on a chocolate brown nail and add thin rays radiating outward. Place a tiny black bat across the sun. It’s a mix of 1970s sunburst design and a Halloween night sky, and it works well on short nails.
Mid-Century Kitsch and Checkerboard
Party-store cheer, diner colors and bold geometry. These looks are fun, graphic and surprisingly easy to repeat across all ten nails.
19. Orange and Black Checkerboard Tips. Paint a cream base, then add a small checkerboard section at the tip of each nail in black and burnt orange. Use thin nail tape or a striping brush to keep the squares neat. It’s a retro diner floor that happens to be Halloween, and it looks sharp on short and long nails alike.
20. Atomic Starburst Pumpkin. Draw a small pumpkin on a nail, then add a few tiny four-point starbursts around it in mustard or cream. The starbursts are a nod to mid-century atomic-age decor. It’s a nice way to blend 1950s design with a classic Halloween shape.
21. Polka-Dot Pumpkin Patch. Paint your nails cream, then dot them with burnt orange and black circles in different sizes. Add a small green stem to a few of the larger orange dots so they read as pumpkins. It’s the easiest design in this list because all you need is a dotting tool.
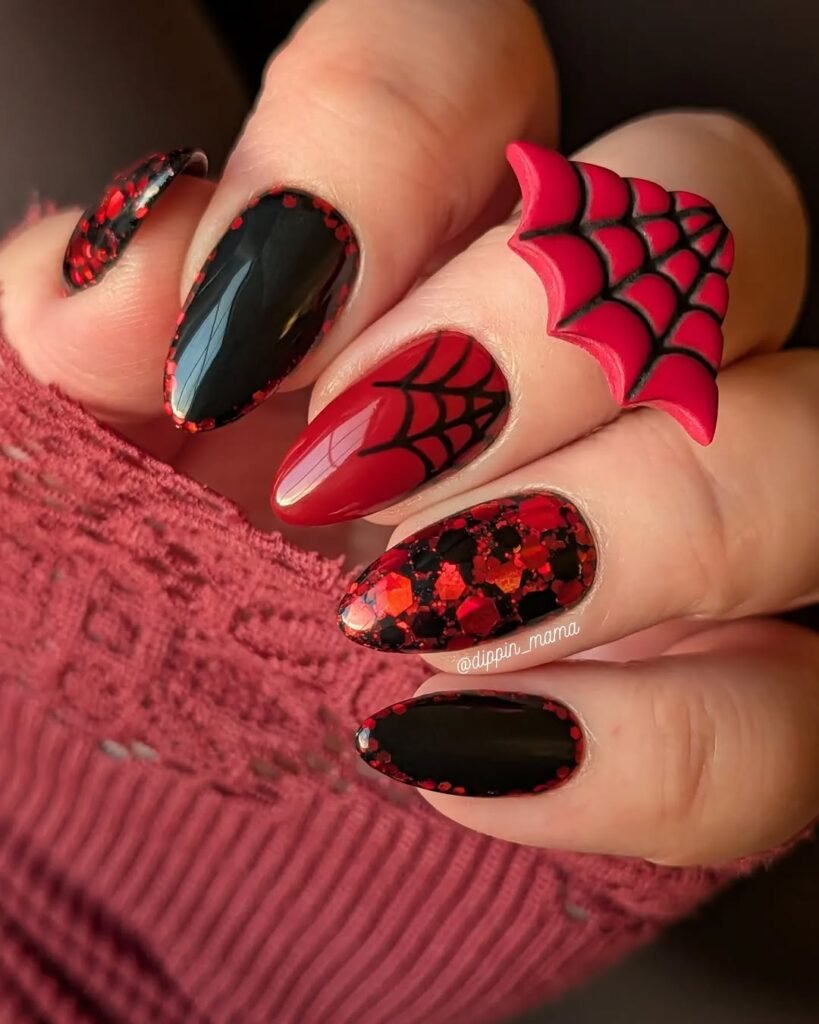
22. Lipstick Red and Spiderweb Tips. Go for a classic mid-century red, slightly warm and creamy, then paint a fine black web at the tip of each nail. A spider hanging from one nail is plenty. It feels like a pin-up version of Halloween, polished and a bit theatrical.
23. Paper Skeleton Joints. On black nails, paint white skeleton arms and legs with little round joints, the way a paper decoration with brass fasteners looks. Spread the limbs across two or three nails so they seem to dance along your hand. It’s playful, graphic and very hand-drawn.
24. Pastel Pumpkin and Mint Ghost. Not all vintage Halloween is dark. Mid-century party decor often used soft peach and mint, so paint one nail in a pale peach pumpkin and another in mint with a cream ghost. It’s a gentle, retro-sweet manicure for people who don’t want black on their nails.

Old Hollywood Horror and Gothic Antique
For those who want their nostalgia darker, moodier and a little more dramatic.
25. Noir Oxblood Vampire Tips. Start with a deep oxblood red base, then add a razor-thin black French tip. A tiny white fang detail at the cuticle on one nail is optional, but fun. It looks like a classic horror film poster, all drama and shadows, and it transitions beautifully into November.
26. Silent-Film Sepia Ghost. Blend a gradient in grays and warm browns, then paint a small, slightly translucent ghost in cream on top. Seal it with a matte top coat. The soft gradient evokes an old photograph, and the ghost looks like a double exposure.
27. Antique Stained Glass Window. Paint thin black lines in a pointed-arch window pattern, then fill each section with muted jewel tones like plum, mustard, olive and brick red. A clear, glossy top coat lets the colors glow. It’s a more intricate option, but a tape-and-sponge approach makes it manageable.
28. Haunted Mansion Silhouette. Blend a dusky sky from dusty plum to burnt orange, then paint a black mansion, a bare tree and a tiny bat on the lower portion of the nail. Use the other nails as quiet, solid plum or black companions. It’s a little scene, and it photographs beautifully.
29. Vintage Tarot Nails. On cream nails, paint thin gold borders and tiny symbols: a moon, a sun, a star, a hand, an eye. Make it look like a worn tarot card by using brown or sepia for the line work. It gives you a witchy, antique-shop feeling that works year-round.
30. Victorian Mourning Jewelry. Paint your nails jet black, then add small pearl-like dots along the cuticle or the tips. A thin silver or gold line adds the finishing touch. It nods to the dark jewelry worn in the 1800s and keeps things glamorous and understated.
Also Read: Candy Corn Nail Ideas
The Best Nail Shapes and Lengths for a Vintage Look
Shape changes the entire feel of a design, so it’s worth thinking about before you pick your art.
Short and rounded or squoval is the most authentically vintage choice. Short nails echo mid-century manicures, and they make simple motifs like polka dots, ghosts and checkerboards look neat and intentional. They’re also practical, since small designs don’t get lost.
Oval is the safe, flattering middle ground. It works with nearly every idea on this list, and it makes cameo frames and moons look especially graceful.
Almond suits the Victorian and gothic looks. The soft point feels elegant, and the extra length gives you a bigger canvas for scenes like the pumpkin patch or the haunted mansion.
Coffin and stiletto are more modern shapes, but they can work if you keep the colors and motifs retro. A long coffin nail in matte black with gold stars still reads vintage because of the palette.
If you’re choosing a length for the first time, go short to medium. Vintage Halloween nails rely on charm rather than drama, and short nails make every illustration feel like a tiny charm on a bracelet.
Read Must : Black Halloween Nails That Will Make Your Spooky Season Manicure Absolutely Unforgettable
How to Do Vintage Halloween Nails at Home: 3 Easy Tutorials
You don’t need a professional kit to get started. A few basic tools go a long way: a base coat, a matte and a glossy top coat, a thin detail brush, a dotting tool and a small makeup sponge. Here are three tutorials, ranked from easiest to most involved.
Tutorial 1: Burnt Pumpkin and Cream French (Beginner)
- Apply a base coat and let it dry completely.
- Paint two coats of cream polish on every nail, allowing each coat to dry.
- Dip a small makeup sponge or a flat brush into burnt orange polish and dab it along the free edge of the nail to create a soft tip. For a crisper line, use a curved tip guide or a piece of tape.
- Clean up around the cuticles with a small brush dipped in nail polish remover.
- Add a tiny black cat or a moon to one accent nail using a detail brush.
- Finish with a glossy top coat, or a matte one if you want it to look papery.
Tutorial 2: Sepia Bat Gradient (Intermediate)
- Paint your nails with a cream base and let it dry.
- On a makeup sponge, paint a stripe of cream and a stripe of caramel brown side by side so they touch.
- Dab the sponge onto your nail with a gentle rocking motion, working from the tip toward the cuticle. Repeat until the gradient looks soft. Clean the skin around the nail right away, since sponge work gets messy.
- Let it dry fully, then use black polish and a thin brush to paint three small bat shapes: two curved wings and a tiny body.
- Apply a matte top coat for an aged paper finish.
Tutorial 3: Checkerboard Tips (Intermediate)
- Paint your nails cream and let them dry.
- Place thin striping tape or a straight piece of tape across the tip to mark the checkerboard area.
- Paint small alternating squares in black and burnt orange using a flat detail brush. Alternate the colors in each row, so a black square sits next to an orange one.
- Peel off any tape carefully while the polish is slightly wet to avoid lifting.
- Once everything is dry, outline the edges with a fine black line if you want a crisper finish, and seal with a glossy top coat.

Polish, Gel, Press-Ons or Stamping?
All four methods can deliver a convincing retro look, and the right one depends on your skill, budget and patience.
Regular polish is the best way to get that flat, papery vintage finish, and it’s cheap and easy to remove. The downside is wear: expect a few days of crisp art before chips begin, so keep a top coat on hand for touch-ups.
Gel polish lasts longer, which is helpful if you want your set to survive a whole October. It also gives you a crisp, glossy finish that holds fine line work well. If you’re doing it at home, follow the curing instructions that come with your polish and lamp, and remove it properly rather than peeling it off.
Press-on nails are the fastest option. Look for sets in muted colors, cream bases and simple motifs. Skip anything covered in glitter or chrome if you want an authentic retro vibe. Press-ons are also great for testing whether you like a design before committing to a salon appointment.
Stamping is the secret weapon for detailed motifs. A stamping plate transfers a pre-made design, such as lace, bats or witches, onto your nail in seconds. Plates themed around retro Halloween exist, and they take the stress out of freehand drawing. Use opaque stamping polish, because sheer polish tends to look patchy.
How to Explain Your Idea to a Nail Tech
Vintage is a vibe, and vibes get lost in translation. To get what you actually want, bring a few specific things to your appointment:
- Two or three reference images, ideally of the same style. Mix a color reference with a motif reference.
- A color list. Say “burnt orange, antique cream and ink black” instead of “Halloween colors.” Those exact words help your tech pick the right polish.
- A finish instruction. Tell them whether you want gloss or matte, and ask for “flat, illustrative art with no heavy shading.”
- A limit on detail. Say something like “I want a simple, hand-drawn look, not too busy,” so they know to keep the drawings chunky.
- Your preferred length and shape. Short oval and almond are the easiest to match with most designs.
If you want the art on only a few nails, say which ones. Most techs are happy to give you a plain base on the rest and concentrate their effort where it counts.
What to Wear With Vintage Halloween Nails
The best part of this style is that it works with real clothes, not just costumes. Cream and burnt-orange nails look great with chunky knits, corduroy, plaid and leather jackets. Dark plum and oxblood sets pair well with black dresses and gold jewelry. If you’re dressing up, match your manicure to the era of your costume. A 1970s witch deserves avocado green and mustard, while a Victorian ghost looks best with lace-edge nails and a cameo brooch.
If you’re heading to the office, pick the quieter looks: the French, the matte black with gold stars or the oxblood tips. They look polished on a Monday and festive at a party that night.
Common Mistakes to Avoid
- Using stark white. Pure white looks modern. Mix a little cream or ivory in, or buy a warm off-white.
- Overcrowding the nail. One or two small motifs per nail is plenty. Space is part of the vintage look.
- Choosing glossy neon. If it glows under a nightclub light, it’s not vintage.
- Skipping the top coat. Detail work smudges and chips without protection.
- Rushing the dry time. Layered colors blend or lift if they’re not fully dry. Give each layer a few minutes.
- Making the art too perfect. A bit of wobble in a cat’s whisker is part of the charm.
Related Post : Ghost Nail Design: 20 Cute, Easy & Spooky Ideas (With Step-by-Step Tutorial)
Aftercare and Easy Removal
To make your set last, apply a fresh top coat every two or three days if you’re wearing regular polish, and wear gloves when you do dishes. Moisturize your cuticles daily with an oil or balm, since dry cuticles make even the best manicure look tired.
When it’s time to remove your set, soak a cotton pad in nail polish remover, place it on the nail for ten to fifteen seconds, and wipe gently. Dark colors like black and burnt orange can stain, so a clear base coat underneath helps. Matte top coats and detailed art can take a bit longer to remove, so be patient and don’t scrape. For gel or press-ons, follow the removal method that comes with the product, rather than pulling them off, and give your nails a little break afterward.
Final Thoughts on Vintage Halloween Nails
Vintage Halloween nails are proof that spooky doesn’t have to be loud. With a warm, muted palette, a few simple illustrated motifs and a finish that feels like old paper, you can turn your fingertips into a tiny collection of nostalgic Halloween treasures. Start with something small, like the burnt pumpkin and cream French, and build from there. Try a cameo, a checkerboard or a hand-drawn cat when you feel more confident.
The most important thing is to have fun with it. These designs were never meant to be flawless. They were meant to feel like a memory, and a little crooked whisker only makes it better.
What are vintage Halloween nails?
Vintage Halloween nails are manicures inspired by Halloween decorations, postcards and costumes from the early 1900s through the 1970s. They use muted colors like burnt orange, cream, mustard and black, plus simple illustrated motifs such as black cats, jack-o’-lanterns, bedsheet ghosts and crescent moons.
What colors are best for a vintage Halloween manicure?
The most authentic shades are burnt pumpkin orange, antique cream, ink black, mustard yellow, avocado green, chocolate brown, dusty plum and oxblood red. Pick cream-finish polishes and avoid neon or heavy glitter to keep the retro look.
Are vintage Halloween nails good for short nails?
Yes. Short rounded or squoval nails are actually the most period-accurate choice. Designs like polka dots, ghosts, cats, checkerboard tips and a simple French all look neat on short nails.
How do I make my Halloween nails look aged or retro?
Use warm, muted colors, choose a matte top coat instead of gloss, and add soft sepia gradients with a makeup sponge. Draw motifs in flat color with little to no shading, and don’t worry about making them perfect.
Can I do vintage Halloween nails if I can’t draw?
Absolutely. Try polka dots with a dotting tool, a simple French tip, a sponge gradient or stamping plates. Stickers and press-ons are other good options. Even one small hand-painted accent nail is enough to give the set a vintage feel.
What nail shape works best for a vintage Halloween manicure?
Short oval or squoval nails feel the most authentic. Almond is lovely for Victorian and gothic designs because the longer canvas gives you more room for scenes. Coffin and stiletto can work if you keep the palette retro.
How long do vintage Halloween nails last?
Regular polish with a good top coat usually lasts several days to a week, depending on your lifestyle. Gel polish and quality press-ons can last longer, often a couple of weeks, when applied and removed properly.
What is the easiest vintage Halloween nail design for beginners?
The burnt pumpkin and cream French and the polka-dot pumpkin patch are the simplest. Both rely on basic tools and forgiving shapes. Add a tiny black cat or a moon to one nail once you feel comfortable.
How do I show my nail tech what I want?
Bring two or three reference photos, list specific colors (like burnt orange, antique cream and ink black), and ask for a flat, illustrative style with no heavy shading. Tell them whether you prefer matte or glossy and which nails should have art.
Can I wear vintage Halloween nails after October?
Most of these sets can. Cream, burnt orange, mustard, plum and chocolate brown are classic fall colors, and designs like the French tips, matte black with gold stars, sepia gradients and oxblood tips work well through November. Just skip the obvious jack-o’-lantern accent once Halloween is over.

One Comment