
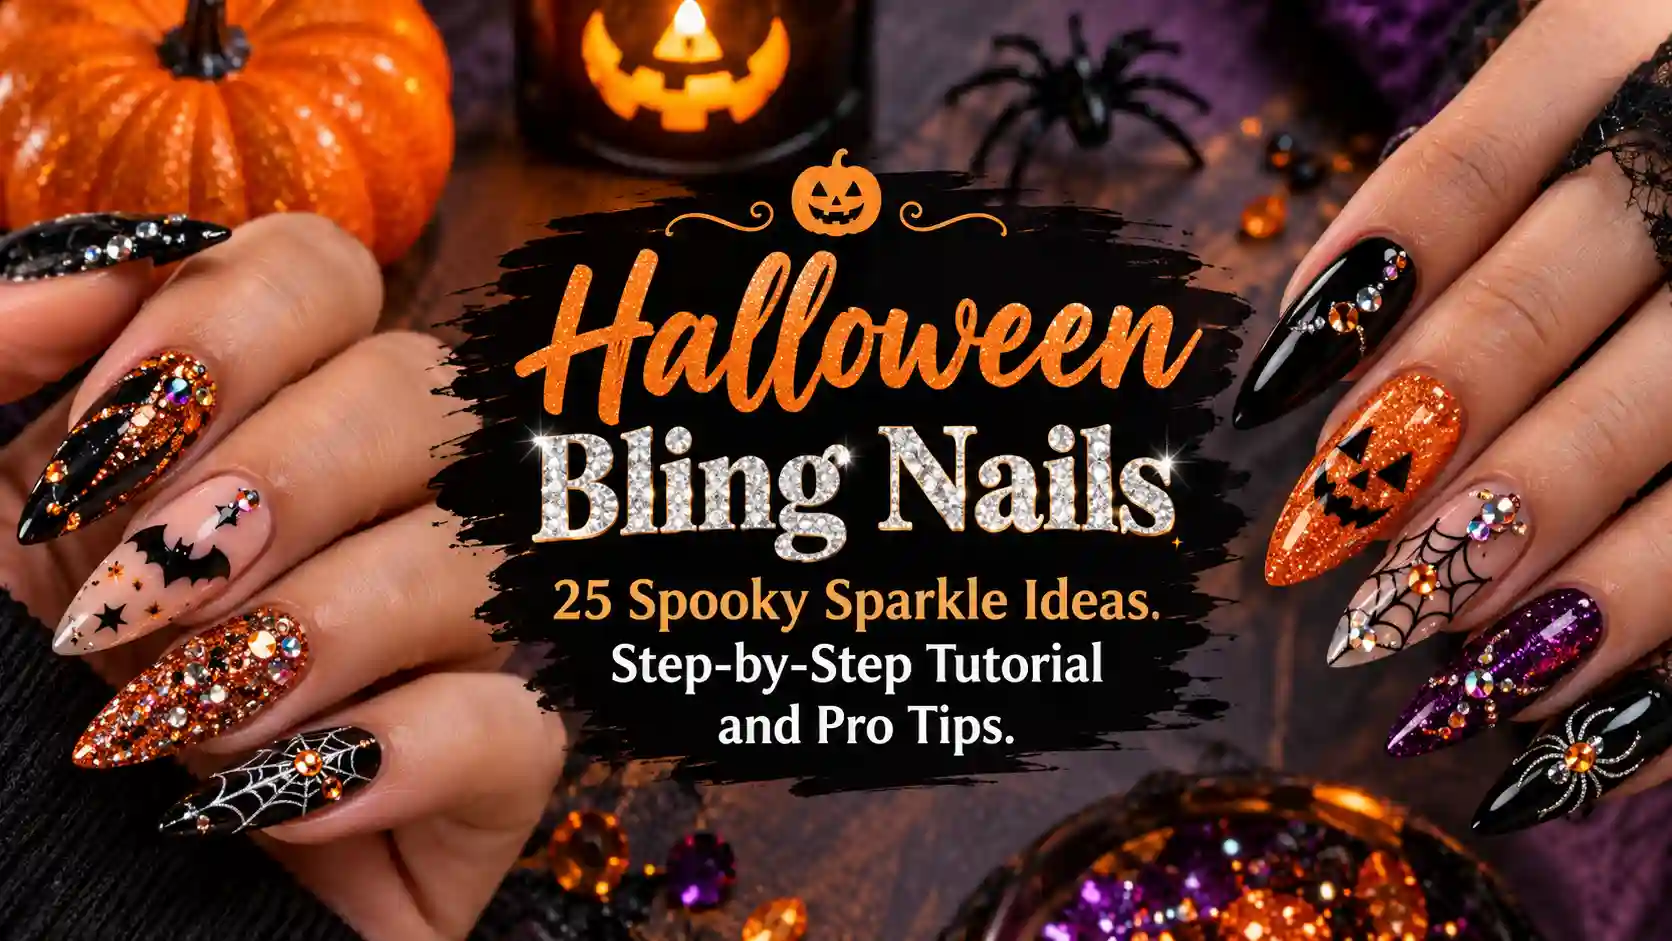
Halloween Bling Nails: 25 Spooky Sparkle Ideas, Step-by-Step Tutorial and Pro Tips
Let me guess how your Halloween nail plans usually go. You scroll for an hour, save forty photos of tiny ghosts and hand-painted spiderwebs, then realise you have neither the steady hand nor the patience to paint any of it. So you wear plain black, again, and feel faintly disappointed every time you reach for a drink.
There is a smarter way to do spooky season, and it has nothing to do with brush control. Halloween bling nails let sparkle do the heavy lifting. A handful of rhinestones, a swipe of chrome powder, one well-placed spider charm, and suddenly a plain black manicure looks like it was designed for a red carpet in a haunted mansion.
This guide is the one I wish I had when I started. You will find 25 designs sorted by mood, a full at-home tutorial that works even if you have never touched a rhinestone, honest advice on salon versus DIY versus press-ons, colour combinations that actually work, and the mistakes that make gems fall off by Tuesday. Grab a drink, settle in, and let’s make your hands the best-dressed thing at the party.
Also Read : Vintage Halloween Nails: 30 Nostalgic Ideas, Color Palettes and Easy Tutorials
What Are Halloween Bling Nails?
Halloween bling nails are Halloween-themed manicures that use sparkle as the main event. Think rhinestones, crystals, glitter, chrome, pearls, studs, metallic foils and tiny charms layered over classic spooky colours like black, blood red, pumpkin orange, witchy purple and poison green.
The idea is simple. Traditional Halloween nail art leans on illustration: a ghost here, a pumpkin there, a web stretched across the tip. Bling flips that. Instead of drawing the theme, you suggest it with texture, light and a few clever accents. A cluster of ruby gems becomes dripping blood. A row of silver crystals along a cuticle reads as a vampire’s jewellery box. A single spider charm on a glossy black nail says everything the whole hand needs to say.
Why this trend keeps growing
Looking at what is ranking and trending right now, the pattern is obvious. Halloween nail round-ups from big beauty and lifestyle sites are full of crystal spiders, rhinestone-studded webs, chrome mummies and pink glitter ghosts, while rhinestone nails are having a major moment in general. Three things are driving it.
- It works for people who don’t paint. Gems and charms are stuck on, not drawn on. That makes bling the most beginner-friendly route to a standout Halloween set.
- It photographs beautifully. Costumes, party lighting and flash photography all love a reflective surface. Sparkle catches the light in a way flat polish simply can’t.
- It carries over. A black-and-crystal set looks just as good at a Friday work dinner as it does at a Halloween party. Pumpkin-only nails do not get that second life.
Also Read: Black Halloween Nails
Which Halloween Bling Style Is Right for You?
Before you commit, it helps to match the sparkle to your life. Use this quick table as a shortcut.
| If you are… | Try this bling style | Why it works |
|---|---|---|
| A total beginner | Black base + 5 to 8 scattered rhinestones | Nothing to paint, forgiving placement |
| Working in an office or school | Milky or sheer nails with tiny crystals | Subtle, professional, still festive |
| Going all-out for a costume | Full-cover crystals, charms, 3D elements | Maximum drama, photo-ready |
| On a budget | Press-ons plus a gem sheet | Salon look without the salon bill |
| Short on time | Chrome powder + one accent gem per nail | Done in under an hour |
| Hard on your hands | Short squoval with flat-back gems | Less snagging, less breakage |
The Halloween Bling Toolkit: What Counts as Bling?
Not all sparkle behaves the same. Knowing what each material does saves you money and heartache.
Rhinestones and crystals
The headline act. Flat-back rhinestones come in dozens of sizes (roughly 1mm up to 5mm or more) and shapes: round, teardrop, marquise, square, heart. For Halloween, teardrops and marquise stones are gold. Teardrops mimic blood drops and spider legs; marquise gems look like fangs or claws. Glass crystals throw more fire than acrylic ones, but both work for a short-term set.
Chrome and mirror powder
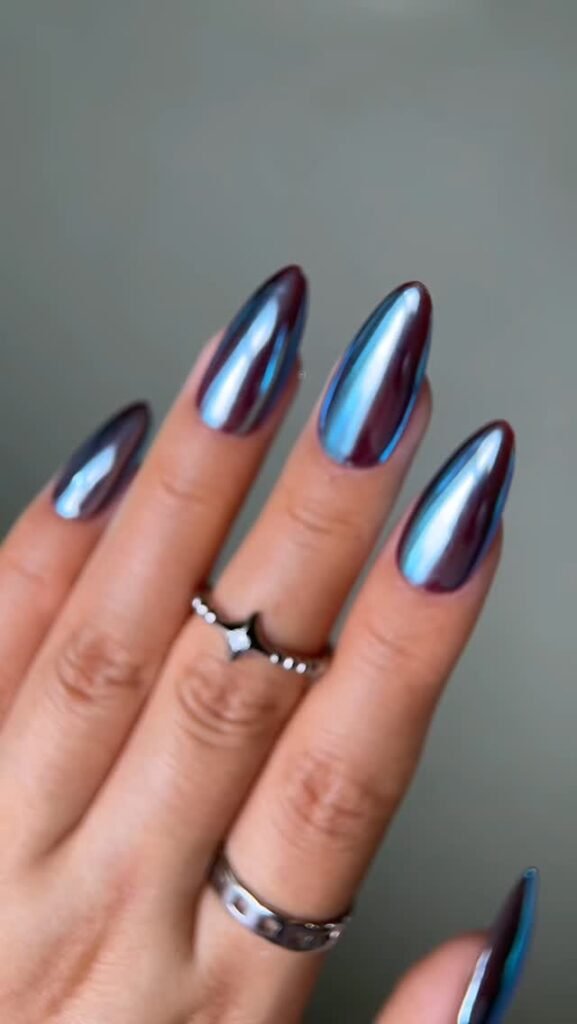
Chrome gives a liquid-metal finish. Silver chrome on a black base looks like moonlight on wet pavement. Gold chrome feels witchy and expensive. Pink and purple chrome are great for “pretty Halloween” looks. It needs a no-wipe gel top coat underneath, so it’s easier with gel than regular polish.
Glitter and holographic flakes
Chunky glitter is party-ready, fine glitter is a softer shimmer. Holographic flakes in orange, black and silver feel like confetti from a haunted ballroom. Use them as ombre tips or a full glitter accent nail.
Pearls and micro-beads
A surprising favourite for ghost and mummy looks. Tiny pearls along a milky white nail instantly say “spooky but sweet.”
Charms and 3D elements
Spiders, bats, moons, skulls, tiny hearts, cobweb studs and dagger shapes. These sit proud of the nail, so they need strong adhesive and a thoughtful placement (one or two per hand is plenty).
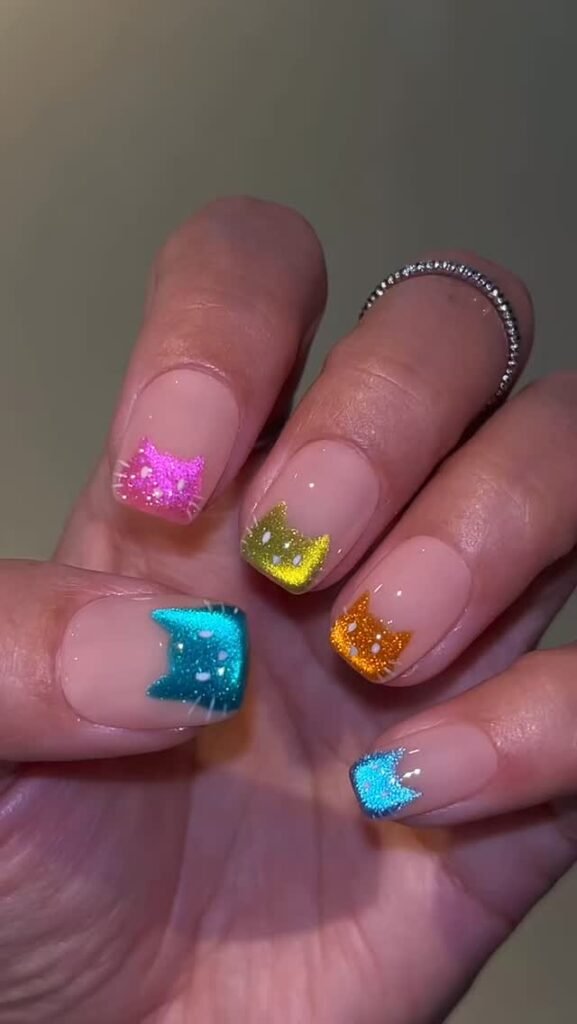
Cat-eye and magnetic gels
Not bling in the strict sense, but a cat-eye finish gives a shimmering, depth-filled base that makes every stone you add look brighter. Plum, emerald and midnight blue cat-eye are perfect for witchy sets.
Must Read : Halloween Cat Eye Nails: 25+ Magnetic Nail Designs (Black, Burgundy, Plum, Gold)
25 Halloween Bling Nail Ideas (Sorted by Vibe)
Here is the fun part. Each idea includes who it suits and a tip so you can recreate it without guessing.
Black and crystal classics
Black is the natural home of bling. It makes every gem look brighter and every metallic look richer.
1. Midnight crystal French A glossy black base with a thin French tip lined in tiny clear rhinestones. It’s elegant, wearable and takes almost no time. Tip: Use 1.5mm stones so the line stays delicate and doesn’t catch on clothes.
2. Matte black with a rhinestone stripe Matte black almond nails with a single row of crystals running down the centre of each nail. The contrast between flat matte and sparkling gems is the whole look. Tip: Keep the stripe on top of a gel layer so you can seal around each stone.
3. Black widow spider charm set Glossy black nails, one silver spider charm on the ring finger, and a tiny red crystal on the spider’s body. Subtle and unmistakably Halloween. Tip: Secure charms with builder gel or a strong nail adhesive, then cure and seal the edges.
4. Gothic cuticle frame Crystals arranged in a crescent along the cuticle line like a tiara. It’s regal, a bit vampire and looks incredible on short nails. Tip: Place the stones on a thin layer of tacky gel and cure only when you’re happy with the curve.
5. Black cat-eye with silver gems A black cat-eye base with a single diagonal band of silver stones. The magnetic shimmer moves as your hand moves. Tip: Run the magnet before you add gems, not after.
Also Read: Halloween Cat Eye Nails
Pumpkin, orange and autumn sparkle
Orange can look dated if it’s too flat. Add metallics and gems and it becomes rich and seasonal.
6. Pumpkin spice shimmer Burnt orange jelly polish with a gold-glitter gradient at the tip and a few amber stones near the cuticle. It looks like caramel in candlelight. Tip: Choose amber and topaz-coloured gems instead of clear ones for a warmer feel.
7. Jack-o’-lantern with gem eyes Orange nails with small black triangle eyes, and a pair of gold rhinestones set in the eyes so they glow. Playful and very photogenic. Tip: Keep the face to one or two accent nails so the set doesn’t feel childish.
8. Candy corn glitter ombre White, orange and yellow bands, each blended with fine glitter and finished with a tiny gem at the point where the colours meet. Sweet, bright and festive. Tip: Sponge the ombre rather than painting stripes for a softer blend.
9. Burnt orange chrome Copper-orange chrome over a black base for a molten, lava-like finish. Add a few black diamond-shaped stones for contrast. Tip: Apply chrome powder with a silicone applicator and press, don’t rub.
Also Read : Pumpkin Nails That Will Make Your Hands The Coziest Part Of Fall
Ghosts, pearls and mummy glam
White and milky tones are having a big moment, and Halloween has quietly borrowed them.
10. Milky ghost French with pearls A sheer milky base, white ghost shapes on two accent nails, and tiny pearls forming the ghost’s eyes. Soft, pretty and office-friendly. Tip: Draw the ghost with a dotting tool: one larger dot, a gentle drag, then wavy edges.
11. “Boo” pearl set Sheer pink nails with a single white pearl at the base of each nail and the word “boo” in thin black lettering on one finger. Cute, not creepy. Tip: Stamping plates make lettering far easier than freehand.
12. White chrome mummy with crystals White chrome nails crossed with thin strips of gauze-effect lines and two tiny black gem “eyes” peeking through. A little humour, a lot of shine. Tip: Use a fine liner brush and work from the centre outward so the bandages look layered.
Purple, green, red and pink: the colour-pop sets
This is where Halloween bling gets truly dramatic.
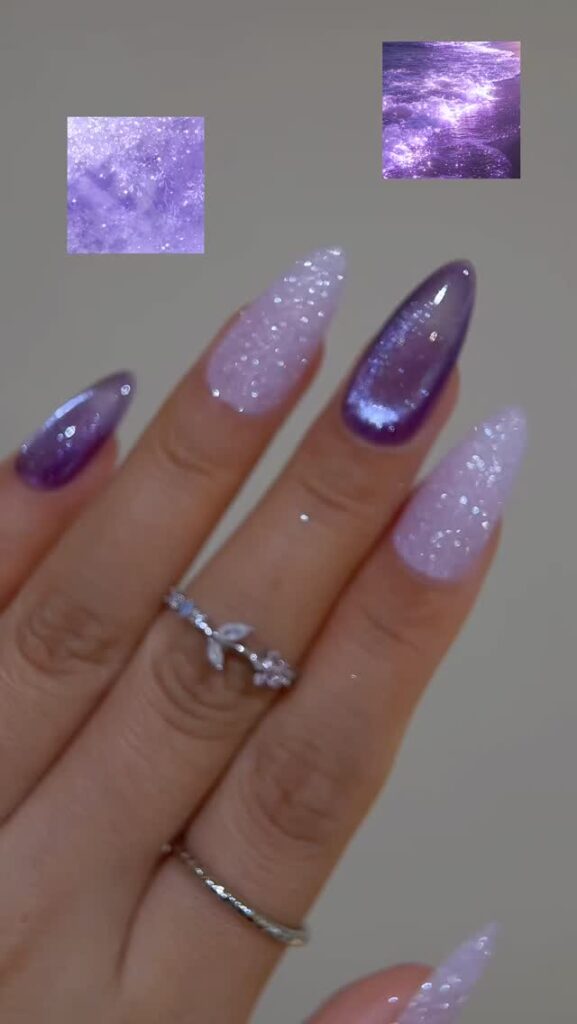
13. Witchy purple aura A deep purple base with a soft blurred aura of lilac in the centre of each nail, and a single crystal teardrop at the cuticle. Mystical and wearable. Tip: Airbrush or sponge the aura and seal it before gems so the colour doesn’t smear.
14. Poison green slime with gems Neon-green drips running down a black base, with a few emerald stones scattered like toxic bubbles. Very Halloween-party. Tip: Make the drips uneven. Perfect symmetry looks fake.
15. Blood drip with ruby teardrops Black or white base with red drips from the cuticle, and a ruby teardrop gem sitting at the end of each drip like a fresh drop. Bold and dramatic. Tip: Use a glossy gel top coat over the drips and a matte coat on the base for contrast.
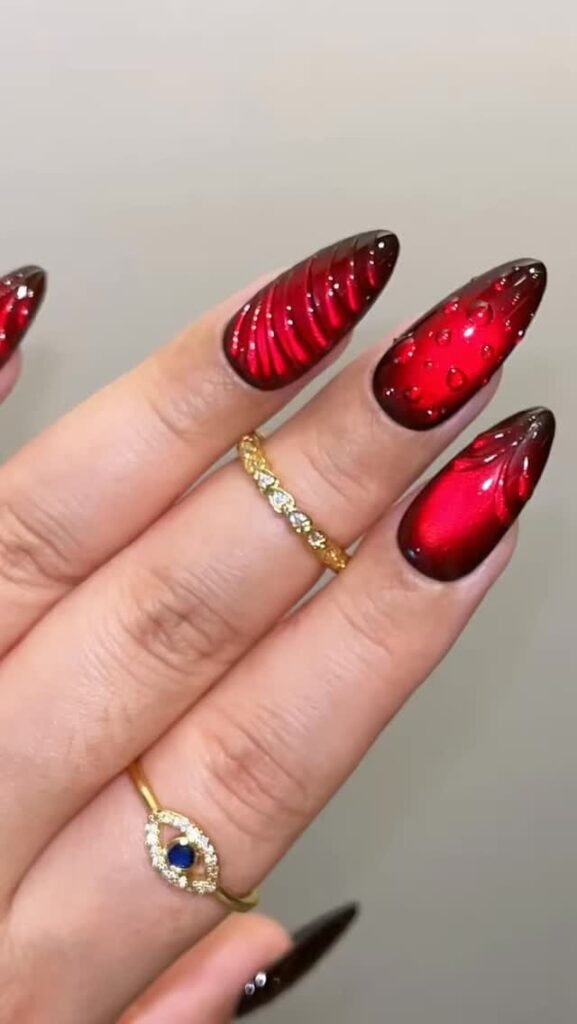
16. Vampire velvet red Deep oxblood velvet nails with a thin line of black crystals at the tips. It’s glamorous, sensual and gothic in the best way. Tip: Velvet powder needs an extra-thin seal around the gems to avoid fuzziness.
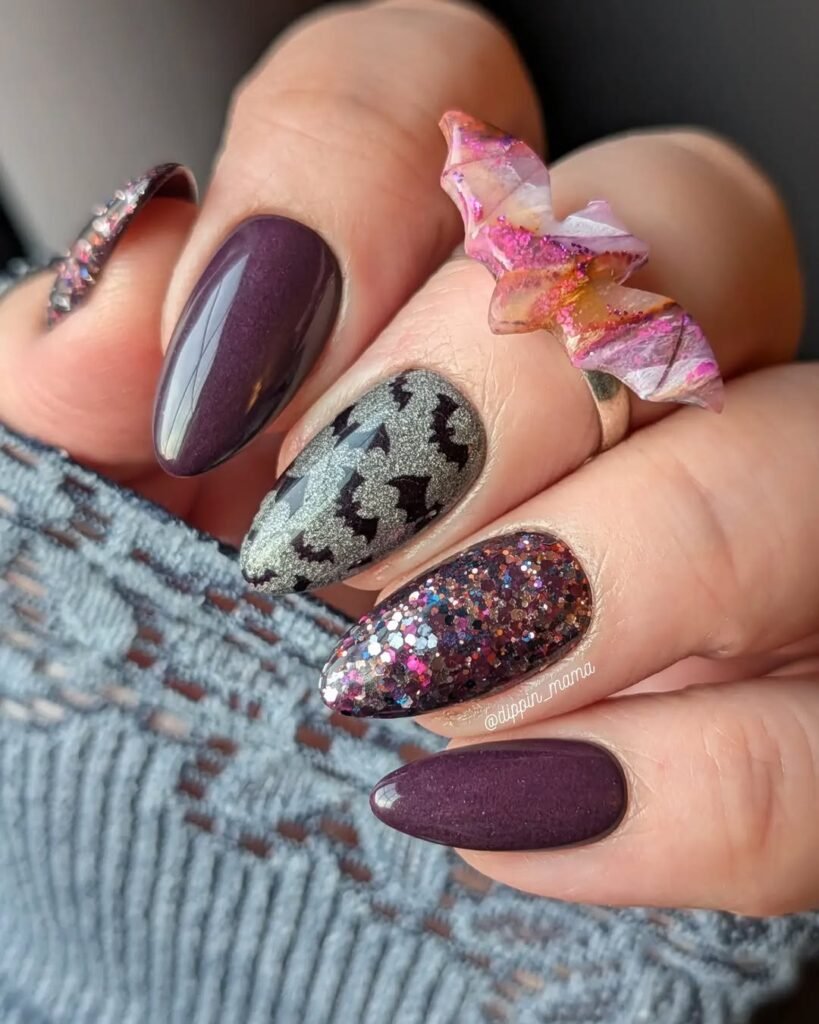
17. Barbie-meets-Halloween pink Pearly pink chrome with tiny black bats and a scatter of pink rhinestones. Pink Halloween looks are a favourite costume pairing, and this one works with everything from a witch hat to a cowgirl outfit. Tip: Keep the bats small and graphic so the pink stays the star.
Celestial, witchy and cosmic
18. Gold moon-phase set Black nails with five crescents in gold foil, one per finger, each moon phase tracked from new to full. Add a tiny star gem at the cuticle. Tip: Apply foil onto tacky gel and press with a silicone tool.
19. Alien crystal chrome Holographic silver chrome with oversized iridescent crystals clustered at the cuticle. It looks like something that fell out of a spaceship. Great for space-themed costumes. Tip: Mix three gem sizes for a natural, mineral-like cluster.
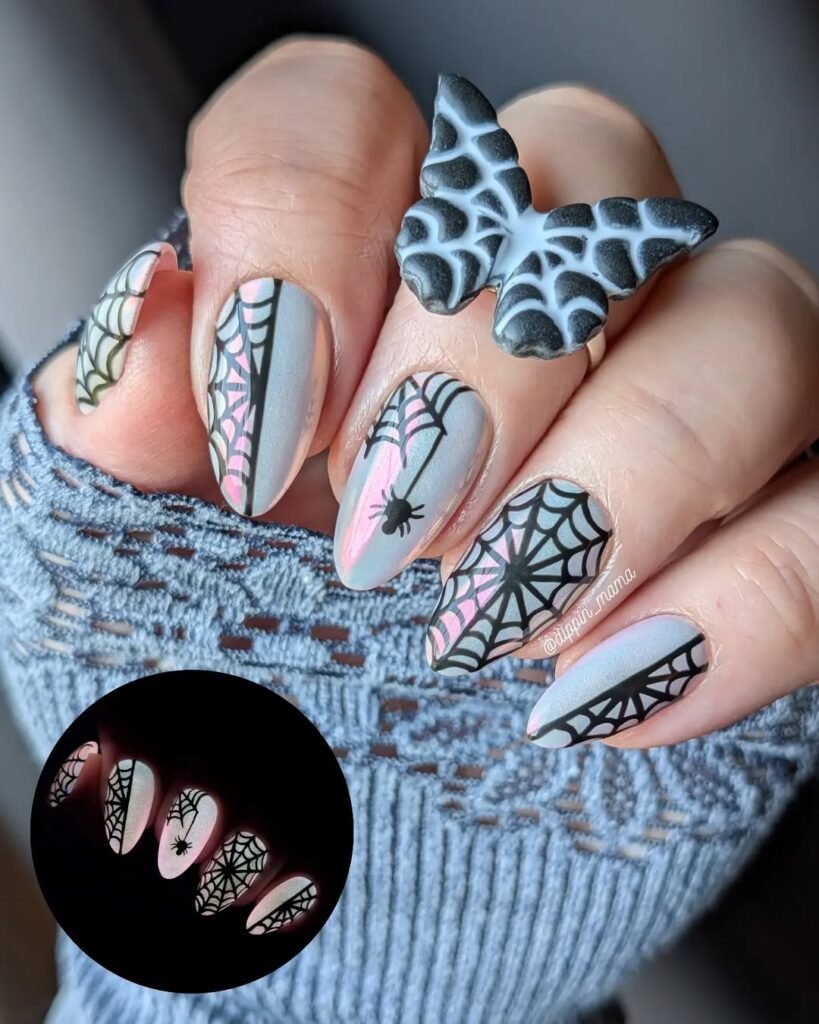
20. Spiderweb with dew-drop gems Thin silver web lines on a smoky grey base, with a tiny rhinestone sitting where two threads cross, like morning dew. Delicate and eerie. Tip: A fine detail brush and gel liner paint give crisper webs than regular polish.
Pop-culture inspired
21. Wednesday-inspired black and silver Long, black coffin nails with silver spider-leg details and a dusting of tiny crystals. Moody, sharp and iconic. Tip: Keep the palette strictly black and silver for maximum effect.
22. Sanderson sisters sparkle Purple, green and orange stripes on three accent nails, with glitter and a few star gems for the magic. Perfect for a Hocus Pocus group costume. Tip: Each friend wears a different sister’s colour palette.
23. Beetlejuice stripes with gems Black and white vertical stripes on every nail, with a green crystal on the thumb and a purple crystal on the ring finger. Chaotic and fun. Tip: Stripe tape gives clean lines in minutes.
Short-nail heroes
Not everyone wants talons. Short nails can carry bling beautifully.
24. Short squoval “starry night” Sheer black jelly with a handful of micro gold stars and mini crystals, spaced like constellations. Practical, wearable and easy to maintain. Tip: Use only 1mm to 2mm stones on short nails to avoid a crowded look.
25. Minimalist crystal ghost One tiny ghost shape on each ring finger, one crystal on every other nail, everything else left clean and milky. It’s the “I’m festive but busy” option. Tip: Less is more here, resist the urge to add extra.
Also Read: Pumpkin Nails
Halloween Bling Nails by Shape and Length
The same rhinestones look completely different on different shapes. Here’s how to match your bling to your nail.
Short nails
Short nails reward restraint. Choose smaller stones (1mm to 2mm), place them at the cuticle or along one edge, and let the base colour shine. Squoval and round shapes are the most comfortable if you type a lot or work with your hands.
Medium almond
Almond is the sweet spot for Halloween bling. The tapered shape elongates your fingers, and the narrow tip is perfect for a single teardrop gem or a tiny French line of crystals. Chrome and cat-eye also show best on almond.
Long coffin and ballerina
Coffin nails give you a wide, flat canvas that’s perfect for blood drips, big charms and cobweb patterns. They’re the most dramatic option, and also the most vulnerable to snags, so use builder gel for strength and seal every gem.
Stiletto and pointed
If you want a truly witchy, villainous look, stiletto delivers. Add a gem at the base and a spike at the tip. Just remember that these are the hardest to wear day to day, so they work best for a single event or a short-term set.
Must Read : Gothic Black and Purple Nails: 25 Dark Ideas, Shade Guide & Step-by-Step How-To
How to Do Halloween Bling Nails at Home: Step-by-Step
You do not need a salon, a UV lamp collection or a steady hand. You need patience, good adhesive and about ninety minutes. This method uses gel polish because it holds gems best, but I have included a regular-polish route too.
What you’ll need
- Nail file and buffer
- Cuticle pusher and cuticle oil
- Alcohol wipes or nail cleanser
- Base coat and a thick, non-wipe gel top coat (or a regular quick-dry top coat)
- Your base colour (black, blood red, pumpkin, plum, whatever you love)
- Rhinestones, charms or glitter
- Rhinestone adhesive gel or builder gel (nail glue works for short-term wear)
- Wax pencil, dotting tool or a damp toothpick for picking up stones
- A small detail brush
- UV/LED lamp for gel
Step 1: Prep like you mean it
Prep is where most home manicures succeed or fail. Push back your cuticles gently, file your nails into your chosen shape, and lightly buff the surface so the base coat can grip. Wipe each nail with cleanser so no oil or dust is left. Gems will not stick to oily nails, no matter how good the glue is.
Step 2: Apply your base coat and colour
Paint a thin layer of base coat and cure it. Apply two thin coats of your chosen colour, curing between each. Thin coats beat thick ones every time: they cure evenly and stay flatter, which gives your gems a sturdy surface to sit on. If you are using chrome powder, add a no-wipe top coat now, cure it, then rub the powder in and seal.
Step 3: Plan your layout before you glue anything
This is the step everyone skips and then regrets. Use the wax pencil to pick up each stone and place it on a dry nail (not yet glued) to see how the design looks. Rearrange until it feels right. For Halloween, odd numbers look best: three stones in a diagonal, five in a crescent, seven in a loose scatter.
Step 4: Add adhesive in small amounts
Place a tiny dot of rhinestone gel or builder gel where the first stone will sit. Do not flood the area. You only need enough to hold the base of the gem. If you are using nail glue instead, work one or two nails at a time because it dries fast.
Step 5: Place and press
Pick up a stone with the wax pencil, set it onto the gel, and press gently. If it shifts, nudge it with a toothpick. Cure the nail under your lamp for the recommended time (usually 30 to 60 seconds for rhinestone gel, check your product). For charms, use a slightly larger dab of builder gel, then cure.
Step 6: Seal around the edges
Here is the trick that keeps bling in place for two weeks instead of two days. Take a small brush and run a thin line of top coat around the base of each stone, not over its face. This locks the edges to the nail without dulling the sparkle. Cure again. Add a little extra seal around charms and anything at the free edge of the nail.
Step 7: Finish and nourish
Wipe away any sticky layer from the nails (skip this over gems), then massage cuticle oil into the skin. Dry skin makes a manicure look unfinished no matter how pretty the nails are.
No gel? Here’s the regular-polish method
You can still wear Halloween bling nails with regular polish. Paint your colour, let it dry fully (at least ten to fifteen minutes), then apply a thick top coat. While that top coat is still wet, set rhinestones in place with tweezers or a wax pencil. Once everything is dry, add another top coat around the edges of each gem. It will not last as long as gel, but it is perfect for a single night out.
Best Colour Combinations for Halloween Bling Nails
Colour choices matter just as much as gem placement. These combos are reliable favourites.
- Black + silver crystals: The ultimate classic. Cool, sleek, endlessly wearable.
- Black + gold: Warmer and more luxurious. Looks especially good with celestial charms.
- Orange + black + amber gems: The traditional Halloween palette, made richer by using warm-toned stones.
- Deep purple + emerald green: Witchy and dramatic, perfect with cat-eye finishes.
- Oxblood red + black crystals: Vampy, seductive and a little dangerous.
- Milky white + pearls + silver: Soft, ghostly and elegant.
- Pink chrome + black accents: Playful and bold, a modern spin on spooky.
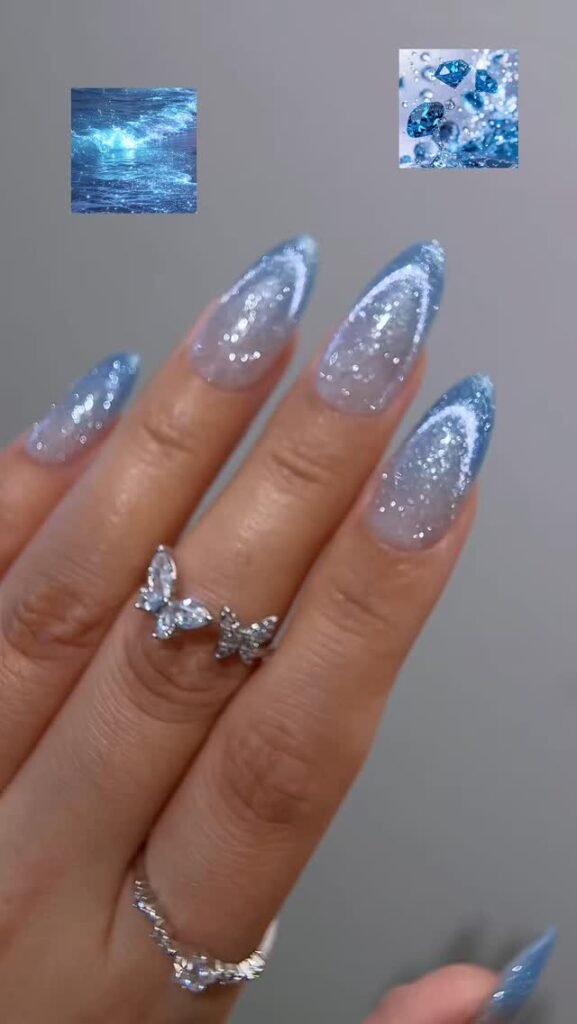
- Smoky grey + iridescent gems: Moody and magical, good for fairy-gothic outfits.
A useful rule: pick one hero colour, one supporting colour, and one metallic. If you are adding more than that, the set starts to feel busy and the sparkle gets lost.
Salon, DIY or Press-On: Which Route Should You Take?
Each method has a place. Here is an honest breakdown.
| Option | Best for | Pros | Cons |
|---|---|---|---|
| Salon | Complex art, 3D charms, long-lasting sets | Professional finish, durable, nail health guidance | Highest cost, needs booking early in October |
| DIY gel | Confident beginners, repeat wearers | Cheaper over time, full control | Needs a lamp, practice and patience |
| DIY regular polish | One-night looks | Low cost, no lamp | Shorter wear, gems can pop off |
| Press-ons | Busy people, costume parties, damaged natural nails | Fast, no damage, reusable | Fit can be tricky, limited custom options |
Booking a salon set
Halloween appointments fill up quickly, often weeks ahead, so book early. Bring two or three reference photos and be clear about how many gems and charms you want. Ask your tech to use builder gel under heavy charms, and mention any daily habits (typing all day, cooking, gym) so they can suggest the right length and shape.
Going the press-on route
Press-ons have come a long way. Many sets now arrive pre-decorated with rhinestones, chrome and 3D details, so you get a salon-style finish in minutes. For the best fit, measure each nail, choose the size that covers the nail without touching the skin, and prep with alcohol before applying. Adhesive tabs are fine for a night out; liquid glue lasts longer for a week or more.
If you want to add your own bling to a plain press-on set, you can. Use a drop of nail glue for each gem, then seal the edges with a thin line of top coat.
Also Read: Candy Corn Nail Ideas
Pairing Halloween Bling Nails With Your Costume
Your nails should feel like part of the outfit, not an afterthought. Here are easy pairings.
- Witch: Deep purple or emerald cat-eye nails with gold moon and star gems.
- Vampire: Oxblood red or black with ruby teardrop gems and silver accents.
- Ghost or angel: Milky white with pearls, soft glitter and silver stones.
- Cat or panther: Black cat-eye, sharp almond shape, tiny silver paw or star charms.
- Skeleton: Black and white with a crystal stripe down each bone-white nail.
- Alien or space traveller: Holographic chrome with oversized iridescent crystals.
- Pop-culture duo or group: Each person wears a different colour from the same palette.
- No costume: Black-and-crystal minimalism, which suits every outfit in your wardrobe.
If you are wearing a lot of makeup or face paint, keep your nails simpler so the look feels balanced. If your costume is fairly minimal, let your hands do the talking.
Placement Tips That Make Bling Look Expensive
Good bling nails look intentional. Bad ones look like someone dropped a jewellery box. Here is how to land on the right side.
- Follow the nail’s natural lines. Place stones along the cuticle, the free edge or a diagonal. Random scatter can work, but lines and curves look more polished.
- Use graduated sizes. One larger stone, two medium and a few tiny ones create a natural focal point.
- Choose one hero nail. The ring finger is the classic spot. Let it carry the most detail while others stay simpler.
- Avoid the sides of the nail. Gems at the sides snag on hair and sleeves. Keep them on the centre or near the tip.
- Mix finishes. Matte base, glossy gems, a touch of chrome. Contrast is what makes sparkle pop.
- Leave breathing room. Negative space makes bling look more expensive. You do not need to cover every millimetre.
Common Halloween Bling Nail Mistakes (and How to Fix Them)
Using too much glue. Excess adhesive pools around the stone and looks cloudy. Use a tiny dot and wipe away overflow with a clean brush before curing.
Skipping the seal. Without sealing the edges, gems catch on fabric and pop off. A thin ring of top coat around each stone solves this.
Putting heavy charms on thin nails. Charms need a strong base. If your nails are weak, use builder gel or a hard gel overlay first.
Choosing stones that are too big. Large gems look dramatic in photos but are annoying in real life. Reserve them for one or two nails.
Ignoring nail health. Constantly gluing and soaking nails dries them out. Take breaks between sets and use cuticle oil daily.
Doing it all at the last minute. Chrome, gems and gel all need time. Give yourself a full evening, or do it the day before the party.
How to Make Your Halloween Bling Nails Last
A good set should survive two weeks. Here is how to protect it.
- Wear gloves for chores. Dish soap and cleaning products wear down top coat and loosen adhesive.
- Use your fingertips, not your nails. Opening cans, scratching labels and popping soda tabs are the main culprits behind lost gems.
- Oil your cuticles daily. It keeps the skin healthy and reduces lifting around the edges.
- Do not pick or peel. If a gem pops off, glue it back immediately instead of waiting for it to snag again.
- Carry a mini repair kit. A tiny pot of gel adhesive or a bottle of nail glue and two spare stones can save a party.
Removing bling safely
Never pry stones off. Soak a cotton pad in acetone, wrap it around each nail with foil, and wait ten to fifteen minutes. Gently slide the softened product away with a cuticle pusher. For heavily decorated sets, ask a nail tech to remove them professionally. Follow with a rich cuticle oil and a hand cream, and consider a nail-strengthening treatment for a week or so.
Budget Guide: What Will Halloween Bling Nails Cost?
Prices vary by country and salon, so treat these as general guidance rather than fixed numbers.
- DIY starter kit: A handful of rhinestone sets, adhesive, a wax pencil and a top coat is usually the cheapest entry point. If you already own gel polish and a lamp, you can build a full set for the cost of a few gem packs.
- Press-on sets: Mid-range. They cost more than a bottle of polish but far less than a salon appointment, and you can often reuse them.
- Salon sets: The most expensive, especially with 3D charms, hand-painted art and long nails. Expect to pay extra for each charm or intricate design.
If you are saving money, spend where it matters: good adhesive and a strong top coat. Cheap stones are fine; cheap glue is not.
Also Read : Candy Corn Nail Ideas That Will Make Your Halloween Manicure Irresistibly Sweet
Trends to Watch This Halloween Season
If you want your set to feel current, these themes keep showing up in nail galleries and salon menus.
- Chrome everything. Silver, pink and aura chrome appear in nearly every Halloween round-up, often paired with tiny crystals.
- Soft and spooky. Milky bases, pastel ghosts and pearl accents appeal to people who want festive without the gore.
- Cat-eye and velvet textures. Depth and shimmer make simple colours look luxe.
- Spiderweb remix. Instead of black on white, think silver on smoky grey, or sheer webs over chrome with a crystal at each crossing.
- Pop-culture nods. Horror favourites, witchy sisters and gothic icons continue to inspire accent nails.
- Mix-and-match sets. Each finger gets a different design, tied together by a shared colour palette and one repeating gem.
Final Thoughts: Let the Sparkle Do the Haunting
Halloween bling nails prove that you do not need to be an artist to wear gorgeous seasonal nails. You just need a plan, a few good materials and the confidence to add one more crystal than feels sensible. Start with a simple black base and a handful of stones. Practise the placement, seal the edges, and build up to charms, chrome and drips as you get comfortable.
Most of all, have fun with it. Halloween is the one time of year when more is more, and nobody will blink if your hands are the sparkliest thing in the room. Save your favourite designs from this list, show your nail tech or gather your supplies, and get ready to spook in style.
What are Halloween bling nails?
Halloween bling nails are spooky-season manicures that use sparkly elements like rhinestones, crystals, chrome, glitter and charms as the main event, rather than painted nail art.
What colours work best for Halloween bling nails?
Black is the most flexible base because it makes gems and metallics stand out. Other great choices include blood red, deep purple, pumpkin orange, emerald green, milky white and pearly pink. Pair your base with silver, gold, clear or coloured stones depending on the mood you want.
How do I stop rhinestones from falling off my nails?
Prep your nails properly, wipe away all oil, and use a dedicated rhinestone gel or builder gel instead of regular polish. Place stones on a small dot of adhesive, cure them, and then seal around the edges with a thin line of top coat. Avoid hot water, picking and heavy-duty chores for the first day or two.
Can I do Halloween bling nails without a UV lamp?
Yes. Use regular polish with a thick top coat and place your gems while the top coat is still wet, or use nail glue for individual stones. Press-on nails are another good option. Regular polish and glue will not last as long as gel, but they are fine for a single night or a weekend.
How long do Halloween bling nails last?
A well-done gel set with sealed gems can last around two weeks, sometimes longer with careful wear. Press-ons last one to two weeks, while regular polish with glued gems is best for a single night or a weekend.
Are Halloween bling nails suitable for short nails?
Absolutely. Use smaller stones (about 1mm to 2mm), keep the placement near the cuticle or along one edge, and choose a short squoval or rounded shape.
What is the easiest Halloween bling nail design for beginners?
A black gel base with five to eight scattered rhinestones, or a single accent nail with a spider charm, is the easiest place to start. You do not need to paint anything, and the result still looks polished and festive.
Can I wear Halloween bling nails to work or school?
Yes, if you choose a subtle version. Go for milky or sheer bases with tiny crystals, a delicate French tip, or a minimalist ghost accent. Avoid oversized charms and extremely long shapes if your workplace has specific rules or you use your hands a lot.
How do I remove rhinestones and gel nails at home safely?
Soak cotton pads in acetone, place them on each nail, and wrap each finger in foil for ten to fifteen minutes. Gently push off the softened product with a cuticle pusher, never pulling or prying. Finish with cuticle oil and hand cream. If your set has heavy builder gel or lots of charms, a salon removal is safer.
How early should I book a Halloween nail appointment?
Book as early as you can, ideally two to three weeks before Halloween, because popular nail techs fill up quickly in October. Bring reference photos, state how many gems or charms you want, and ask whether the price includes custom art.

One Comment