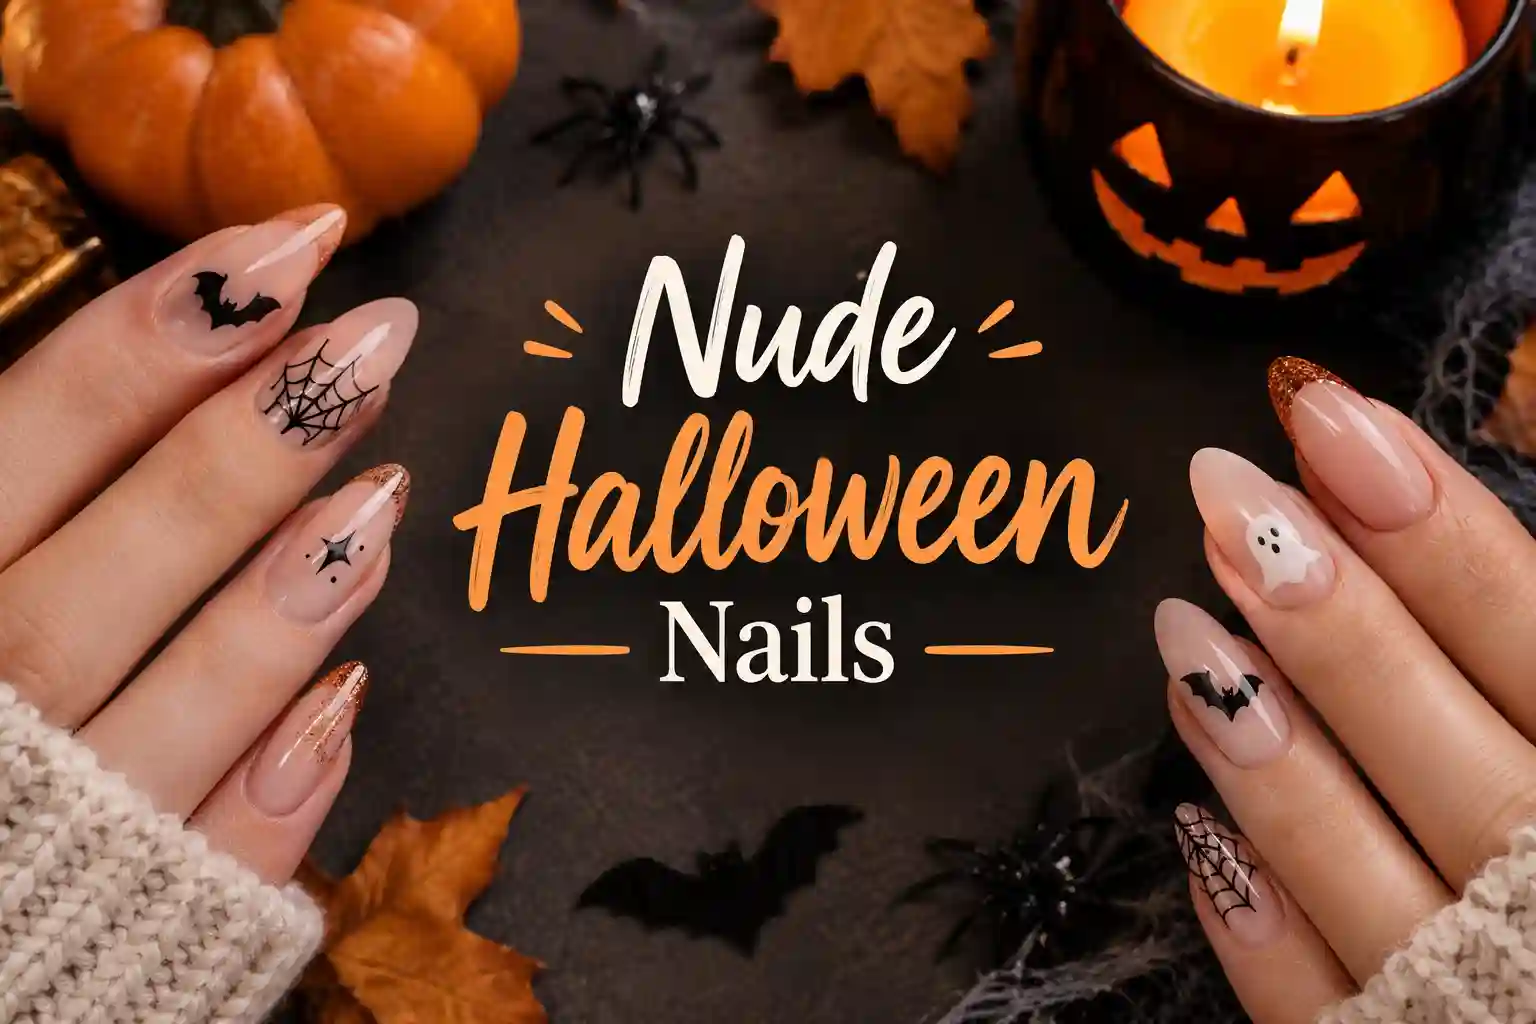
Nude Halloween Nails: 37 Chic, Subtle & Spooky Ideas
Let’s be honest: not everyone wants to walk around all October with jet-black coffin claws and 3D spiders crawling over their knuckles. Maybe you work in an office where a full horror set would raise eyebrows. Maybe you’re a teacher, a nurse, or a parent who gets pulled into a dozen school parties. Or maybe you just love the clean, expensive look of a milky, skin-tone manicure and you refuse to give it up because the calendar says spooky season.
That is exactly where nude Halloween nails come in. They take the soft, polished base you already love and add just enough ghosts, webs, drips, moons or pumpkins to say “yes, I know what day it is” without shouting it. From across the room, you look elegant. Up close, someone leans in and whispers, “Wait, is that a tiny ghost?” That small moment of discovery is the whole charm.
Also Read : Halloween Bling Nails: 25 Spooky Sparkle Ideas, Step-by-Step Tutorial and Pro Tips
Halloween is only days away, so this guide is built to be useful right now. Below you’ll find 37 nude Halloween nails ideas, grouped by mood so you can jump straight to your style. You’ll also get a practical guide to choosing the right nude for your skin tone, the best shapes and lengths, simple step-by-step tutorials you can do at home tonight, a press-on versus gel versus acrylic comparison, outfit pairing tips, and a straight-talking section on making your manicure last and coming off safely. Ten FAQs wrap everything up.
Grab a coffee (or a pumpkin spice something) and let’s get into it.
What Are Nude Halloween Nails?
Nude Halloween nails are simply manicures built on a neutral, skin-tone-friendly base (think sheer beige, blush, milky pink, soft taupe, warm caramel or a barely-there tint) and finished with one or more Halloween details. The base does the heavy lifting of looking polished. The spooky part is the accent.
Those accents usually fall into a few families:
- Creatures and characters: ghosts, bats, black cats, spiders, skeletons.
- Dark details: cobwebs, blood drips, stitches, splatters.
- Mystic touches: moons, stars, eyes, witchy points.
- Autumn colors: pumpkin orange, burnt rust, burgundy, deep forest green.
- Glam extras: chrome, glitter, rhinestones, gold foil.
The beauty of this approach is flexibility. You can go barely-there (one tiny bat on one finger) or fairly dramatic (long almond nails with red chrome drips and a full web). The nude base keeps everything cohesive either way. It also forgives mistakes. If a ghost comes out slightly wonky on a dark base, it looks like a flaw. On a nude base, it looks charming and hand-painted.
Why Nude Halloween Nails Are Everywhere This Year
If you’ve scrolled through nail inspiration lately, you’ve probably noticed the same shift we have. The loud, all-black, all-orange look hasn’t disappeared, but the “soft spooky” trend has clearly taken over a lot of feeds. Sheer nude or blush bases with tiny ghosts, mini pumpkins and scattered bats are showing up on salon menus, press-on brands and creator pages alike.
There are a few reasons it keeps winning:
1. It fits real life. Most of us can’t wear a costume manicure to a client meeting. Nude Halloween nails slide into work, school and family dinners without comment.
2. It lasts past October 31. A manicure with a nude base and a few seasonal touches can be tweaked into a fall manicure the next day. Swap the ghost for a gold leaf and you’re set for Thanksgiving.
3. It suits short nails. Tiny details and negative space look intentional on short natural nails. You don’t need long extensions for a design to feel finished.
4. It’s beginner-friendly. Because you’re only decorating a few nails, and the details are small, you can do most of these looks at home with a dotting tool and a thin brush.
5. It photographs beautifully. A neutral canvas makes black, white, red and gold details pop, which is a big deal when your nails are going to end up in your Instagram stories.
In short, nude Halloween nails let you join the fun without committing your whole hand to it.
How to Pick the Right Nude Shade for Your Skin Tone
This is the part most Halloween nail roundups skip, and it’s the part that makes the biggest difference. The wrong nude can make your hands look washed-out or chalky. The right one makes them look smooth, healthy and a little glowing. Since your nude is the star of the show, choose it with care.
Start with your undertone
Look at the veins on your inner wrist in natural light.
- Blue or purple veins: you likely have a cool undertone. Rosy, pinkish, mauve-leaning nudes tend to look best.
- Green veins: you likely have a warm undertone. Peachy, caramel, golden-beige and honey nudes tend to flatter.
- A mix of both: you’re probably neutral, which means you can wear almost anything. Soft beiges and balanced taupes are your friend.
This isn’t a perfect science, and plenty of people sit somewhere in between. The real test is simple: paint one nail, step near a window and look.
Quick shade guide by skin depth
| Skin depth | Nudes that tend to flatter | Halloween details that pop |
|---|---|---|
| Very fair | Sheer pink, soft peach, milky white-pink | Black fine lines, deep red drips, silver |
| Fair to light | Blush, ballet pink, light beige | Black, burgundy, orange, gold |
| Light-medium / olive | Warm beige, soft taupe, peachy nude | Dark green, rust, black, gold |
| Medium / tan | Caramel, honey, warm mocha-nude | White ghosts, chrome silver, deep plum |
| Deep | Rich caramel, cinnamon, chestnut, warm brown-nude | White, bright orange, gold, metallic copper |
Treat that table as a starting point, not a rulebook. Nude means your nude.
Must Read : Vintage Halloween Nails: 30 Nostalgic Ideas, Color Palettes and Easy Tutorials
Sheer versus opaque
A sheer nude (sometimes called a jelly or milky finish) lets a hint of your natural nail show through. It looks soft and natural, hides growth lines better, and makes white designs like ghosts look gently translucent. Sheer pinks like the ones often used for the ghost-and-pumpkin looks you’ll see online are popular for exactly this reason.
An opaque nude gives you full, even color in one or two coats. It’s a better canvas if you want crisp, graphic detail, or if you want to hide ridges or staining. If you’re doing chrome or glitter on top, opaque usually behaves more predictably.
A quick finish note
Glossy nude feels fresh and classic. Matte nude looks moody and a bit gothic, especially with black or burgundy details. A satin or “velvet” top coat sits in between and photographs very well. For Halloween, matte details on a glossy base (or the reverse) is a neat trick that adds depth without extra color.
Best Nail Shapes and Lengths for Nude Halloween Nails
Good news: almost every shape works. Still, some shapes show off certain designs better than others.
Short round or squoval. Practical, durable and ideal for micro designs like a single ghost or a thin web corner. If you type all day, start here.
Short to medium almond. This is the sweet spot for nude Halloween nails. The tapered shape elongates fingers, and the sheer base looks especially elegant. Ghost French tips and drip tips sit beautifully on almond.
Square or squoval, medium length. Great for flat, graphic art such as black French tips or full spiderwebs. Square gives you a wide canvas to work with.
Oval. A soft, ladylike option that suits celestial designs, pumpkins and delicate line art.
Coffin or ballerina. Better if you want drama. Long nude coffin nails with red drips or skeleton hands feel dramatic without needing a dark base.
Stiletto. The most theatrical choice. A nude stiletto with a thin black web or blood-red tip reads as elegant horror rather than costume.
A small practical tip: if you’re doing very tiny details, choose a shape with a flatter nail plate. Extremely curved nails can distort fine lines, so take your time and rotate the finger as you paint.
37 Nude Halloween Nails Ideas to Try This Year
Here’s the main event. Each idea includes what it looks like, how to approach it, and who it suits. Scan the section headings and jump to the mood you’re in.
Cute and Ghostly Nude Halloween Nails
Ghosts are the gateway drug of Halloween nail art. They’re friendly, they’re simple, and they look best on a pale, soft base.
1. The Single Accent Ghost Paint all nails in a sheer nude, then add one small white ghost on the ring finger. Use a dotting tool for the rounded head and drag down for the body, adding a wavy hem. Two black dots make the eyes. That’s it. This is the easiest entry point into nude Halloween nails, and it works for office days, school pickups and last-minute parties.
2. Ghost French Tips Instead of a classic white smile line, form tiny ghost shapes along the nail tips, with the wavy edges pointing toward the cuticle. Add little black faces on one or two nails only, so the set stays subtle. Best on short almond or oval nails in a milky nude base.
3. Peekaboo Ghosts Paint a small white ghost so it appears to peek up from the bottom edge of the nail or sneak out from behind the cuticle. This design plays with negative space, so it looks especially smart on a sheer beige base. Keep the other nails plain.
4. Glazed Chrome Ghosts Apply a pearly chrome powder over a nude base for that “glazed donut” shine, then add a raised or outlined ghost in white gel. It’s neutral but a little futuristic, and it works well for people who want texture rather than color.
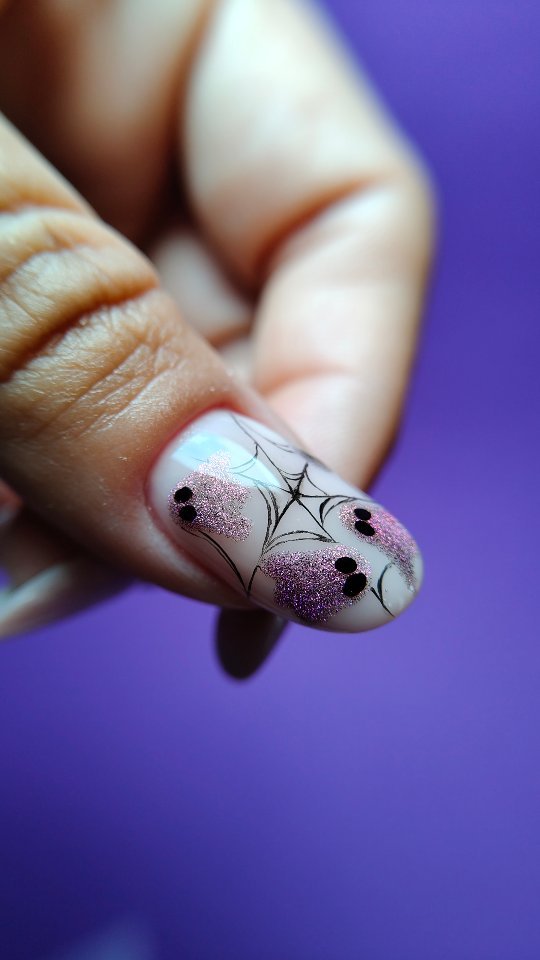
5. Tiny Ghost Scatter Instead of one big ghost, scatter four or five micro ghosts across an accent nail, with the others left bare. Mix in a black star or two. It’s the kind of “soft spooky” detail that looks cute without looking childish.
Read Must : Halloween Cat Eye Nails: 25+ Magnetic Nail Designs (Black, Burgundy, Plum, Gold)
6. Minimalist Ghost Line Art Use a thin black gel liner to draw a ghost outline with a single wavy line and two dot eyes, with no white fill. The nude base shows through the ghost, which feels modern and artsy. Ideal if you like gallery-style nails.
Also Read: Black Halloween Nails
Spiders and Webs on Nude Halloween Nails
Cobwebs are the classic Halloween nail motif, and they look surprisingly refined when they’re drawn in fine lines over a neutral base.
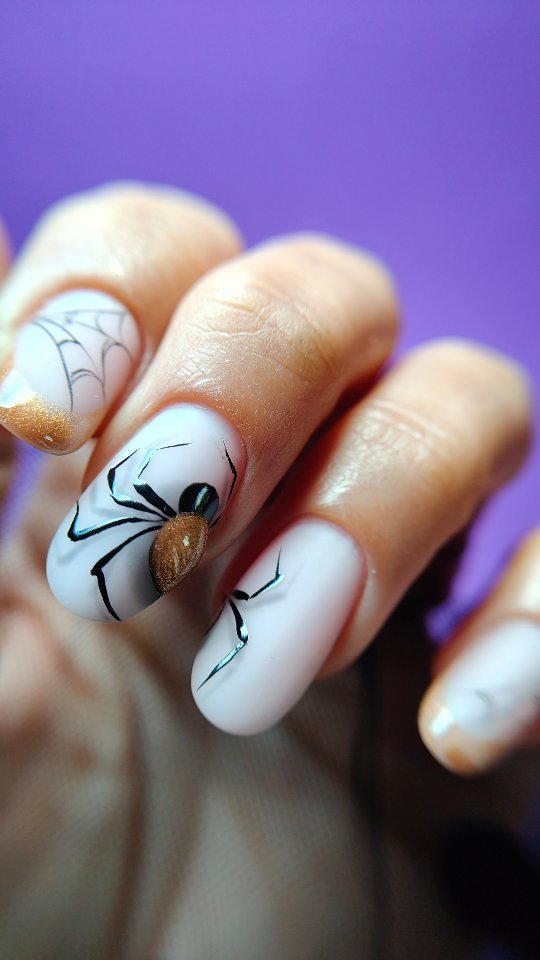
7. Fine-Line Web on Sheer Nude Draw a delicate black web from one corner of the nail using a thin striper brush. Start with three or four lines radiating from the corner, then connect them with soft curves. Keep the lines thin. The more delicate the web, the more elegant it looks. This one is a true classic and an easy win for beginners.
8. Silver Glitter Spiderweb Paint a web in silver glitter gel or foil instead of black. Against a nude or blush base, it reads as glamorous rather than creepy. It catches the light as you move your hands, which is perfect for party nights.
9. Micro Spider French Tips Paint thin black French tips (or orange ones for a seasonal twist) and place tiny spiders on one or two nails. Use a dotting tool for the body and a fine brush for four or six wispy legs. Keep them small and spaced out so the manicure stays soft.
10. Girly Gold Spider Nails On a soft nude-pink base, paint little metallic gold spiders and a few gold stars. It’s a feminine take on spider nails, very “spooky but make it pretty.” Gold is also lovely on warm and deeper skin tones.
11. Raised 3D Spiders Build up a tiny black gel spider using a thick gel or sculpting product, then cure and finish. Place it on a single accent nail on a clean nude base. The raised texture catches attention instantly. Just remember that 3D art can snag on hair and sweaters, so keep it to one or two nails.
12. Half-Web Corner Accent Paint two nails black and the others nude, then add a corner web on the nude ones. The contrast between nude and black gives the manicure a graphic, gothic look without covering every nail in dark polish. Good for people who love monochrome.
Blood Drip and Horror-Lite Nude Halloween Nails
Want a hint of horror without full gore? These designs are the answer. A nude base makes red details look sharp and intentional.
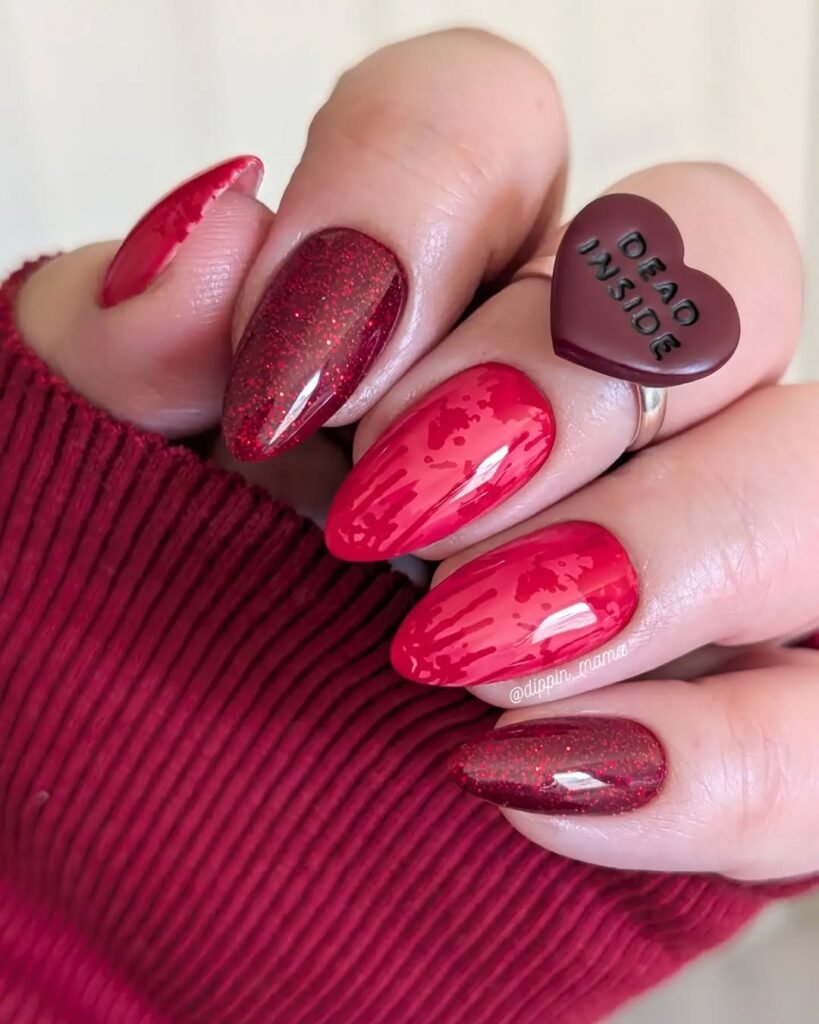
13. Classic Blood Drip French Paint a sheer nude base, then add a fine red line at the tip and let little drops fall toward the cuticle. Vary the length of the drips so they look natural. This design is subtle, chic and instantly recognizable as Halloween. Use a deep, slightly brownish red for a more realistic look, or a bright red for a more playful vibe.
14. Single-Nail Splatter Keep every nail clean and nude except one, then flick a few tiny red droplets across it with a dotting tool or a splatter brush. From a distance you’d almost mistake it for a plain nude manicure. Up close, it’s a delicious little surprise.
15. Red Chrome Drip Swap the matte red for a mirror-finish red chrome. The drips look wet, glossy and expensive. This works beautifully on longer almond or coffin nails and shows off best in bright light.
16. Scream-Inspired Mask Accent Paint four nails with a nude base and a thin black French tip, then hand-paint a simple elongated white mask on the ring finger. Add black outlines and a hint of shadow. It nods to horror movies without taking over the whole set.
17. Stitched Frankenstein Tips On a nude base, paint soft green tips (or mint green for a pastel vibe), then draw thin black cross-stitches along the tip line. The result is a playful twist on the French manicure that looks quirky but not messy.
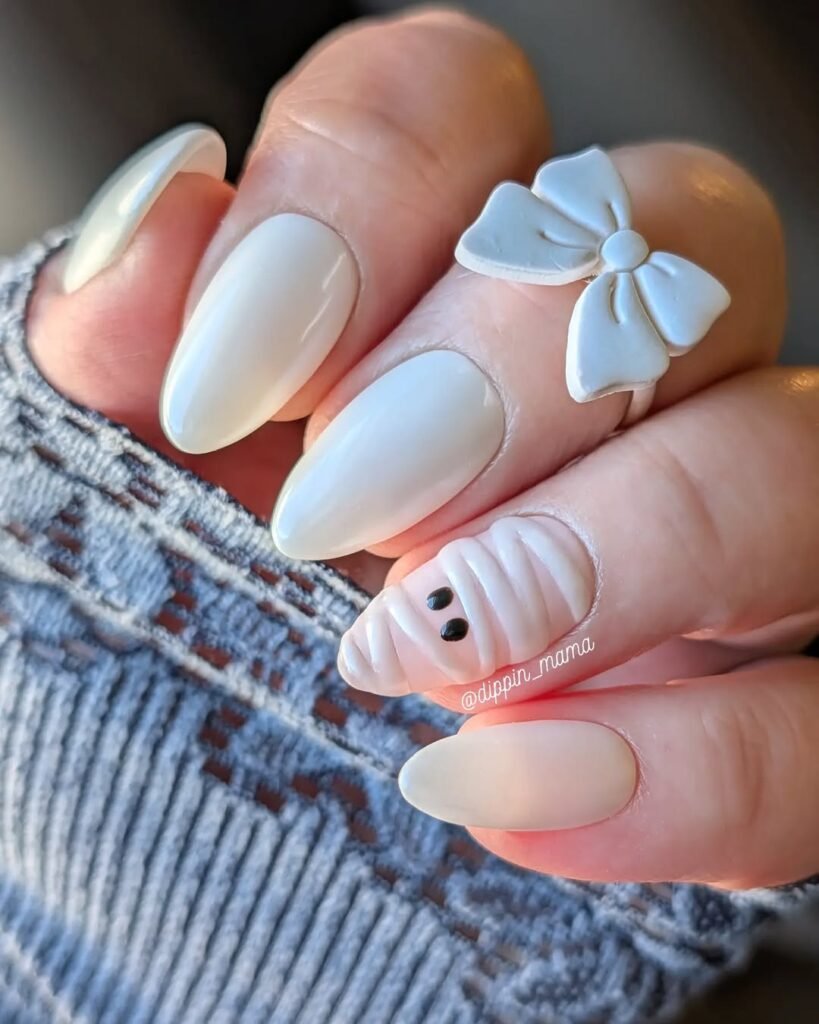
18. Mummy-Inspired Chrome Wraps Paint thin diagonal bandage lines over a nude or chrome base, leaving small gaps so the base shows through. Add two little dot eyes peeking out of the gap on an accent nail. The chrome adds a modern feel, and it’s a fun nod to the classic mummy costume.
Witchy and Celestial Nude Halloween Nails
If ghosts feel too cute and blood feels too much, the night sky is a lovely middle ground. Moons, stars and cats look delicate on neutral polish.
Also Read : Pumpkin Nails That Will Make Your Hands The Coziest Part Of Fall
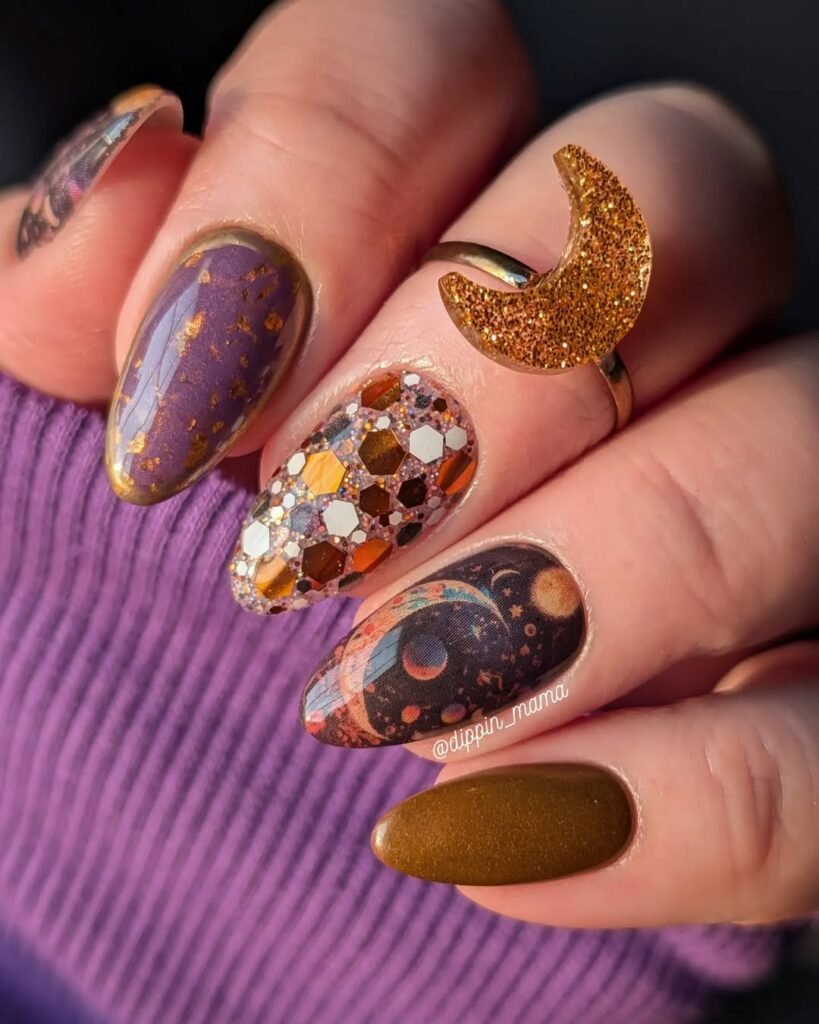
19. Moons and Stars Scatter Paint tiny black crescent moons and stars across a sheer nude manicure, with a few gold dots in between. Keep the placement uneven, as if someone flicked stars across the sky. It feels mystical, soft and surprisingly sophisticated, and it’s one of the easiest looks to adapt after Halloween.
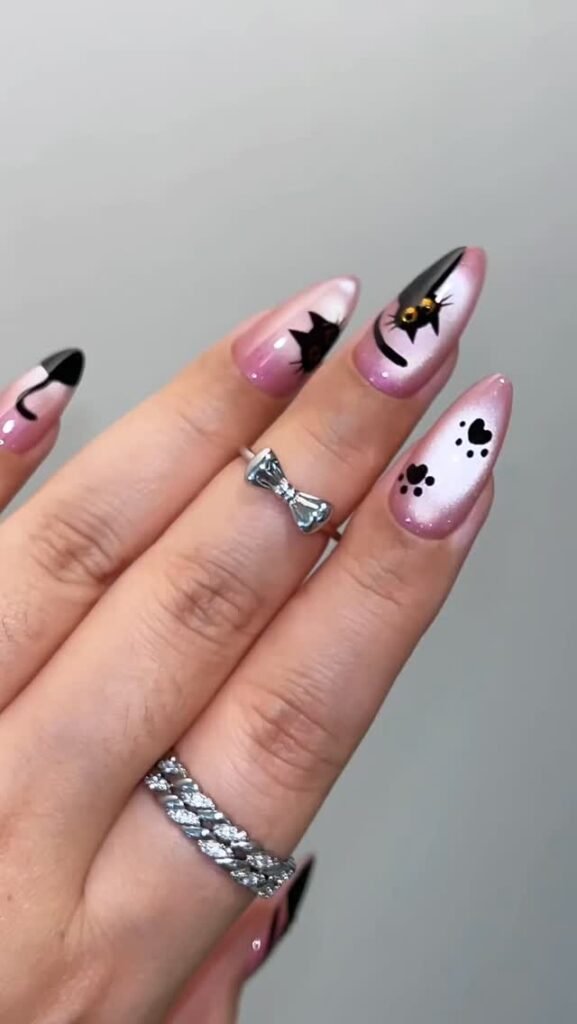
20. Black Cat Silhouette A nude manicure with a tiny black cat silhouette on one accent nail is quietly adorable. Paint the body as a small rounded shape, add two pointed ears, a thin tail, and a crescent moon behind it if you’re feeling ambitious. Short nails love this one.
21. Midnight Bats Draw two or three small bats mid-flight on one nude accent nail using simple curved wing shapes. Don’t overthink it. A bat is basically a tiny black “M” with a body. Add a hairline black tip on the other nails to tie everything together.
22. Witchy Triangle Tips Place tape on each side of the nail, meeting in the middle to form a triangle, then fill with black or deep plum. Peel the tape and you have a pointed, witch-hat-inspired French tip that gives a sharp illusion even on short nails. This is an old trick and still an excellent one.
23. The Evil Eye Accent Paint a stylized eye on one accent nail: an almond outline, a black pupil, a ring of iris in gold or deep blue, and a white highlight. Everything else stays nude. It’s mystical, a bit gothic, and ties in nicely with silver or gold jewelry.
Pumpkin and Autumn Nude Halloween Nails
Not every Halloween manicure needs black. If you’re more of a cozy-season person, these designs lean into the harvest side of the holiday.
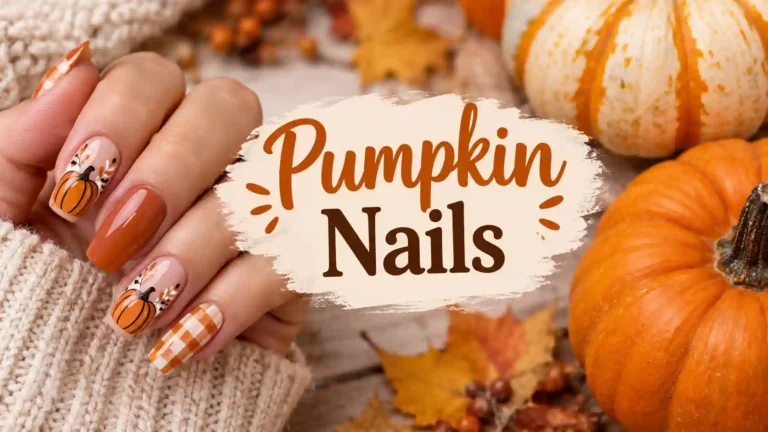
24. Micro Pumpkin Scatter Paint a few tiny orange pumpkins across a nude base, each with a small green stem and a couple of curved lines to suggest segments. Space them out like confetti. This is one of the most wearable designs because it works for the entire fall season.
25. Orange Micro French Paint very thin orange tips over a sheer nude base, then place a tiny black spider or star on one or two nails. It’s a clever way to add that classic Halloween orange without committing to a full orange set.
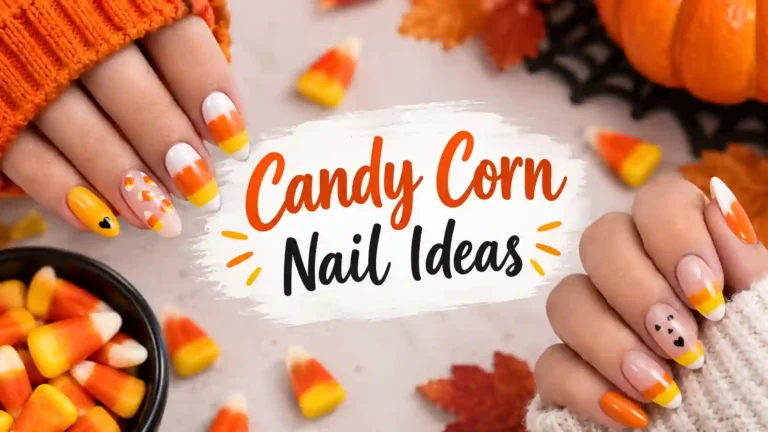
26. Candy Corn Ombré Blend yellow, orange and white into a soft gradient, either as a tip or a vertical band across the nail. Keep the nude base visible on at least a few nails so it doesn’t become too sugary. A sponge makes the blending easy.
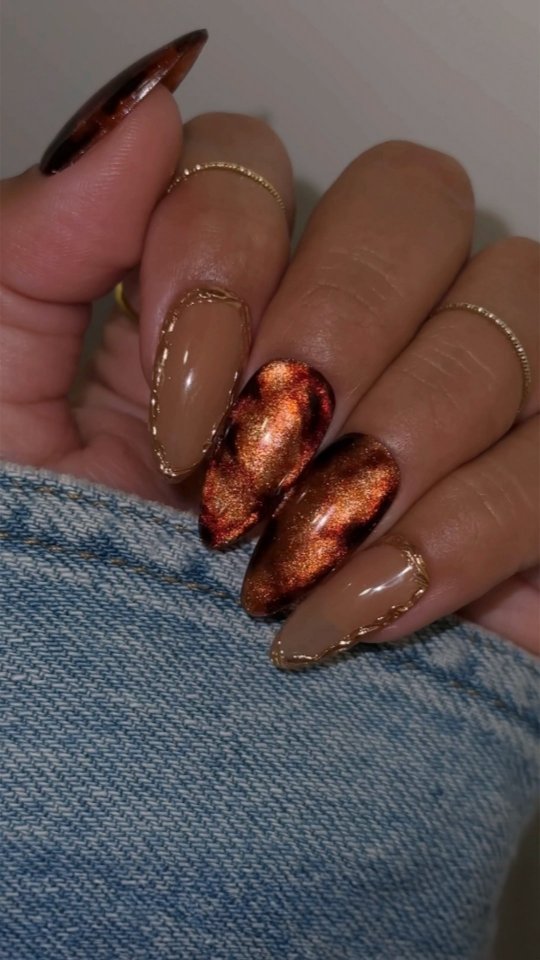
27. Pumpkin Spice Gold Details Choose a warm, latte-colored nude and add thin gold lines, tiny gold flakes and one little pumpkin on an accent nail. The result feels like a cozy fall sweater in manicure form.
28. Burnt Orange Gradient Blend a rusty, burnt orange up from the tip into a nude base so it fades out around the middle of the nail. It’s softer than a full orange set and gives you that warm sunset effect. Great for deeper skin tones, where the contrast looks rich.
Dark-Meets-Nude Halloween Nails
These are for you if you like your Halloween with a little more shadow. The nude base keeps the look balanced, so dark tones feel intentional rather than heavy.
29. Glossy Black French Tips Trade the usual white tips for glossy black, painted nice and thin, on a sheer nude base. Add a tiny web or a star on one nail if you’d like. It’s sleek, modern and wearable all year round, which makes it the best value on this list.
30. Burgundy Accent Nails Paint two or three nails in deep burgundy or wine, and leave the rest nude. The contrast gives you a moody, vampy look, and wine tones are universally flattering. Add a thin gold line on one nail for extra polish.
31. Smoky Nude-to-Black Gradient Blend a soft black or charcoal up from the tips, fading into a nude base. Add subtle sparkle or tiny gems for a “midnight web” effect. It looks elegant and eerie at the same time, which is exactly the point.
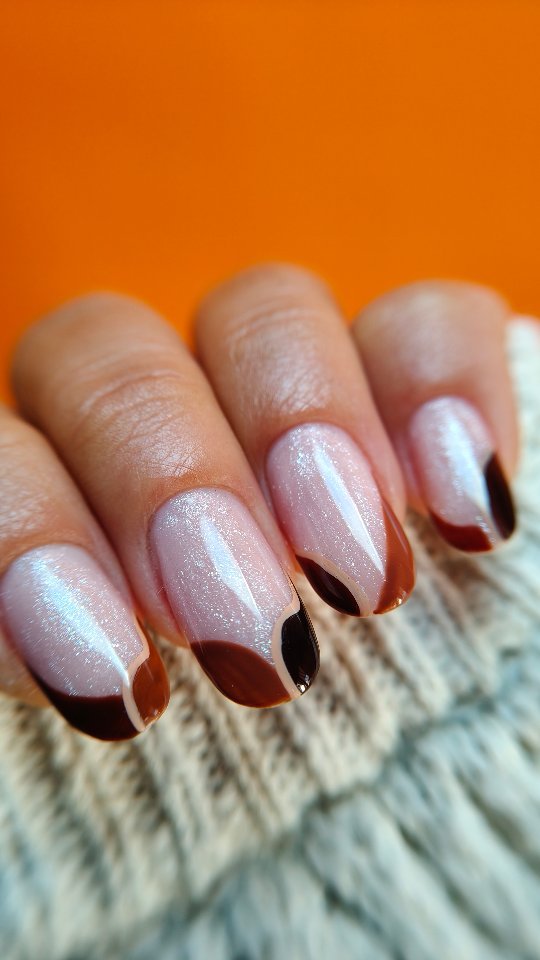
32. Chocolate Brown and Nude Dark doesn’t have to mean black. A matte chocolate brown paired with a warm nude feels moody but softer against many skin tones. Add one tiny bat or ghost in cream and you’re done.
33. Emerald Glitter Tips and Web Paint emerald green glitter French tips over a nude almond nail, then add a delicate black web on one or two fingers. Green can feel unexpected for Halloween, which is precisely why it looks so fresh.
Also Read: Candy Corn Nail Ideas
Glam and Statement Nude Halloween Nails
Sometimes you want the nails to be the outfit. These ideas bring drama while keeping the nude foundation.
34. Rhinestone Spiderweb Place tiny clear or black rhinestones along the lines of a fine web, with one larger crystal at the center. The sparkle makes the web look like it’s covered in dew. It’s a showstopper for parties and photos.
35. Skeleton Hand Accent Paint a simplified skeleton hand in white across one black or nude accent nail, drawing thin bones along each finger. Keep the remaining nails nude so the skeleton hand stands out. It’s dramatic, graphic and very Halloween.
36. Red and Black Aura Accent Blend a soft red and black aura effect onto one or two nails, leaving the rest in clean nude. The glowing, smoky edges look modern and moody, and they pair beautifully with chrome powder.
37. Halloween Confetti Nude On a sheer nude base, scatter tiny ghosts, pumpkins, bats, stars and spiders concentrated near the tips. Keeping the artwork small and clustered near the tips stops the manicure from feeling busy. It’s a great option if you can’t pick just one motif.
Nude Halloween Nails for Short Nails
If your nails are short, congratulations: you’re in an excellent position. Nude and short is already a flattering combination, and Halloween details are naturally small.
Keep the details tiny. One micro ghost, three little stars, a hairline web. On short nails, small is not a limitation, it’s the aesthetic.
Use negative space. Let the nude show. Leaving most of the nail bare gives the art room to breathe, and it makes the nail bed look longer.
Choose vertical elements. Drips, thin lines and tall ghosts draw the eye upward and visually lengthen fingers.
Stick with one or two accent nails. Decorating every nail on a short set can look crowded. Choose the ring finger and middle finger, or the ring finger and thumb, and keep the others simple.
Pick a sheer color close to your nail bed. A shade that’s similar to your natural nail makes the nail bed appear longer and cleaner.
The best short options from the list above: 1 (single ghost), 7 (fine-line web), 14 (single-nail splatter), 19 (moons and stars), 20 (cat silhouette), 24 (micro pumpkin scatter) and 29 (black French tips).
Press-On, Gel, Acrylic or Regular Polish? Which Is Best?
The “right” method depends on your time, budget and how long you need the manicure to last. Here’s an honest comparison.
| Method | Typical wear | Best for | Watch out for |
|---|---|---|---|
| Regular polish | 3–5 days | Quick, cheap, beginner-friendly looks | Smudging, chipping, longer dry time for nail art |
| Gel polish (salon or at-home lamp) | 2–3 weeks | Neat detail, durable art, glossy finish | Needs a UV/LED lamp and careful removal |
| Acrylic or builder gel extensions | 3–5 weeks with fill-ins | Length, shape changes, 3D art | Higher cost, needs professional skill |
| Press-on nails | 1–2 weeks (longer with glue) | Last-minute parties, damage-free trials | Fit and sizing, glue choice |
When regular polish makes sense
If Halloween is a single-evening event, regular polish is perfect. Choose a quick-drying nude, allow plenty of time between layers, and finish with a fast-dry top coat. Use acrylic paint or nail art polish for details, because it’s easier to control than standard bottle polish.
When gel is worth it
Gel gives you crisp lines, glossy depth and weeks of wear, and you control curing time so you can fix mistakes before they set. If you’re planning intricate nude Halloween nails like webs, drips or skeleton hands, gel is the friendliest medium.
When to go press-on
With Halloween only days away, press-ons are a lifesaver. Many brands now offer short almond sets with a sheer nude base and a few Halloween accents, like black French tips with tiny spiders, ghost details or red drips. They’re ideal if you can’t get a salon appointment or if you want to avoid prolonged exposure to products. Measure your nails carefully, prep the nail surface properly, and choose the right adhesive for your timeline: adhesive tabs for a few days, nail glue for a week or more.
When to book a nail tech
Book a professional if you want sculpted length, true 3D art, a flawless chrome finish or a complex hand-painted design. Bring a few reference photos, tell them how much art you want, and ask about the nude shade that works best for your skin. A good tech will mix or suggest something that looks natural on you.
How to Do Nude Halloween Nails at Home (Step by Step)
You don’t need to be a nail artist to pull off nude Halloween nails. You need a steady hand, a little patience and a few inexpensive tools. Here’s how to set yourself up and three beginner-friendly tutorials.
Your simple toolkit
- A nude polish or gel in a shade you love (sheer and opaque if you can)
- Base coat and a good glossy or matte top coat
- A dotting tool, or a toothpick or bobby pin as a stand-in
- A thin striper or detail brush
- Black and white nail art polish or gel paint
- A little red for drips and splatters
- A small palette (foil, a plastic lid or a scrap of paper)
- Cotton swabs and a little acetone or cleanup brush for tidying edges
- A UV/LED lamp if you’re using gel
Prep matters more than art
Before any design, do the basics. Push back your cuticles gently, shape your nails, buff away shine so polish grips, and wipe the surface with a lint-free wipe. Apply a thin base coat, then two thin coats of your nude. Thin coats cure or dry more evenly and reduce the risk of bubbling or smudging. Let everything dry (or cure) fully before you start drawing on top.
Must Read : Gothic Black and Purple Nails: 25 Dark Ideas, Shade Guide & Step-by-Step How-To
Tutorial 1: The simple ghost
- Apply your nude base and top coat, then let it dry completely. If you’re using gel, cure it, wipe off the sticky layer if needed, and keep the lamp handy.
- Place a small dot of white on your palette. Dip a dotting tool in it.
- Press the dot near the center of the nail. Drag it straight down about a third of the nail length to form the ghost’s body.
- With a clean thin brush, add two or three little wave bumps at the bottom for the ghost’s hem.
- Add two black dots for eyes (and a tiny oval for a mouth if you want a surprised ghost).
- Seal with a top coat, being careful not to drag the white into the nude.
Pro tip: Draw your ghost slightly smaller than you think you need to. Tiny ghosts look intentional and chic. Large ones start to look like clipart.
Tutorial 2: The fine-line corner web
- Start with a fully dry, top-coated nude manicure.
- Dip your thin brush in black and wipe off the excess on the palette. Too much paint makes thick, clumsy lines.
- Draw three or four lines that start from one corner of the nail and fan outward.
- Connect those lines with soft, curved, slightly sagging arcs, working from the corner outward.
- Add a tiny dot at the corner for a spider if you’d like.
- Let it dry fully and finish with a top coat. A matte top coat on the web only (with glossy on the rest) is a nice textured detail.
Pro tip: Hold your painting hand steady by resting your pinky on the table. It makes a huge difference for fine lines.
Tutorial 3: The blood drip tips
- Apply your nude base and top coat, and let it dry.
- Dab a small bead of red on your palette and use a detail brush or dotting tool.
- Paint a thin red line along the nail tip, following the smile line.
- Pull a few drips down from the line, varying the lengths. Add a tiny round bead at the end of each drip to make it look wet.
- Add a small drop of white to red for a highlight if you want a glossy 3D look, or dab a tiny clear gel drop on top.
- Seal with a glossy top coat and avoid touching the drips while they set.
Pro tip: Uneven drips look more natural than even ones. If you make them all the same size, it starts to look like a fringe.
Fixing mistakes
Wobbly line? Dip a thin brush in a little acetone or cleanup solution and tidy it up before it fully dries. With gel, wipe the uncured design off with a lint-free wipe and redo it. A nude base is forgiving, and a slightly imperfect ghost has plenty of personality.
What to Wear With Your Nude Halloween Nails
Because they’re neutral, these nails pair with almost anything, but a bit of planning makes the whole look feel intentional.
For a costume: Match the details to your character. Black cat ears? Choose the black cat silhouette. A vampire or Dracula look? Go for burgundy and blood drips. Ghost costume? Ghost French tips are a no-brainer. A witch outfit pairs well with moons, stars and witchy triangle tips. Skeletons and skulls suit the skeleton hand accent.
For a Halloween party in regular clothes: A black dress, leather jacket or all-black outfit makes ghost and web designs pop. Silver or gold jewelry echoes metallic details on the nails.
For the office: Choose a single ghost, a fine web, a black French tip or a micro pumpkin. They’re subtle enough to look professional and still festive.
For date night: Burgundy accents, a smoky nude-to-black gradient or rhinestone webs feel romantic and a little dangerous.
For family events and trick-or-treating: Pumpkin scatters, tiny ghosts and candy corn ombré are friendly and fun. They also hide chips well, which helps if you’re carrying buckets and sticky candy.
For a night at a theme park or haunted event: Short, practical nails in sheer nude with small details hold up better than long extensions that may snag or break.
How to Make Your Nude Halloween Nails Last
A good manicure can last a long time if you treat it kindly. These habits help:
- Cap the free edge. When applying polish or gel, run the brush lightly along the tip of the nail to seal it. It reduces chipping.
- Use a quality top coat. Reapply a thin layer of regular top coat every few days if you’re wearing regular polish.
- Wear gloves for chores. Hot water, detergents and cleaning products shorten the life of any manicure.
- Moisturize your cuticles. Cuticle oil keeps the skin and nails flexible and your manicure looking fresh.
- Don’t use your nails as tools. Opening cans, scraping labels and prying things apart is the fastest route to a broken nail.
- Avoid long soaks. Extended time in hot baths or pools can loosen press-ons and soften polish.
How to Remove Halloween Nails Safely
The temptation to peel is real, especially once the holiday is over. Please resist it, because peeling polish, gel or press-ons can take layers of your natural nail with it and leave nails thin and sensitive.
Regular polish: Use a gentle remover and cotton pads. Hold the pad on the nail for a few seconds before wiping, so the glitter and dark pigments loosen.
Gel polish: File off the shiny top layer lightly, soak cotton pads in acetone, place them on the nails, wrap each finger with foil and wait about 10 to 15 minutes. The gel should lift easily. Push it away gently with a cuticle pusher and avoid scraping hard. If it doesn’t lift, soak again rather than forcing it.
Press-ons: Soak your fingertips in warm soapy water with a little cuticle oil, then slide a cuticle stick gently under the edges to loosen the adhesive. If you used glue, a bit of acetone around the edges can help. Never yank them off.
Acrylics or builder gel: Go back to your nail tech for removal. It’s safer and often faster.
Afterwards, apply cuticle oil and a rich hand cream, and give your nails a day or two to rest before the next manicure.
Common Mistakes to Avoid With Nude Halloween Nails
Picking a nude that fights your skin tone. If your hands look gray, yellow or washed-out, the base is wrong. Swatch before committing.
Doing too much. Five different motifs on one hand can make the manicure feel chaotic. Choose two or three, and give them space.
Using thick paint for detail. Too much polish makes lines clumsy and slow to dry. Wipe your brush on the palette and use thin layers.
Skipping the top coat. Without a top coat, hand-painted details can wear off in a day or two and the nude base can stain.
Rushing the base. If your nude hasn’t dried or cured fully, drawing over it will drag and smudge the color. Wait.
Forgetting the edges. Leaving the tip unsealed leads to early chips. Always cap the free edge.
Going too large with ghosts and pumpkins. Small details feel elevated. Big ones can feel childish unless that’s the mood you’re going for.
Read Also : Neon Orange Nail Ideas: 35 Bold Designs, Shade Tips and Pro Tricks
After Halloween: How to Reuse Your Nude Manicure
One underrated perk of a nude base is how easily it can transition into the rest of the fall. Once Halloween passes, you can add a gold foil flake or two over the ghost to turn it into a shimmer detail, cover the spooky accent nails with a deep burgundy or chocolate polish, or simply remove the art and keep the nude on the rest of the nails. If you’re wearing gel, a skilled tech can paint over the accent nails without redoing the whole set, which saves time and money.
Final Thoughts on Nude Halloween Nails
Nude Halloween nails prove that spooky season can be subtle. They’re wearable at work, forgiving for beginners, kind to short nails and easy to turn into a fall manicure when the candy is gone. Whether you choose one small ghost, a fine-line web, a blood drip French or a full confetti of mini motifs, the nude base keeps everything looking polished and intentional.
Now pick your nude, grab your brush and have fun. Happy Halloween!
What are nude Halloween nails?
Nude Halloween nails are manicures that use a neutral, skin-tone-friendly base such as sheer beige, blush, milky pink or caramel, decorated with subtle Halloween details like ghosts, webs, blood drips, bats, moons or tiny pumpkins. They’re a softer alternative to full black-and-orange sets and work well for school, work and everyday life.
What nude shade is best for Halloween nails?
The best nude is the one that flatters your skin tone. Fair skin often looks best in sheer pinks and soft peaches, medium and olive skin in warm beiges and caramel, and deeper skin in rich caramel, cinnamon and chestnut-based nudes. Swatch a nail in natural light before you commit. Sheer finishes feel soft and natural, while opaque nudes give a crisper canvas for detailed art.
What Halloween designs look best on a nude base?
Ghosts, fine-line spiderwebs, blood drip French tips, moons and stars, black cat silhouettes, bats and micro pumpkins all look great on nude. The neutral background makes black, white, red and gold details stand out. If you’re unsure, a single accent ghost or a thin black French tip is a safe, stylish place to start.
Can I do nude Halloween nails on short nails?
Absolutely. Short nails are a great canvas for small details like a single ghost, a corner web or a handful of tiny stars. Use negative space, keep the art minimal, and stick to one or two accent nails. A sheer nude close to your natural nail color will also make short nails look longer and cleaner.
Are nude Halloween nails appropriate for work or school?
Yes, that’s one of their biggest advantages. Designs like a micro ghost, a fine web, a black French tip or a small pumpkin look polished and professional while still being festive. If your workplace has stricter rules, keep the art to one nail or choose a tiny detail near the tip.
How do I make nude Halloween nails at home?
Prep your nails, apply a base coat and two thin coats of nude polish or gel, and let them dry or cure fully. Then add small details using a dotting tool and a thin brush: a dot-and-drag ghost, a few curved lines for a web, or a thin red line with drips for blood. Finish with a top coat and cap the free edge. Practice on a nail tip or piece of foil first if you’re nervous.
Are press-on nails a good choice for Halloween nails?
Yes, especially if you’re short on time. Many press-on sets come in sheer nude bases with ghost, spider or blood drip details, and they can be applied in minutes. Measure your nails properly, prep the surface, and choose adhesive tabs for a few days or nail glue for longer wear. Remove them gently with a soak rather than pulling.
How long do Halloween nails last?
Regular polish usually lasts three to five days, press-ons about one to two weeks depending on adhesive, gel manicures roughly two to three weeks, and acrylic or builder gel extensions three to five weeks with fill-ins. Prep, sealing the free edge, using a good top coat and protecting your hands during chores can all extend wear.
What colors go well with nude for Halloween?
Black and white are the classics, followed by deep red, burgundy, pumpkin orange, emerald green, chocolate brown, silver and gold. Black gives a gothic edge, red adds a dramatic touch, orange feels cozy and seasonal, and metallics add glamour. Pick one or two accent colors rather than all of them at once.
Can I wear my nude Halloween nails after October?
Yes. That’s one of the best things about them. Simple designs like black French tips, moons and stars or burgundy accent nails look just as good in November. If you have ghosts or spiders you don’t want to keep, you can paint over those accent nails or remove the art and keep the nude base for a clean fall manicure.