
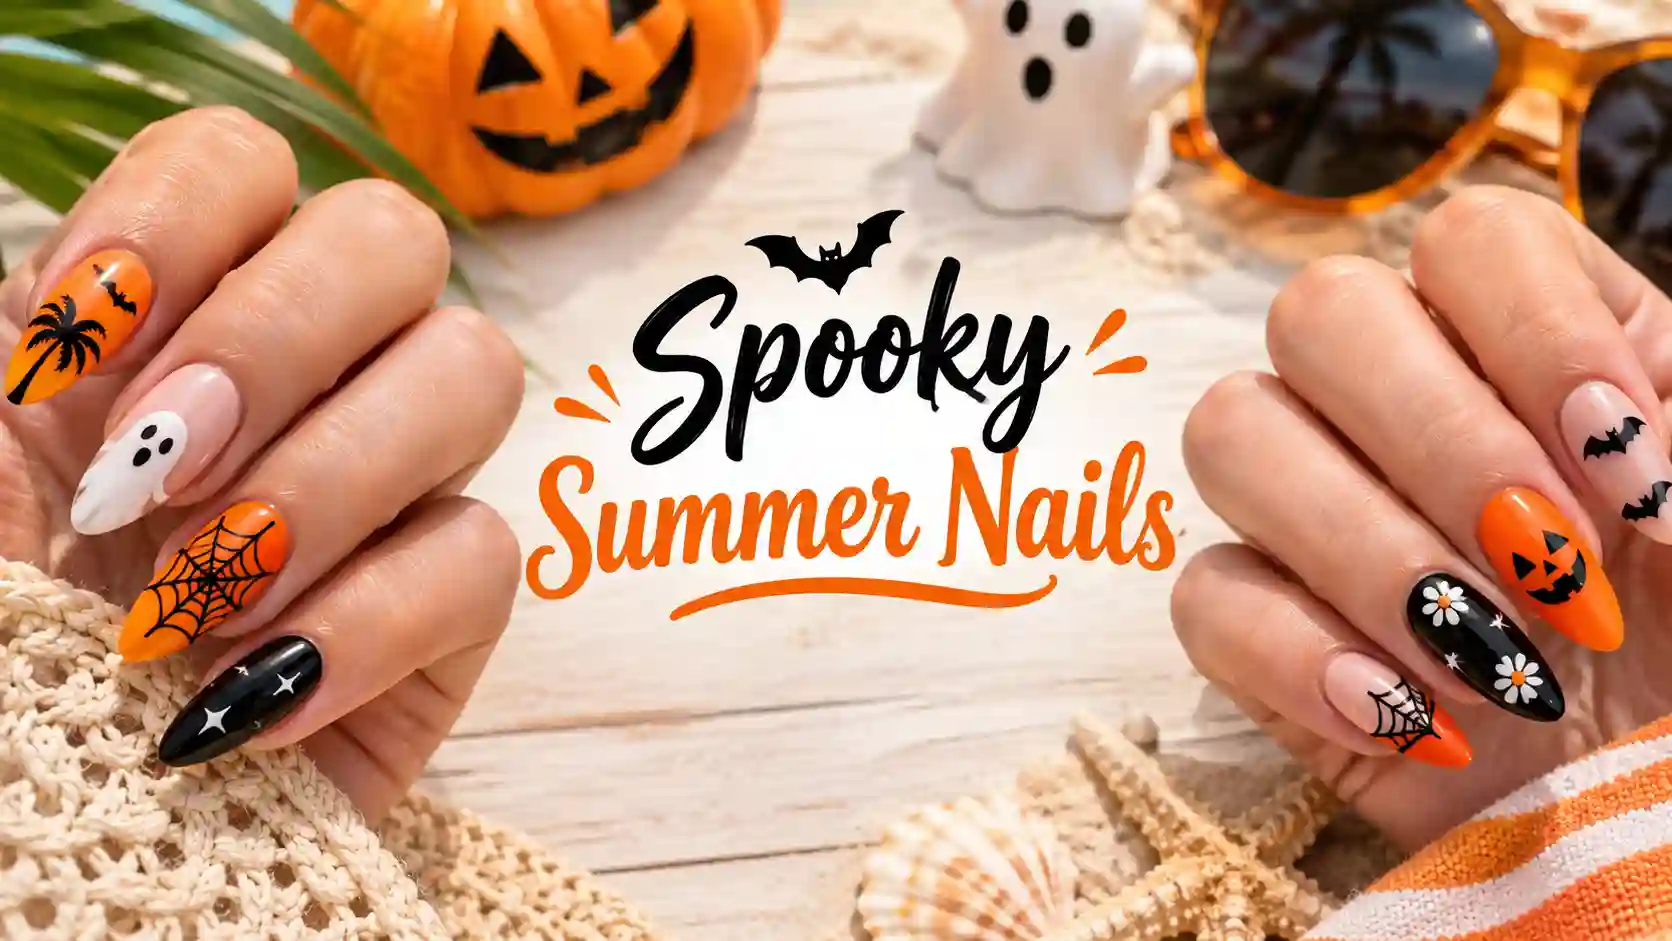
Spooky Summer Nails: The Bold New Manicure Trend Mixing Sunshine With A Hint Of Eerie Charm
Every so often a nail trend comes along that completely breaks the rules of what a season is supposed to look like, and spooky summer nails are exactly that kind of trend. When clients first started asking me for this look, I will admit I was a little surprised. Spooky designs usually belong to October, and summer usually means bright florals, tropical colors and beachy pastels. But once I actually painted my first set, I completely understood the appeal.
Spooky summer nails take the eerie, moody elements people usually save for Halloween, things like tiny bats, cracked textures, deep purples and blood red accents, and blend them with the bright, sun soaked color palette of summer. The result is something unexpected, a little edgy and honestly a lot of fun to create.
I have been painting nails professionally for years, and I can say this is one of the more creative requests I get, especially from clients who love alternative fashion or simply want something different from the typical summer manicure everyone else is wearing. In this guide, I am going to walk you through everything I know about spooky summer nails, based on real appointments and real experimentation in my own chair.
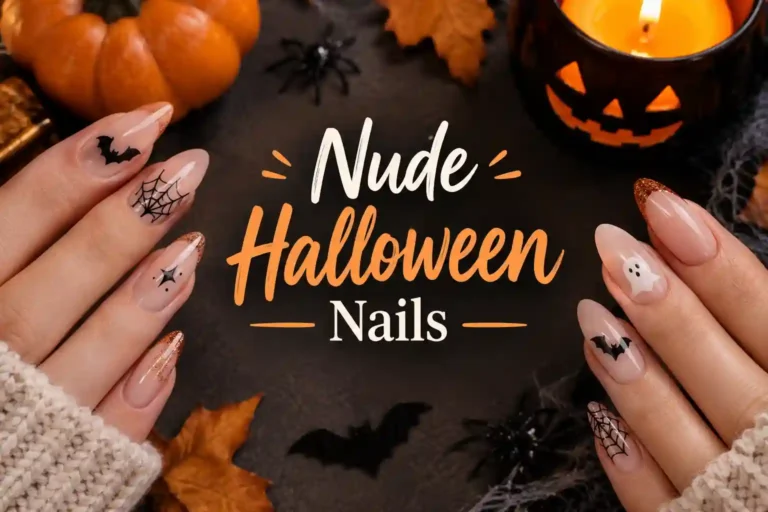
Related Post :Ghost Nail Design: 20 Cute, Easy & Spooky Ideas (With Step-by-Step Tutorial)
What Are Spooky Summer Nails And Why Are They Trending

Spooky summer nails are essentially a fusion trend, combining dark, eerie themes like spiders, bats, skulls and cracked textures with bright, warm summer colors like coral, turquoise, hot pink and sunny yellow. Instead of choosing between a cute beachy manicure or a moody gothic one, this trend lets you have both at the same time.
I think the popularity of spooky summer nails comes from a growing desire for nail art that feels a bit more personal and unexpected. A lot of clients tell me they are tired of the same tropical florals and ombre sunsets every summer, and they want something that reflects a more alternative or edgy personality without giving up the fun, colorful energy of the season.
Social media has definitely helped push this trend forward too. Scroll through nail inspiration pages during the summer months and you will start noticing more and more spooky summer nails popping up, often paired with bold color combinations that would never usually show up in October but somehow work beautifully in July.
My Experience Creating Spooky Summer Nails For Clients
The first time a client asked me for spooky summer nails, she described it as wanting her nails to feel like a horror movie poster but in beach colors. That description stuck with me, and it completely shaped how I approach this style now. It is really about contrast, taking something dark and unsettling and placing it against something bright and cheerful.
What I love most about painting spooky summer nails is how much creative freedom it allows. There is no strict formula, unlike some trends that have a very specific expected color palette or design. One client might want a cracked, weathered texture in hot pink with tiny black spiders, while another might want a bright turquoise base with subtle bat silhouettes near the cuticle.
Over time, spooky summer nails have become one of my favorite categories to work in specifically because clients tend to come in with such unique, personal ideas. It pushes me to experiment more than a lot of the standard seasonal requests I get throughout the year.
Choosing The Right Color Palette For Spooky Summer Nails
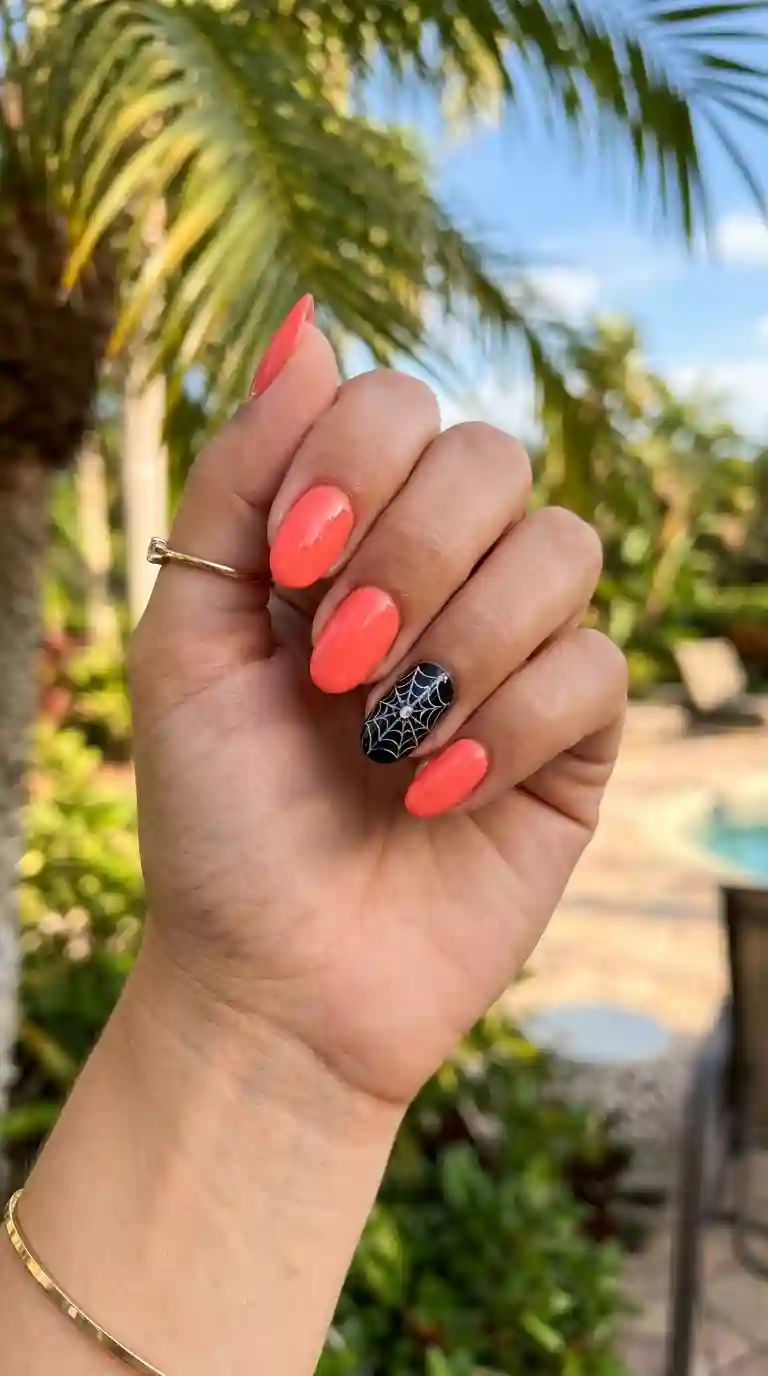
Color choice makes or breaks spooky summer nails, and this is where the trend really gets interesting. Instead of the usual black, orange and purple palette associated with Halloween, this style leans into brighter, more saturated summer tones as the base, with darker eerie details layered on top as accents.
I usually recommend starting with a bold summer color as the main base, something like hot pink, coral, turquoise or a sunny yellow, and then reserving black, deep purple or blood red for smaller detailed accents like a spider web, a cracked texture or tiny bat silhouettes. This keeps the overall look feeling bright and summery while still delivering that eerie, unexpected twist.
Must Read : Baby Blue Winter Nails: The Frosty Manicure Trend Taking Over Every Salon Chair This Season
Bright Base Colors That Work Best For Spooky Summer Nails
Some of my most requested base colors for spooky summer nails include hot coral, electric turquoise, sunny mango yellow and a vivid fuchsia pink. These colors immediately read as summery and warm, which creates the perfect contrast once darker, spookier details get layered on top.
I have also had clients request a neon lime green base, which tends to look especially striking paired with black spider details, almost like a glow in the dark, eerie garden effect. The key is choosing a base bright enough that the spooky elements feel like an intentional twist rather than the design simply looking like a toned down Halloween manicure.
Spooky Summer Nails With Spider Web Details
Spider webs are probably one of the most requested individual details within the spooky summer nails trend. They translate beautifully onto almost any bright base color and instantly communicate that eerie, unexpected element the whole trend is built around.
I usually paint spider webs using a thin detail brush, starting with a center point near the cuticle and working outward in soft, slightly curved lines to mimic the natural shape of a real web. Adding a tiny black dot near the center for the spider itself finishes the detail nicely without overcomplicating the design.
This detail works beautifully as a single accent nail within a full set of spooky summer nails, especially when placed against a bright, glossy summer color like coral or turquoise for maximum contrast.
Bat Silhouette Designs For Spooky Summer Nails

Bats are another favorite detail I get asked to include in spooky summer nails, and they work particularly well because the simple silhouette shape is quick to paint and reads clearly even at a small scale.
I usually paint bats using a small round dotting tool for the body, then add two curved wings on either side using a thin detail brush. Placing one or two bats near the cuticle of an accent nail, rather than covering the entire nail, keeps the design feeling light and playful rather than heavy or overly dark.
Bats also pair beautifully with a starry night sky effect, which I sometimes add using tiny white dots scattered across a deep purple or navy accent nail within a broader set of spooky summer nails.
Cracked Texture Spooky Summer Nails
One of my favorite techniques within this trend involves creating a cracked, weathered texture across a bright summer base color. This effect gives spooky summer nails an almost sun bleached, desert like appearance, as if the bright polish has started cracking under intense heat, which ties in beautifully with both the summer and spooky themes at once.
To create this look, I usually apply a special crackle top coat over a fully dried base color, which naturally splits and separates as it dries, revealing thin lines that resemble cracked earth or old, weathered paint. Using a dark color underneath a bright top layer, or vice versa, creates dramatic contrast within the cracks themselves.
This technique tends to be one of the more advanced options within spooky summer nails, but the dramatic, textured result makes it well worth the extra effort for clients who really want their design to stand out.
Spooky Summer Nails Featuring Skulls And Bones
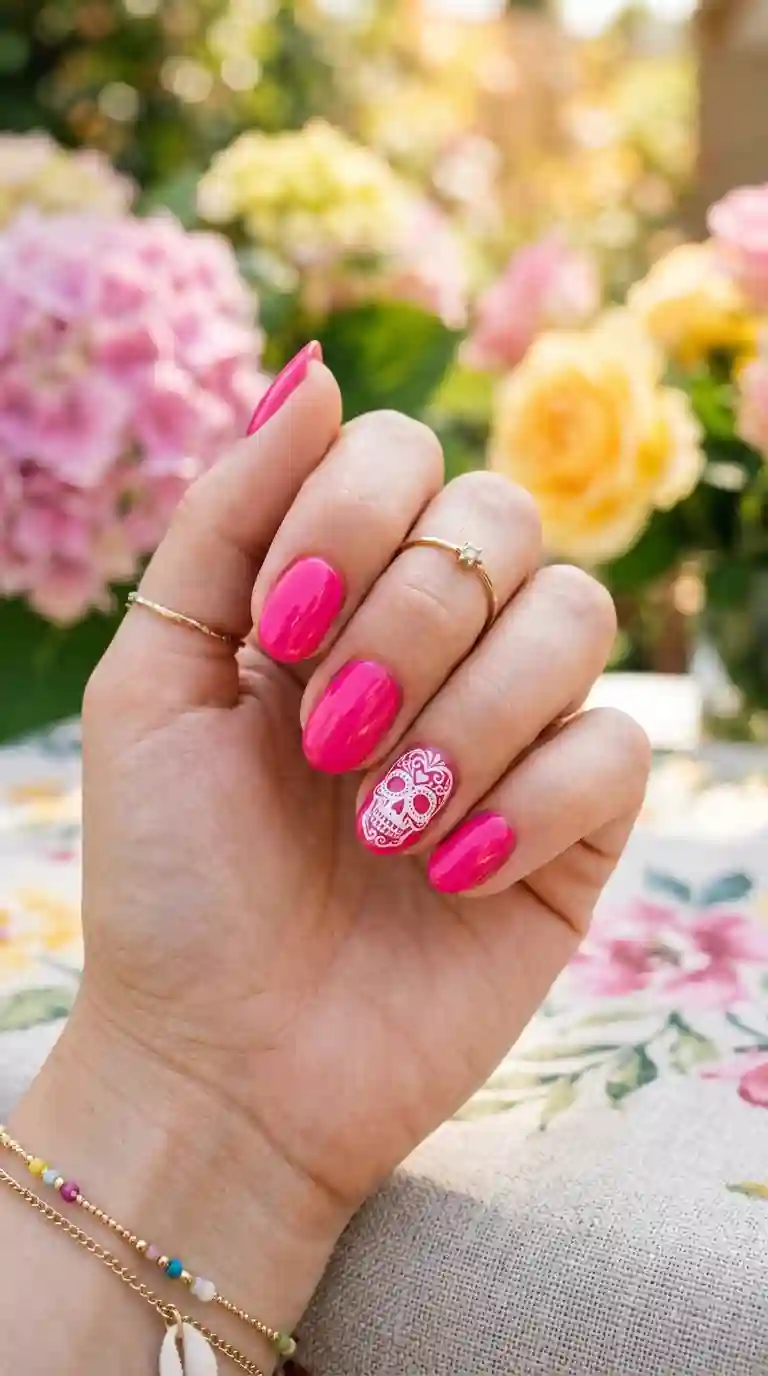
Skulls bring a bold, unmistakably spooky element into this trend, and when paired with bright summer colors, they take on a completely different, almost playful energy compared to a traditional Halloween design. I usually paint a simplified, slightly rounded skull shape rather than something overly realistic, which keeps the design feeling fun rather than genuinely frightening.
Adding small floral details around the skull, like tiny painted hibiscus flowers or simple daisy shapes, is one of my favorite ways to blend the eerie and summery elements even further within spooky summer nails. This combination has become especially popular with clients who love a slightly gothic, alternative aesthetic mixed with tropical summer vibes.
Keeping the skull design to just one accent nail, surrounded by bright, glossy summer colors on the remaining nails, tends to create the most balanced and wearable result.
Glow In The Dark Spooky Summer Nails
Summer nights bring a fun opportunity to take spooky summer nails even further with glow in the dark polish. I love using this feature for clients attending beach bonfires, summer festivals or late night outdoor parties, since the design essentially transforms once the sun goes down.
A glow in the dark topcoat applied over spider webs, bat silhouettes or tiny stars creates a subtle, eerie effect once the lights go low, while the underlying bright summer base still looks completely normal and cheerful during the day. This dual effect is part of what makes spooky summer nails feel so unique compared to other seasonal trends.
I usually recommend this option to clients who want their manicure to have a bit of a surprise element built in, since most people do not expect a bright, cheerful summer manicure to suddenly glow with hidden spooky details after dark.
Read Also : Gorgeous Gray Nail Ideas That Will Instantly Upgrade Your Manicure Game
Ombre Spooky Summer Nails
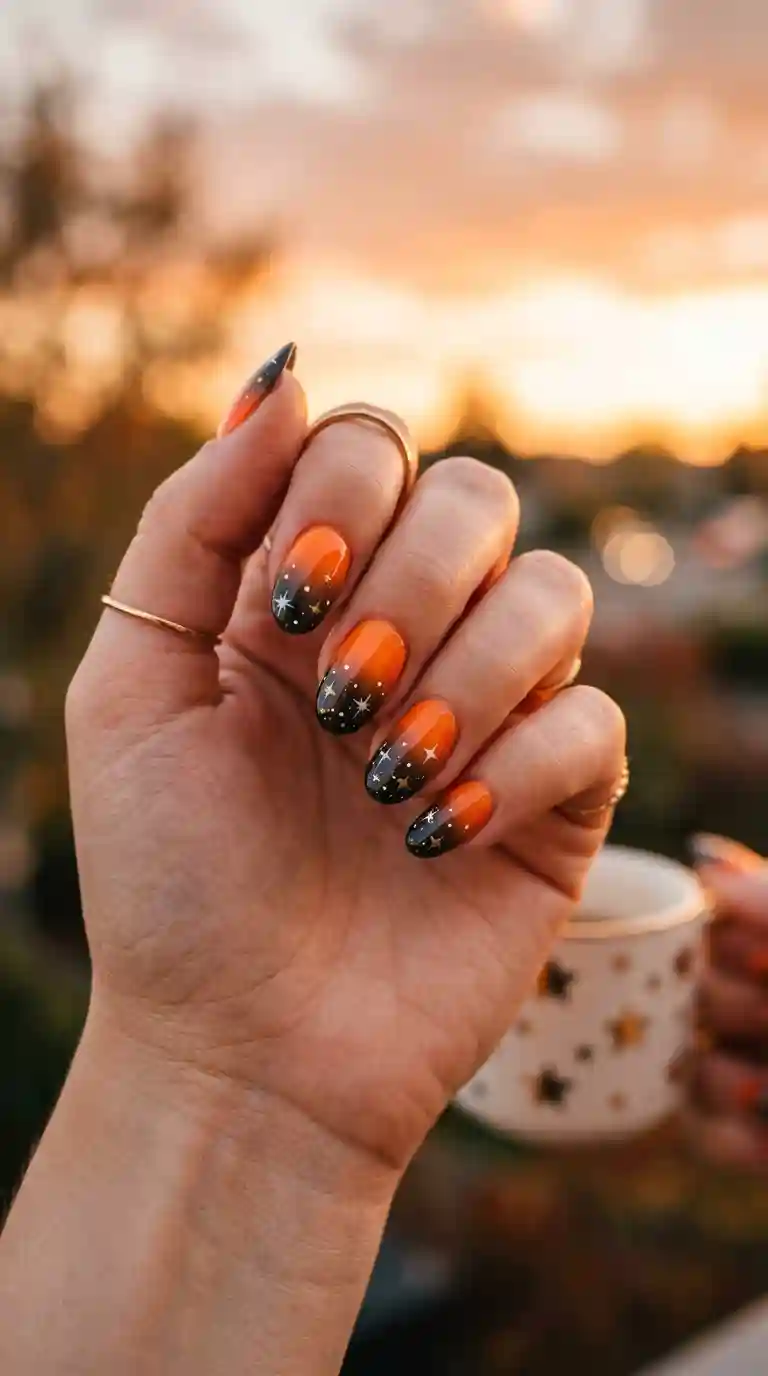
Ombre effects translate beautifully into the spooky summer nails trend, especially when transitioning from a bright, warm summer color into a deep, moody shade like black or dark purple. This gradient mimics the transition from a sunny day into an eerie night, which fits the whole concept of this trend perfectly.
I usually start with a bright orange, coral or yellow near the cuticle and gradually blend into black or deep purple toward the tips using a sponge or gradient brush. Adding tiny white dots within the darker portion of the ombre creates a subtle starry sky effect that ties the whole design together beautifully.
This ombre approach has become one of my most requested variations of spooky summer nails, mainly because it delivers that dramatic contrast without requiring any detailed hand painted illustrations.
Minimalist Spooky Summer Nails For Everyday Wear
Not every client wants a heavily detailed, illustrated design, and that is completely understandable. Some of my favorite spooky summer nails are actually the simplest ones, relying on subtle color choices and tiny details rather than full illustrations.
A bright summer base color with just a single tiny black dot near the cuticle, meant to represent a hidden spider, is one of my go to minimalist takes on this trend. It reads as a fun summer manicure at first glance, with the spooky element only becoming noticeable up close.
Another minimalist approach involves painting four nails in a bright summer shade and one nail entirely black with a tiny painted moon, creating a subtle color block effect that nods to the spooky side of the trend without requiring any detailed artwork at all.
Spooky Summer Nails For Short Nails
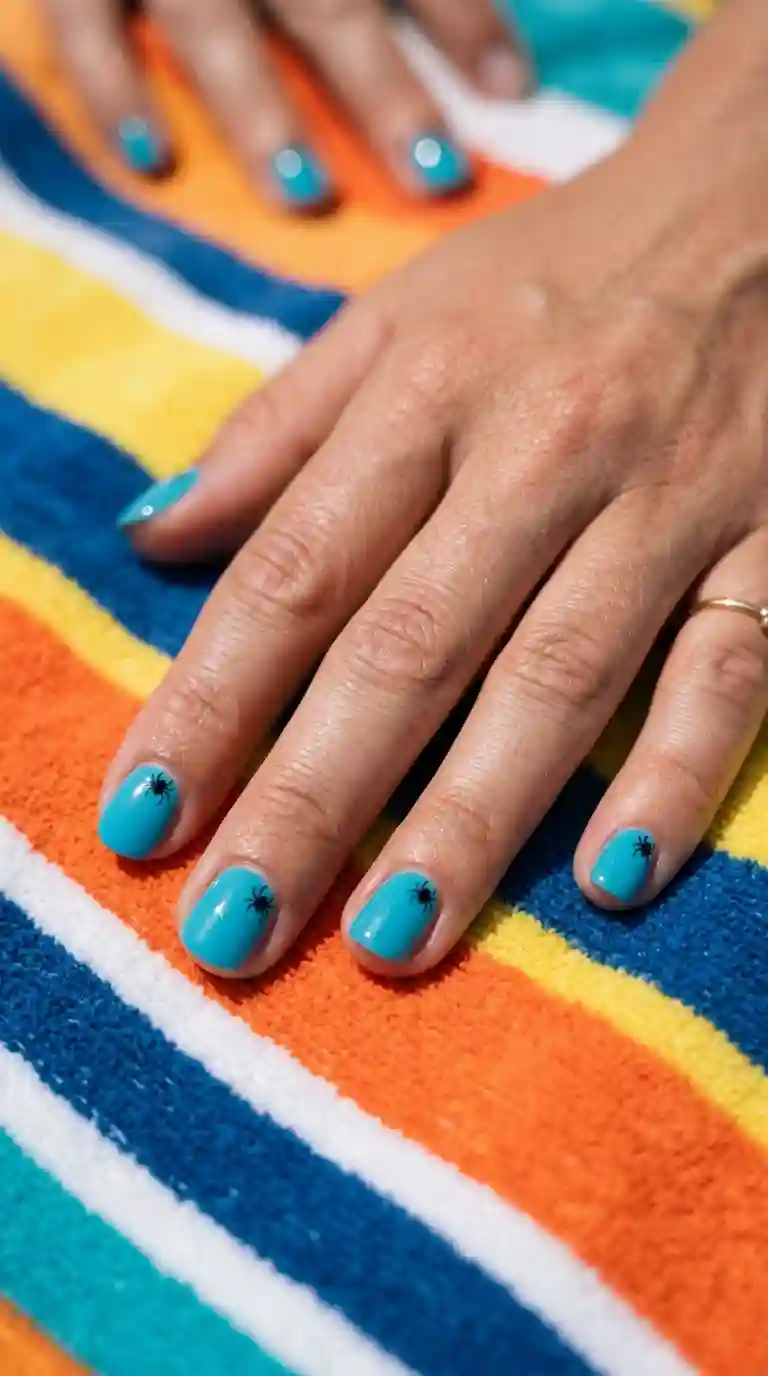
Short nails absolutely can handle spooky summer nails, you simply need to scale the details down to fit the smaller surface area available. I usually keep detailed elements like spider webs, bats or tiny skulls concentrated near the cuticle rather than spreading them across the entire nail bed.
For shorter nails, I often lean toward color blocking with two contrasting shades, like a bright summer color paired with a single black or deep purple accent nail, rather than attempting a fully detailed illustration that might feel cramped on a smaller canvas. Keeping things simple actually tends to look more polished on shorter nail beds anyway.
Spooky Summer Nails For Long And Almond Shaped Nails
On longer nails, there is so much more room to get creative with spooky summer nails. I love using the extra surface area for larger illustrations, layered ombre effects, or even small detailed scenes that combine multiple elements like a spider web, a few bats and a bright sunset background all on a single accent nail.
Almond and coffin shaped nails in particular provide a beautiful canvas for this kind of detailed storytelling. I often design a full scene across just the accent nails while keeping the remaining nails in a simple, complementary summer shade, which keeps the overall set feeling balanced rather than overwhelming.
French tips also translate beautifully into this trend on longer nails. Swapping the traditional white tip for a deep black or purple tip against a bright summer base gives a bold, unexpected twist that fits perfectly within the spooky summer nails category.
Spooky Summer French Tip Nails
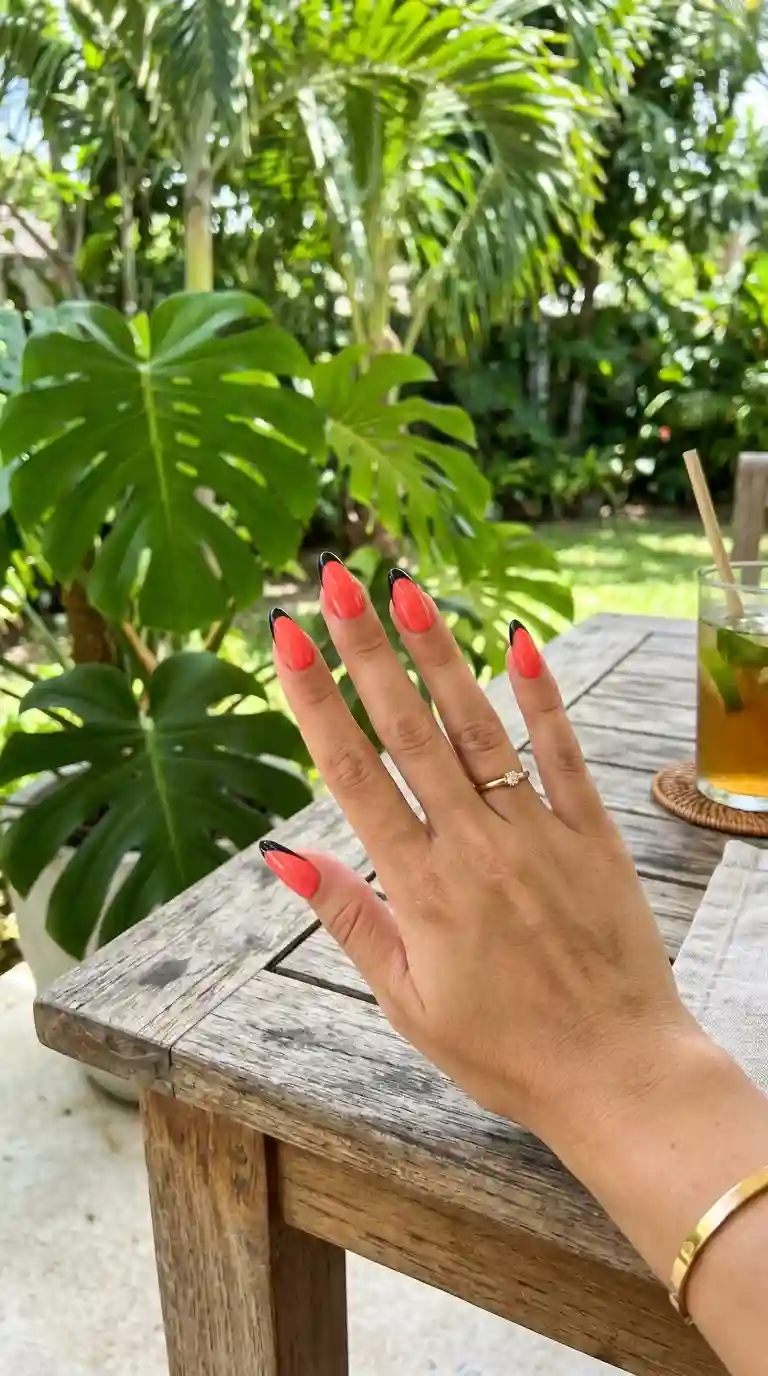
Reinventing the classic french manicure is one of my favorite ways to bring spooky summer nails into a more sophisticated, wearable format. Instead of the usual white tip, I use a deep black, purple or even a dark blood red shade to outline the tip of each nail.
I usually create this look using a thin brush or a guide sticker to keep the tip line clean and precise. Adding a tiny painted spider, star or crescent moon right where the tip meets the bright base gives the design just enough extra detail without overwhelming the overall clean silhouette.
This version of spooky summer nails tends to appeal to clients who want something bold enough to feel edgy but still polished enough for everyday wear throughout the entire summer season.
Also Read : Cat Eye Nail Ideas That Will Instantly Transform Your Manicure Into Pure Magic
Spooky Summer Nails With Glitter And Shimmer
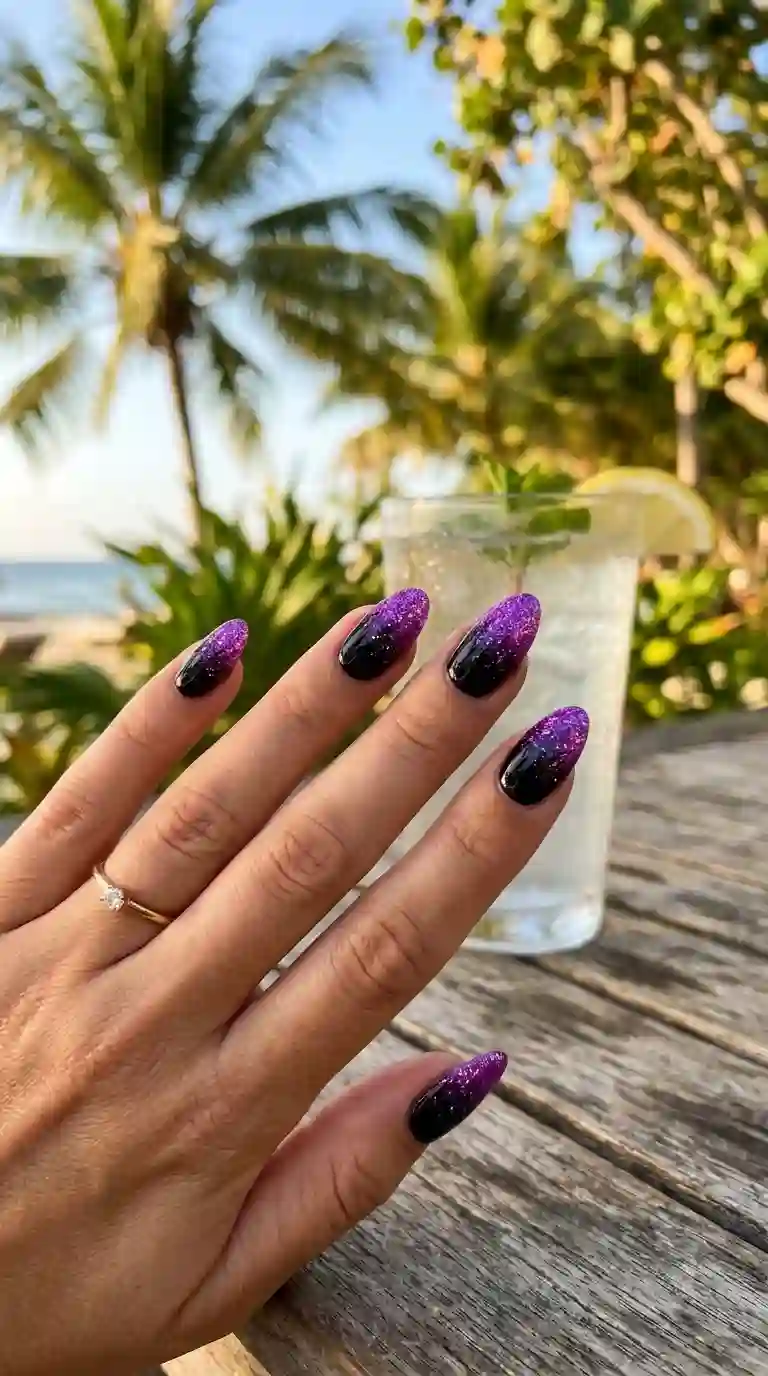
Glitter might not be the first thing people associate with spooky designs, but it actually works beautifully within spooky summer nails, especially when used to represent stars against a dark portion of the design. Purple, black and deep red glitters all pair wonderfully with the bright summer base colors central to this trend.
I often apply glitter as a gradient, fading from a bright summer color near the cuticle into sparkling black or deep purple near the tip, mimicking a starry evening sky emerging from a bright sunset. This creates a shimmering effect that fits beautifully into the overall aesthetic of spooky summer nails.
For clients who want extra sparkle, adding a fine holographic glitter over just the darker portion of an ombre design gives an almost magical, otherworldly shimmer that photographs beautifully in natural sunlight.
Matte Finish Spooky Summer Nails For A Moodier Look
Matte finishes bring a completely different energy to spooky summer nails, giving the design a softer, almost velvety texture that feels a bit moodier compared to a glossy finish. A matte black or deep purple accent nail paired with a glossy bright summer base creates a lovely textural contrast within the same set.
I usually recommend matte for clients who want their spooky summer nails to feel a bit more grown up or subdued, especially if they love the darker, eerie elements of the trend but want something less bold or attention grabbing than a fully glossy finish.
Spooky Summer Nails For Acrylic And Gel Extensions
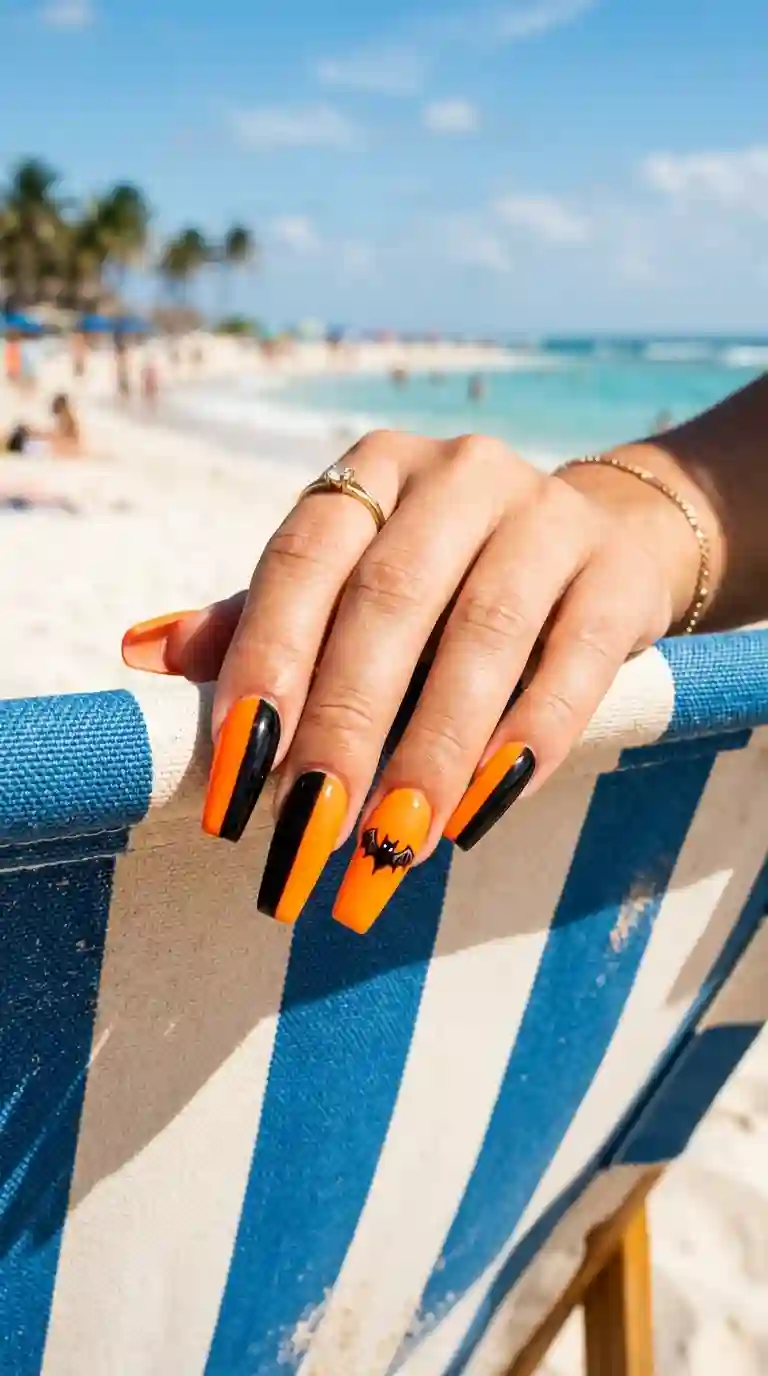
Clients often ask whether spooky summer nails work well on extensions, and the answer is definitely yes. Acrylic and gel extensions actually provide even more surface area to work with, which is especially helpful for anyone wanting a more detailed illustration or a layered ombre effect.
For acrylic sets, I typically recommend an almond or coffin shape, since the elongated surface really allows spider webs, bats or skull illustrations to stand out clearly. Gel extensions offer a slightly more natural, flexible feel while still providing plenty of length for detailed nail art.
Whether working with acrylic or gel, the process for creating spooky summer nails stays fairly consistent. A smooth, evenly applied base color makes a significant difference in how crisp and clean the final spooky details end up looking against the bright summer background.
How To Recreate Spooky Summer Nails At Home
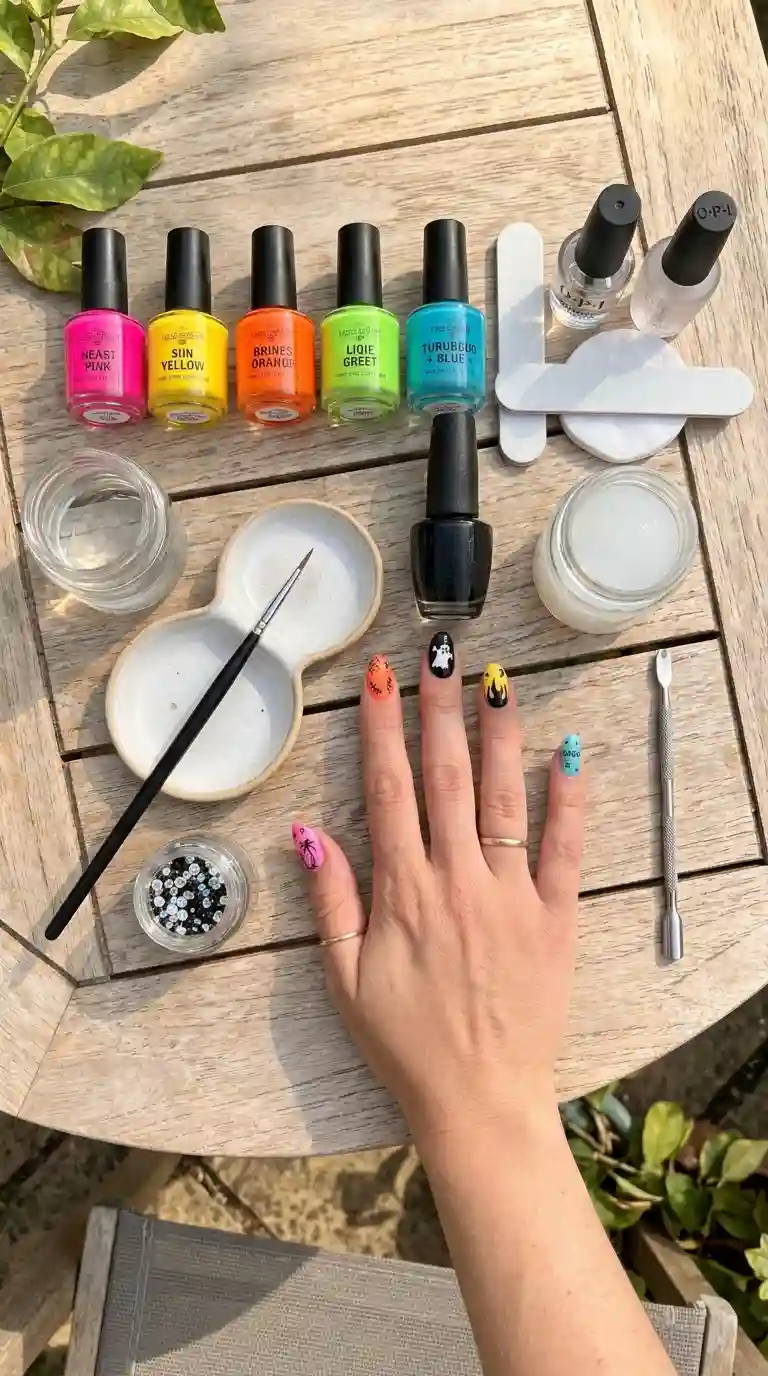
You do not need professional training to try spooky summer nails at home, though a bit of patience definitely helps, especially for the more detailed designs like spider webs or bats. Over the years I have picked up a few tricks that make this process much easier for clients recreating the look on their own.
Start with clean, properly prepped nails. Push back your cuticles gently, lightly buff the nail surface and wipe away any oils with rubbing alcohol before applying polish. This step matters more than people expect, since bright summer colors tend to show any unevenness on the nail bed more clearly than darker polishes.
Apply a good base coat, followed by two thin coats of your chosen bright summer color, allowing each layer to dry fully before moving on. Once your base is completely set, that is when you can begin adding your chosen spooky detail, whether that is a tiny bat, a spider web or a cracked texture effect.
Read Also: 45 Fall Dip Nail Ideas That’ll Make You Want to Book an Appointment Right Now
Step By Step Guide For Spooky Summer Nails
- Start with clean, dry nails and gently push back the cuticles.
- Apply a thin base coat and allow it to dry completely.
- Paint two thin coats of your chosen bright summer color, letting each layer dry before adding the next.
- Add your chosen spooky detail, whether that is a spider web, bat, skull or cracked texture.
- Seal everything with a glossy or matte topcoat depending on your preferred finish.
- Clean up any excess polish around the cuticles using a small brush dipped in acetone.
Following these steps carefully makes a noticeable difference in how polished and professional your finished spooky summer nails end up looking, even as a first attempt.
Tools And Products For Creating Spooky Summer Nails
Over time I have built a small collection of tools that make creating spooky summer nails much easier, both for detailed studio work and simpler designs at home. A fine detail brush is essential for anything beyond a solid color base, since it allows for clean lines when painting spider webs, bats or small skull details.
A dotting tool comes in handy for adding small details like spider bodies, tiny stars or scattered accent dots across the nail. I also keep a wide range of bright summer polishes on hand, alongside black, deep purple and dark red, since having both ends of the color spectrum available makes it much easier to create that signature contrast central to spooky summer nails.
For clients who want a bit of extra shine or a hidden surprise element, a small bottle of glow in the dark topcoat and a container of fine black glitter can instantly elevate a simple set of spooky summer nails into something that feels a bit more special and unexpected.
How To Make Spooky Summer Nails Last Longer
Nobody wants their carefully painted design chipping away within a few days, especially during a season full of swimming, sunscreen and outdoor activities. There are a few habits that really help extend the life of spooky summer nails throughout the busy summer months.
Applying a strong gel topcoat helps protect detailed spooky elements like spider webs or bat silhouettes from smudging or fading, especially with frequent sun and water exposure. Wearing gloves while cleaning, applying sunscreen carefully around the nail area and reapplying cuticle oil regularly all help keep the manicure looking fresh for as long as possible.
Chlorine and salt water in particular can be harsh on nail polish, so rinsing your hands with fresh water after swimming and applying a bit of cuticle oil afterward helps protect your spooky summer nails from premature chipping or fading throughout the season.
Spooky Summer Nails For Different Skin Tones
One of the great things about spooky summer nails is how flexible the color palette can be across different skin tones. Bright, warm summer colors like coral, orange and yellow tend to look especially vibrant against deeper skin tones, while cooler bright shades like turquoise and fuchsia often stand out beautifully against lighter skin tones.
The darker, spookier accent colors like black, deep purple and dark red generally complement every skin tone well, since they function as small detailed accents rather than the main base color across the entire set. This flexibility is part of why spooky summer nails have become such a popular choice among such a wide range of clients.
Mistakes To Avoid When Trying Spooky Summer Nails
After creating spooky summer nails for so many clients, I have noticed a few common mistakes that tend to come up, especially among those trying this design for the first time at home. One frequent issue is making the spooky elements too large or too dark, which can end up overwhelming the bright, cheerful summer base entirely.
Skipping a proper base coat is another common mistake, especially with brighter shades that tend to show unevenness or staining more easily. Rushing between layers is also an issue I see often, since spooky summer nails frequently involve multiple steps, from a bright base color to fine detail work to a final topcoat, and skipping proper drying time between each step tends to result in smudging that ruins otherwise careful detail work.
Spooky Summer Nails For Nail Art Beginners
If you are new to nail art, spooky summer nails might feel a bit intimidating given the detailed elements often associated with the trend, but there are plenty of simpler entry points. Starting with a bright summer base and a single small black dot near the cuticle already captures the spirit of the design without requiring advanced painting skills.
Once you feel more comfortable, you can slowly build up to slightly more detailed elements like a simple bat silhouette or a small spider web. Practicing on a paper nail wheel before committing to your actual nails is always a smart way to build confidence with a brush and get comfortable with proportions before attempting the real thing.
Pairing Spooky Summer Nails With Your Outfit
I love encouraging clients to think about their spooky summer nails as part of their broader summer wardrobe rather than an isolated detail. The bold, contrasting color palette pairs beautifully with alternative summer fashion, including black sundresses, graphic tees and denim shorts.
For a beachy, casual outfit, brighter summer colors with small dark accents tend to complement the overall look nicely, while a bolder, darker version of the trend pairs beautifully with edgier, more gothic summer fashion choices. Even a simple white outfit feels instantly more interesting with a bold, unexpected manicure like this one.
Spooky Summer Nails For Festivals And Summer Events
Spooky summer nails have become a particularly popular choice for summer festivals, outdoor concerts and alternative fashion events. The bold, eye catching color combinations tend to photograph beautifully under festival lighting, and the unexpected spooky elements often become a fun conversation starter throughout the event.
For festival appointments, I often add a bit more sparkle or a glow in the dark element, since many summer events extend well into the evening hours, giving the hidden spooky details a chance to shine once the sun goes down.
Caring For Your Nails Underneath Spooky Summer Nails
A beautiful manicure always starts with healthy nails underneath, and this holds true regardless of the design on top. I always recommend applying cuticle oil nightly, regardless of how busy the summer season gets, since this simple habit keeps the nail bed properly hydrated and helps prevent premature lifting.
Taking short breaks between manicures, especially if you regularly wear gel or acrylic extensions, gives your natural nails time to recover and stay strong throughout the season. Healthy nails underneath not only make spooky summer nails look better, they also help the design last significantly longer despite increased sun, water and outdoor activity exposure.
Final Thoughts On Spooky Summer Nails
After painting spooky summer nails for so many clients over the past few seasons, I can honestly say this trend has become one of my favorite categories to work in. It takes two seemingly opposite aesthetics, bright, cheerful summer energy and dark, eerie detailing, and blends them into something that feels genuinely fresh and unexpected.
Whether you prefer a simple bright manicure with a single tiny spider detail, or a fully illustrated design featuring bats, skulls and a dramatic ombre effect, there is a version of spooky summer nails that fits your personal style and comfort level. My biggest piece of advice, both as someone who paints this design constantly and someone who genuinely enjoys the creativity it allows, is to embrace the contrast. Do not be afraid to mix bright and dark elements boldly, since that unexpected combination is exactly what makes this trend so much fun.
Frequently Asked Questions About Spooky Summer Nails
What colors are used for spooky summer nails?
Bright summer shades like coral, turquoise, hot pink and yellow are typically used as the base, paired with darker accent colors like black, deep purple or dark red for spooky details.
Are spooky summer nails only for Halloween lovers?
Not at all. Many clients who simply want something different from typical summer florals request this trend, regardless of whether they specifically love Halloween.
How do I make my spooky summer nails last longer?
Using a strong gel topcoat, rinsing your hands after swimming and applying cuticle oil daily are the best ways to extend the wear time of this design during summer activities.
Can spooky summer nails work for short nails?
Yes, short nails handle this design beautifully. Keeping spooky details like spiders or bats concentrated near the cuticle helps the design stay proportionate.
What is the best base color for spooky summer nails?
Bright, saturated summer shades like coral, turquoise or mango yellow tend to give the best contrast against darker spooky accents.
Do spooky summer nails suit every skin tone?
Yes, the flexible color palette allows for adjustments based on skin tone, with warm colors like coral and orange flattering deeper tones and cooler brights suiting lighter tones.
How many coats of bright polish do I need?
Most bright summer polishes require two to three thin coats for full, even opacity, since lighter and brighter shades often need extra layers.
Can I do spooky summer nails on acrylic extensions?
Definitely. Acrylic extensions provide extra surface area, making them a great canvas for more detailed illustrations like spider webs or bats.
What nail shape works best for this design?
Almond and coffin shapes showcase detailed illustrations beautifully, though the design translates well onto virtually any nail shape, including short and square nails.
How do I paint a spider web on my nails?
Start with a small center point near the cuticle and work outward using thin, slightly curved lines to mimic the natural shape of a real web, then add a tiny dot for the spider.



2 Comments