
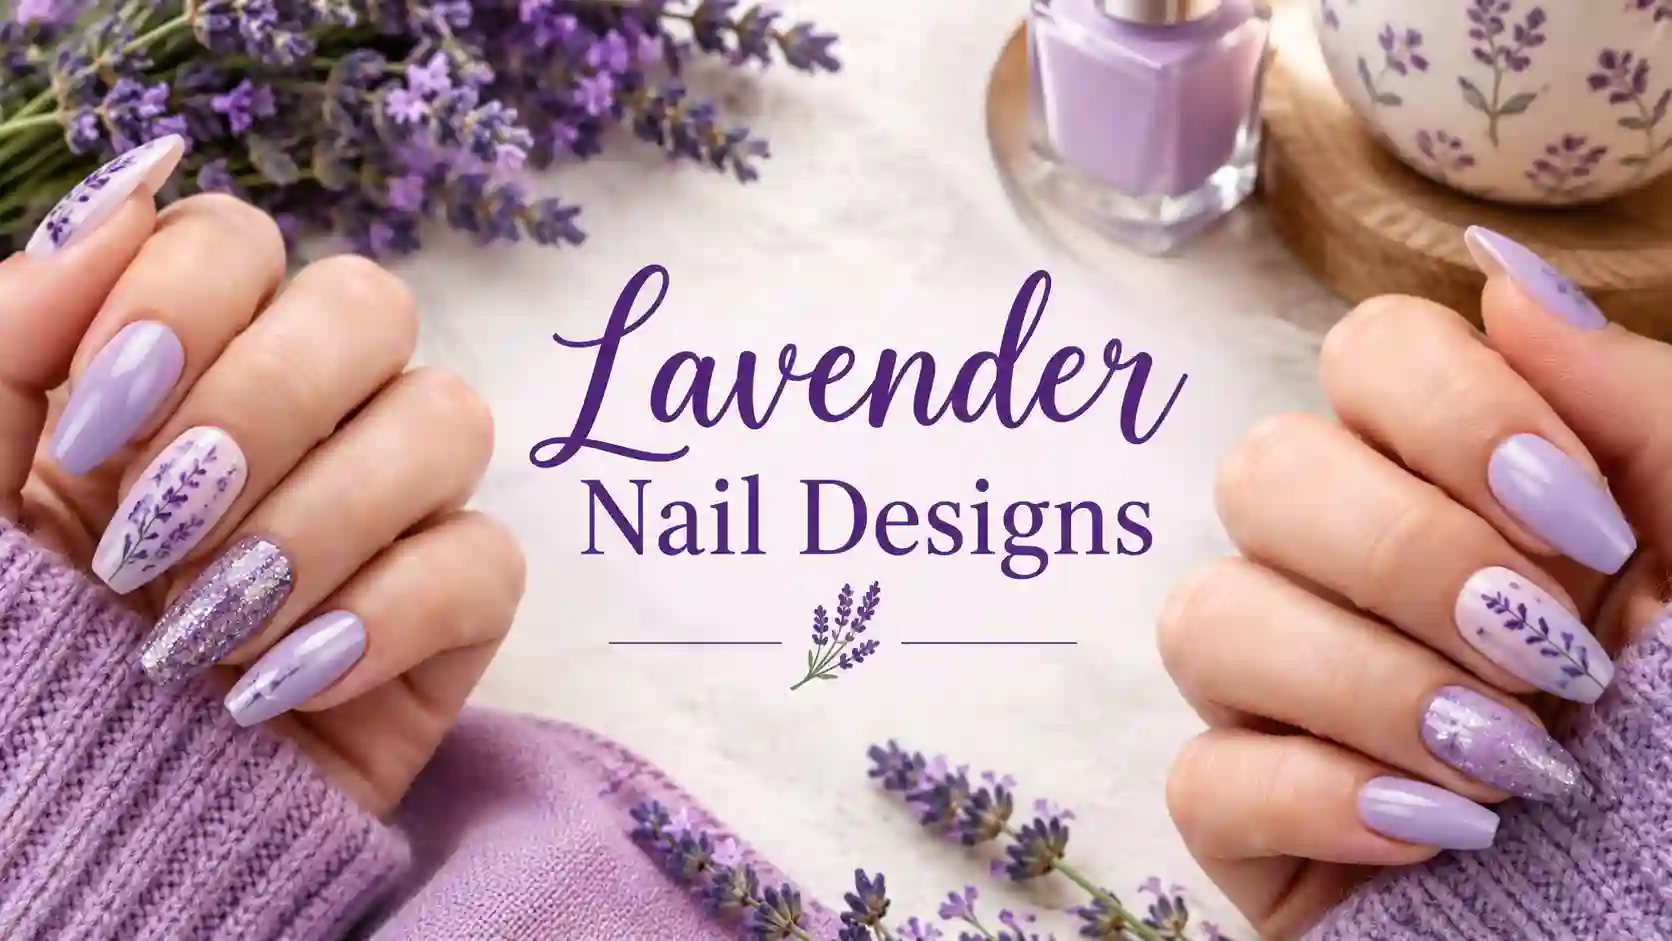
Lavender Nail Designs That Prove Soft Colors Can Still Make A Statement
Lavender sits in this perfect middle ground that very few colors manage to hit. It is soft enough to feel calming and elegant, but it still has enough presence to read as intentional rather than boring. Clients who choose lavender nail designs are usually looking for something that feels a little different from the typical nude or pastel pink, without going anywhere near bold or dramatic.
I have spent years working with this color across every finish, technique and nail shape imaginable, and I want to use this guide to actually share what works, based on real appointments rather than recycled trend lists. If you are considering lavender nail designs for your next manicure, this should give you everything you need to make a confident, informed choice.
Also Read : 40 Bright Colorful Nail Ideas to Make Every Manicure Pop (2026 Guide)
Why Lavender Nail Designs Have Become So Popular
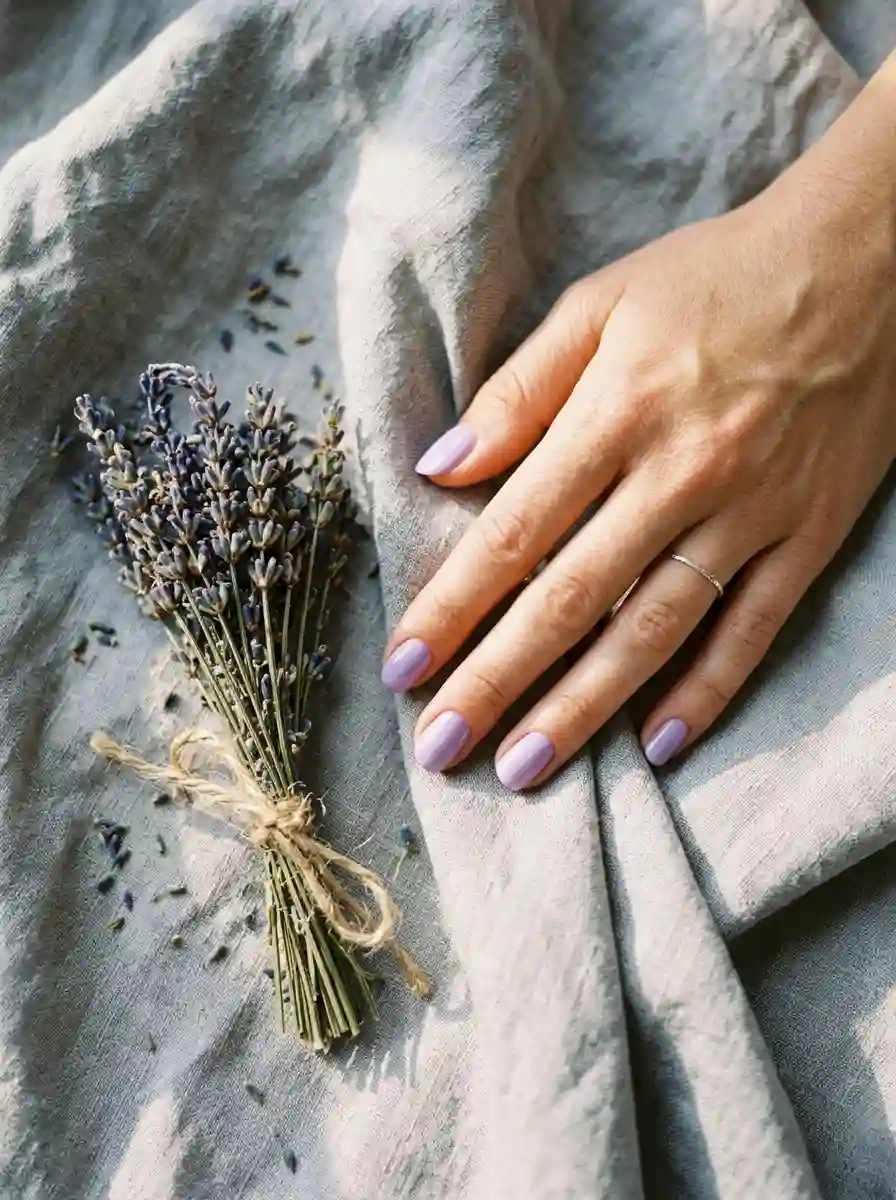
Lavender nail designs have grown steadily in popularity for a pretty simple reason, they manage to feel fresh without being trendy in a way that expires after one season. Unlike a lot of color trends that peak quickly and fade just as fast, lavender has settled into something closer to a modern classic.
Part of the appeal comes down to how the color photographs. Lavender nail designs tend to look soft and flattering under almost any lighting, which matters a lot given how often people photograph their hands for social media these days. The color also reads as elevated without requiring any extra effort, something a lot of clients appreciate when they want their manicure to look polished without feeling fussy.
I also think lavender nail designs benefit from the color’s association with calm and femininity, without tipping into anything that feels too young or too sweet. It strikes a balance that a lot of other pastel shades struggle to find, which is part of why I see such a wide age range of clients requesting this particular color.
My Experience Creating Lavender Nail Designs In The Studio
Working with lavender regularly has taught me that this color attracts a specific kind of client, usually someone who wants their manicure to feel thoughtful and a little romantic without being over the top. Lavender nail designs tend to appeal to people who appreciate subtlety but still want their nails to feel like a genuine style choice rather than an afterthought.
What surprises a lot of clients during their first lavender appointment is just how many directions this single color family can go. A pale, almost grey leaning lavender looks completely different from a bright, saturated lilac, and both of those look nothing like a dusty, muted mauve lavender. I usually bring out several swatches during a consultation, since most clients end up drawn to a shade slightly different from what they originally pictured.
I have also noticed that lavender nail designs tend to transition beautifully across seasons, which is somewhat rare for a pastel shade. A cooler, icier lavender feels right at home during winter and early spring, while a warmer, slightly pinker lavender works beautifully through summer and into early fall without ever feeling out of place.
Choosing The Right Shade Of Lavender For Your Nails
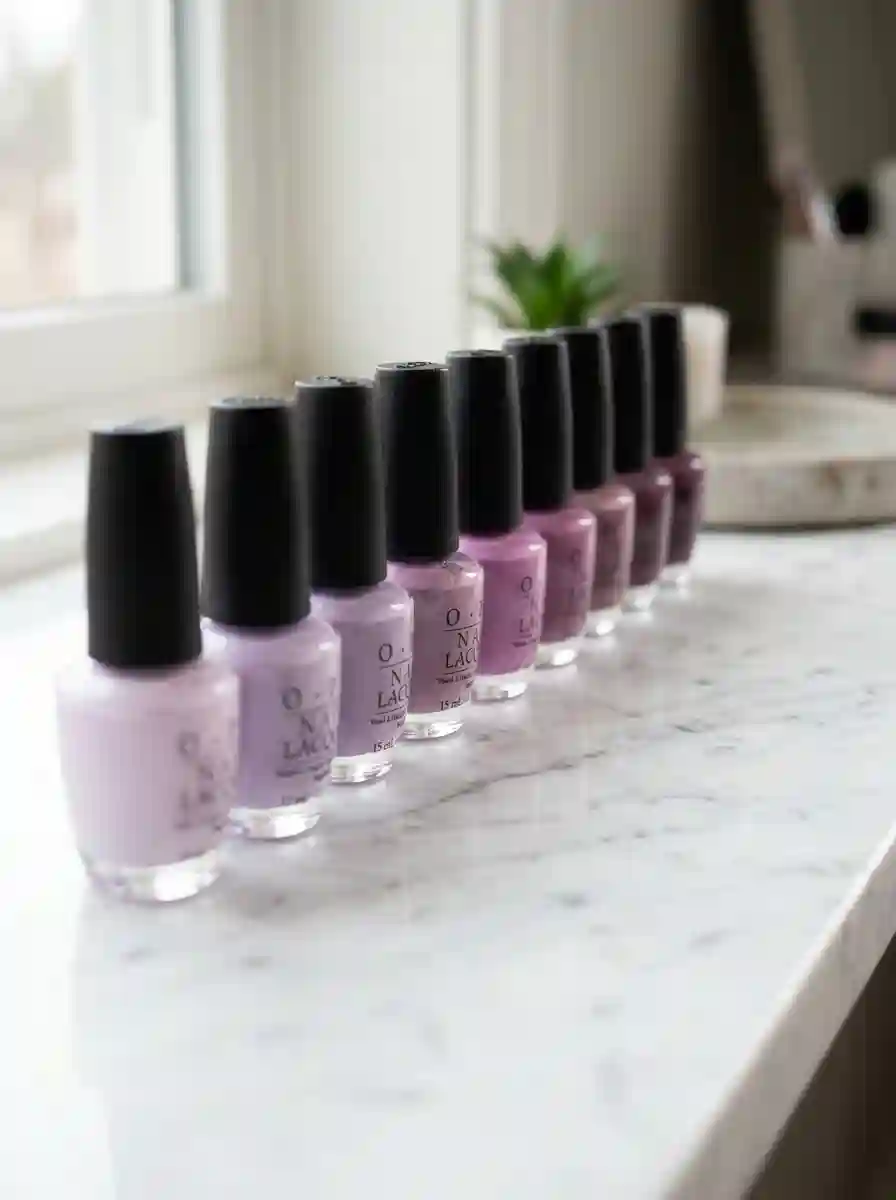
Selecting the correct shade matters more than most people initially realize when exploring lavender nail designs. The lavender family covers a surprisingly wide range, from nearly white pastel lilac all the way to a deeper, dustier mauve that leans closer to a muted plum.
I usually recommend thinking about your skin undertone before settling on a specific shade for your lavender nail designs. Cooler undertones tend to pair beautifully with a true, slightly blue leaning lavender, while warmer undertones often look best with a softer, pinker lavender that avoids appearing washed out or chalky against the skin.
Testing a few different swatches directly against your actual nail, rather than relying only on how a polish looks in the bottle, remains the most reliable way to find your ideal shade. Lighting plays a significant role here as well, since lavender nail designs can shift noticeably in appearance under warm indoor lighting compared to natural daylight.
Read Also : String Nail Art: The Delicate Lace Effect Technique Every Nail Lover Needs To Try
Pale Lilac Versus Dusty Mauve Lavender
Pale lilac leans closer to a soft, almost whitewashed purple, giving a delicate, ethereal quality that works beautifully for minimalist designs. Dusty mauve lavender, on the other hand, carries a deeper, more muted quality that feels slightly more sophisticated and grown up, often preferred by clients wanting their lavender nail designs to feel a bit richer.
Choosing Lavender Based On Skin Tone
Lavender nail designs genuinely flatter nearly every skin tone, though adjusting the specific shade can make the color feel even more intentional and well suited to you personally. For fair skin, a soft, pale lilac tends to create a gentle, romantic contrast without overwhelming lighter complexions. For medium skin tones, a classic, true lavender generally looks beautifully balanced and versatile. For deeper skin tones, a richer, more saturated lavender or a dusty mauve leaning shade tends to create a particularly striking and elegant contrast.
I always encourage clients to try a shade they are drawn to rather than strictly following any rule about undertones, since personal preference ultimately matters more than any guideline. That said, understanding these general tendencies helps narrow down options significantly during a consultation, especially for clients overwhelmed by the sheer number of lavender shades available.
Classic Solid Lavender Nail Designs For Everyday Wear
A clean, solid lavender manicure remains one of the most requested lavender nail designs in my studio, and it is easy to understand the appeal. There is something effortlessly elegant about a single, well chosen shade applied smoothly and evenly, whether finished glossy or matte.
I usually apply two to three thin coats of polish for full, even opacity, finishing with a topcoat depending on the client’s preferred finish. Solid lavender nail designs work for literally any occasion, from the office to a casual weekend outing, which is part of why this style continues to be such a reliable favorite among clients who want something polished without much fuss or upkeep.
This simplicity also makes solid lavender nail designs incredibly easy to maintain, since there is no detailed artwork to touch up or worry about chipping unevenly compared to more intricate designs involving multiple colors or layers.
Matte Lavender Nail Designs For A Soft Velvet Finish
Matte finishes bring an entirely different texture and mood to lavender nail designs, giving the color a soft, almost powdery quality that feels distinctly romantic. I often recommend matte to clients who want their manicure to feel a bit more understated and dreamy compared to a glossy, high shine look.
Applying a matte topcoat over lavender nail designs slightly softens the overall appearance of the color, giving it a gentle, almost suede like texture that photographs beautifully under both natural and indoor lighting. Pairing a matte lavender base with one glossy accent nail creates a lovely textural contrast, something I find myself recommending often for clients who want a bit more visual interest without adding any actual artwork.
One important note I always share with clients considering matte lavender nail designs is that matte specific topcoats tend to hold up significantly better over time compared to simply skipping that final sealing step.
Lavender French Tip Nail Designs
The classic french manicure receives a beautifully romantic update when reimagined through lavender nail designs. Instead of the traditional white tip, I often use a soft lavender shade against a sheer nude or pale pink base, creating a fresh, modern twist on an otherwise timeless style.
I usually outline the tip shape using a thin striping brush, keeping the line clean and precise for a polished, professional finished look. Adding a tiny rhinestone or dot of silver glitter right at the point where the tip meets the base gives the design an extra touch of detail without overcomplicating the overall aesthetic.
This particular approach to lavender nail designs tends to appeal to clients who want something elegant enough for a formal event while still feeling fresh and a little different from a standard, more traditional white tipped french manicure.
Lavender Ombre Nail Designs For A Gradient Effect
Ombre effects translate beautifully into lavender nail designs, creating a soft, gradual color transition that feels dreamy without being overly complicated to achieve. A popular combination involves fading from a deeper lavender near the cuticle into a much paler, nearly white lavender near the tips.
I usually create this effect using a makeup sponge to blend two or three shades of lavender together, dabbing gently to create a soft, diffused transition rather than a harsh visible line between colors. This technique works particularly well on longer nails, where there is more surface area for the gradient to fully develop and show off the subtle color shift.
Glitter ombre offers another lovely variation within lavender nail designs, where the gradient transitions from a solid lavender base into sparkling silver or iridescent glitter near the tips, adding a gentle sparkle that still feels cohesive with the overall soft, romantic palette.
Also Read : Best Simple Nail Art Ideas That Look Salon Fancy
Floral Lavender Nail Designs For A Feminine Touch
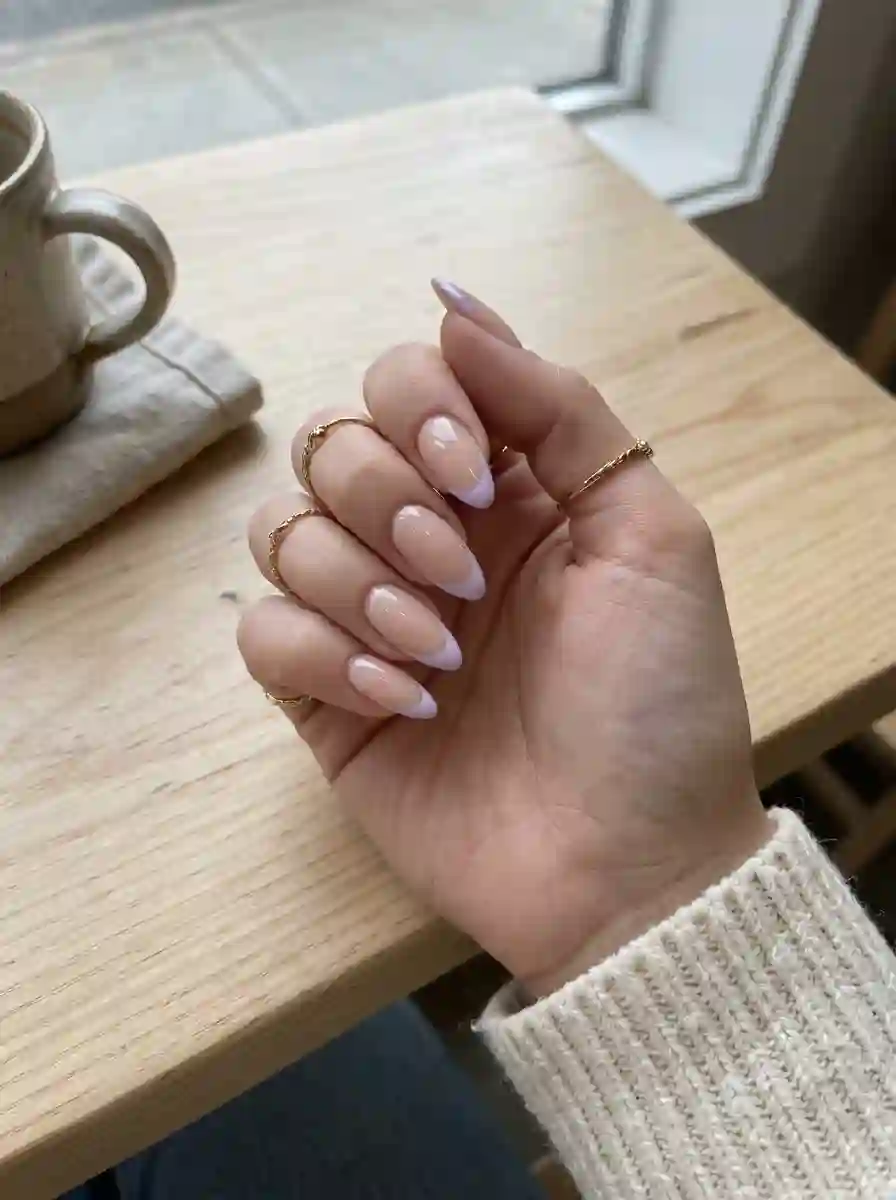
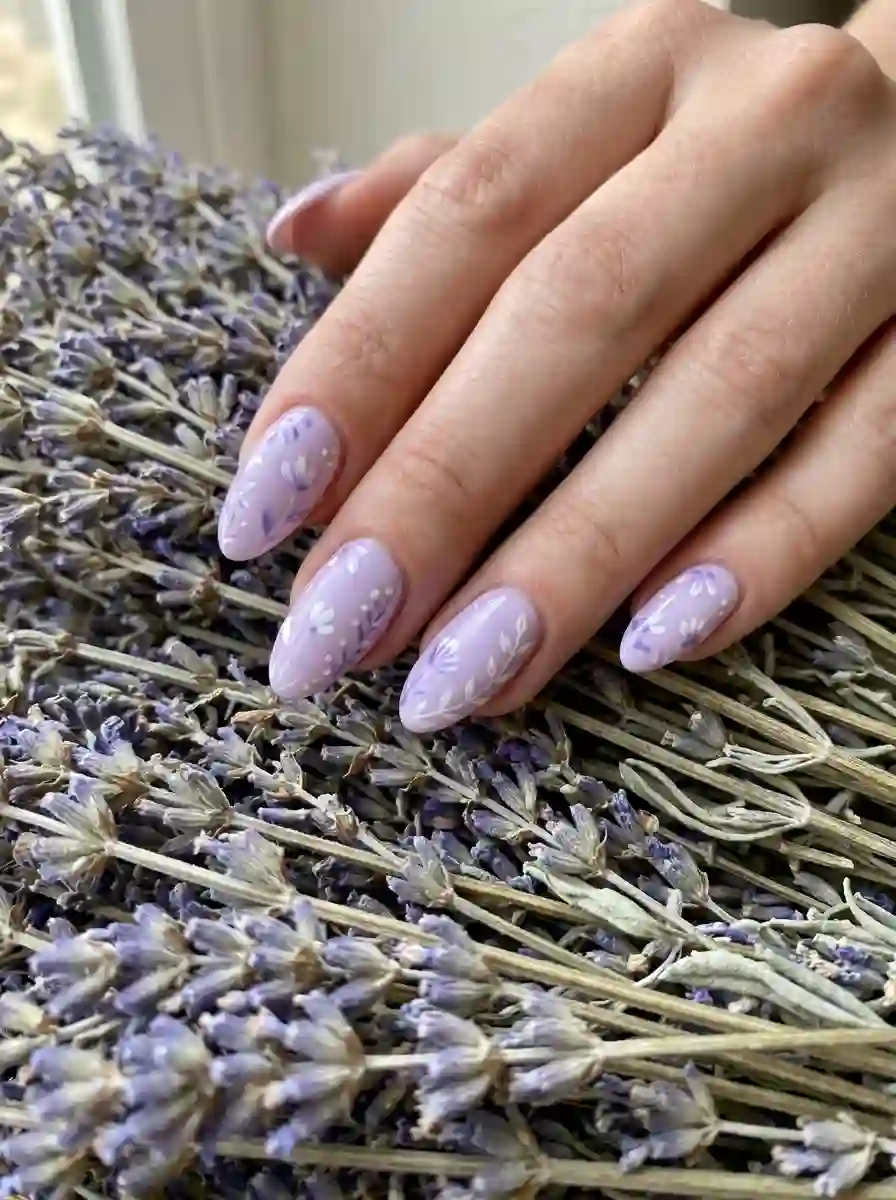
Floral details pair naturally with lavender nail designs, almost as if the color itself was designed specifically to complement delicate flower illustrations. Small, simple florals work especially well against a lavender base, since the soft background color allows even minimal detailing to stand out beautifully.
I usually paint a basic five petal flower using a dotting tool or thin brush, starting with small oval shaped petals arranged in a circle, then adding a tiny dot of contrasting color in the center. Keeping florals simple tends to look more elegant within lavender nail designs compared to overly detailed designs, which can sometimes feel busy against such a soft, muted background.
This style pairs beautifully for spring and summer occasions, though a more muted, dusty lavender with subtle floral detailing also works wonderfully for fall, proving this particular design approach genuinely transitions across the entire year.
Lavender Marble Nail Designs
Marble effects translate beautifully into lavender nail designs, creating a soft, artistic texture that feels both elegant and a bit unexpected. Swirling lavender and white together produces a pattern reminiscent of soft storm clouds or delicate natural stone.
I usually create this effect using a fine detail brush to drag and swirl thin lines of white polish through a wet lavender base before it fully dries, allowing the colors to blend naturally rather than forming sharp, defined lines. No two marble designs ever look exactly the same, which is part of what makes this particular take on lavender nail designs feel so personal and unique for each client who chooses it.
This technique works beautifully as a full set or reserved for just one or two accent nails within a broader collection of solid lavender nails, depending on how much visual detail a client is looking for in their finished design.
Lavender Nail Designs With Metallic Accents
Pairing lavender with metallic accents instantly elevates even the simplest lavender nail designs into something that feels a bit more special. Silver and chrome details lean into a cooler, icier aesthetic, while gold accents create a surprisingly warm, luxurious contrast against the soft purple base.
I often apply chrome powder or gold foil to just one or two accent nails within an otherwise solid lavender set, keeping the overall look balanced rather than overwhelming. Sometimes I add a thin metallic line running along the cuticle, almost like a subtle reverse french tip, which gives lavender nail designs a polished, finished appearance without requiring extensive additional detail work.
Clients consistently love this particular approach because it feels dressed up and intentional while still remaining versatile enough for both everyday wear and more formal occasions like weddings or holiday parties.
Lavender Nail Designs With Glitter And Shimmer
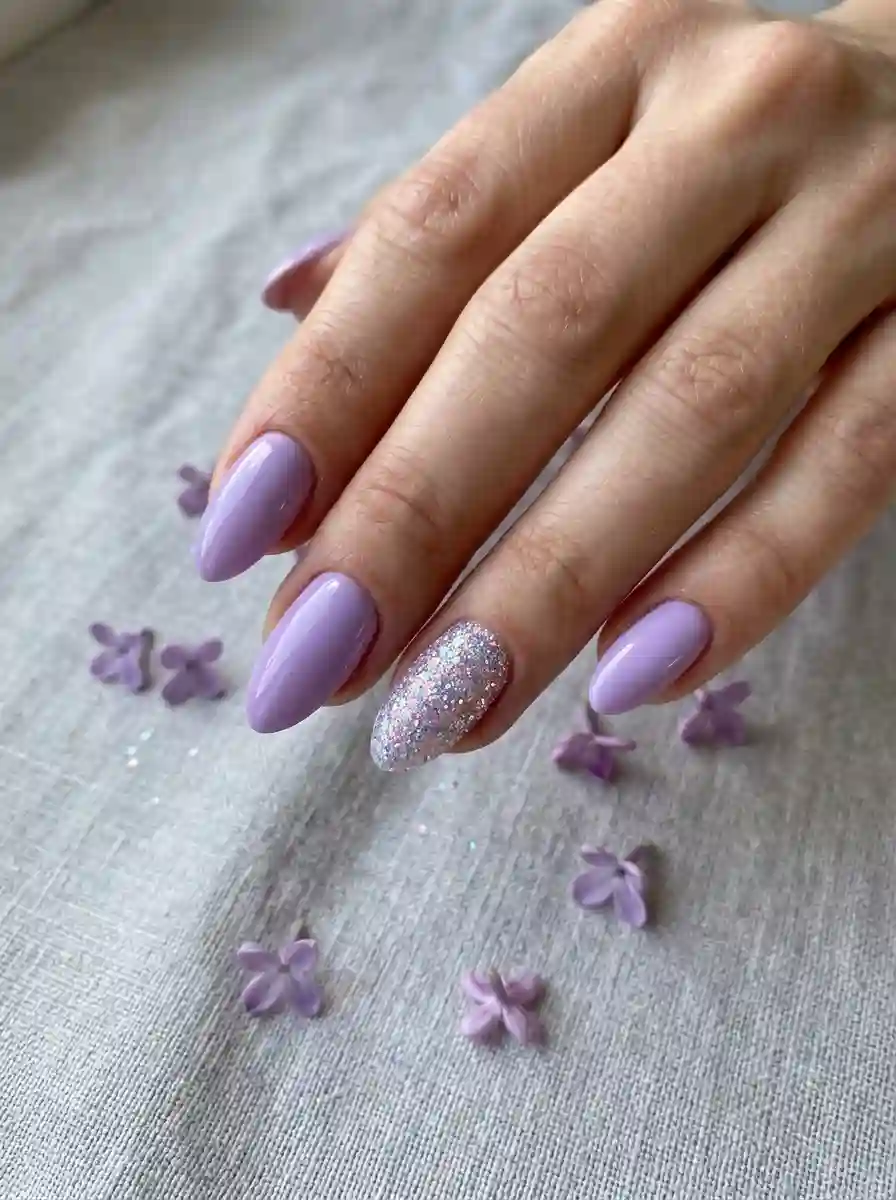
Glitter adds an instant element of sparkle to lavender nail designs without overpowering the gentle, romantic quality that makes this color so appealing in the first place. Iridescent and holographic glitters work particularly well against lavender, since they shift and catch light in a way that complements the soft, dreamy undertone of the base color.
I often apply glitter as a gradient near the tips of the nail, allowing the sparkle to fade gently into the solid lavender base closer to the cuticle. This technique gives lavender nail designs a soft, shimmering effect without covering the entire nail in glitter, which can sometimes feel overwhelming depending on a client’s personal style preferences.
Alternatively, a full glitter accent nail paired with solid lavender on the remaining fingers offers a similar sparkling effect while keeping most of the overall set clean and understated.
Negative Space Lavender Nail Designs
Negative space techniques pair beautifully with lavender, creating a modern, artistic effect where small sections of the natural nail remain unpainted within an otherwise solid lavender design. This technique works particularly well for clients who want their lavender nail designs to feel a bit more edgy or contemporary compared to a traditional full coverage manicure.
I usually use thin striping tape to mask off small geometric shapes before applying the lavender polish, then carefully remove the tape once the polish has dried to reveal clean, crisp lines of exposed natural nail underneath. Stars, triangles and simple curved lines all work beautifully within this particular approach to lavender nail designs.
This technique also tends to make the overall manicure feel lighter and more delicate, since the exposed sections of natural nail break up the solid color in a visually interesting way without requiring any additional polish colors at all.
Lavender Nail Designs For Short Nails
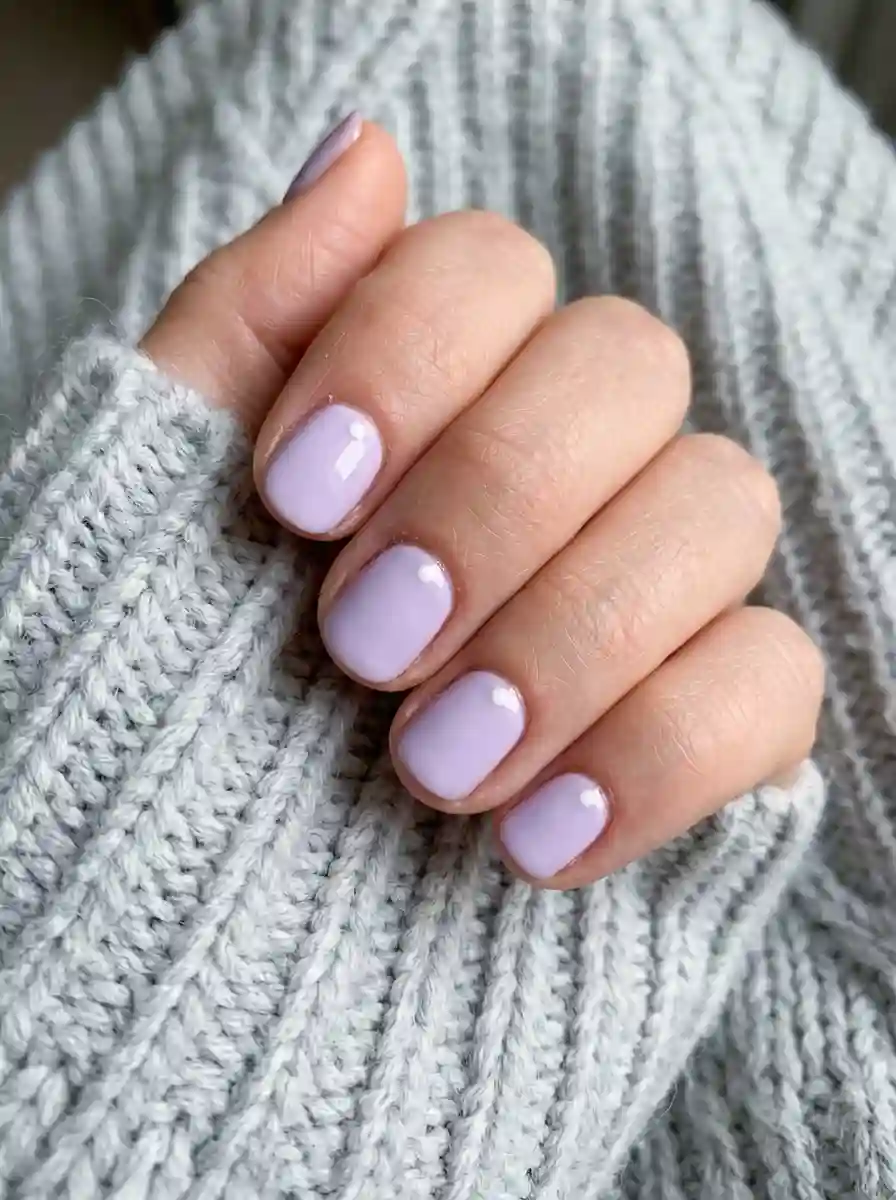
A common question I hear involves whether lavender nail designs work well on shorter nail beds, and the answer is absolutely yes. In fact, I often find that lavender looks especially fresh and clean on shorter nails, since the soft, muted tone avoids the slightly heavier appearance that some bolder or darker colors can sometimes create on a smaller canvas.
For shorter nails, I usually keep any additional detail concentrated near the cuticle rather than spreading it across the entire nail surface. Small details like tiny white dots, a thin metallic line or a single miniature flower near the base all work beautifully on shorter lavender nail designs without appearing cramped or overly busy.
Must Read : White Nail Design: 40 Fresh Ideas, Expert Tips and a Complete How-To Guide
Lavender Nail Designs For Long And Almond Shaped Nails
On longer almond or coffin shaped nails, lavender nail designs offer significantly more room to experiment with detailed work. I love using the extra surface area for larger floral illustrations, more developed ombre gradients or subtle marble effects that incorporate multiple shades of lavender and white together within the same set.
Negative space designs also work beautifully on longer nails within this color family, where a small unpainted section creates visual interest against the solid lavender background without requiring heavy, elaborate detailing across every single nail. French tips, mentioned earlier, also particularly shine on longer nails, since the extended length gives more room to create a clean, visible tip line that really stands out.
Lavender Nail Designs For Acrylic And Gel Extensions
Clients frequently ask whether lavender nail designs translate well onto acrylic or gel extensions, and the answer is definitely yes. Extensions actually provide additional surface area, which works especially well for more detailed designs like marble effects, floral illustrations or ombre gradients within this particular color palette.
For acrylic sets, I typically recommend an almond or coffin shape, since the elongated surface really allows lavender nail designs to show off any additional detailing beautifully. Gel extensions offer a slightly more natural, flexible feel while still providing plenty of length for detailed nail art if desired.
Regardless of which extension type you choose, achieving a smooth, even base coat matters significantly when working with lavender, since any unevenness in application tends to show through fairly clearly against this particular pastel tone.
How To Apply Lavender Nail Designs At Home
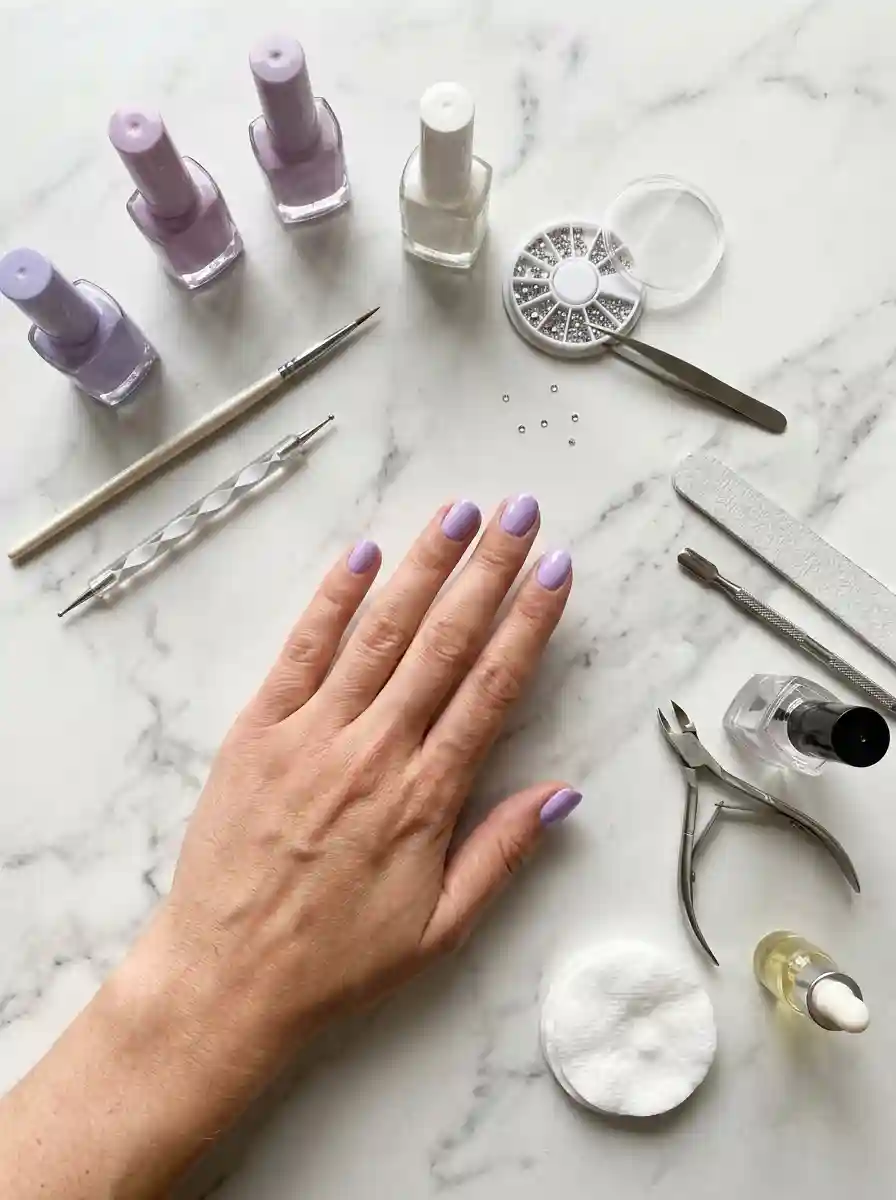
You do not need professional training to recreate lavender nail designs at home, though a bit of patience definitely helps, especially given how much lighter shades tend to show any application mistakes. Over the years I have picked up several tricks that make this process significantly easier for anyone attempting it themselves.
Start with properly prepped nails. Gently push back your cuticles, lightly buff the nail surface and wipe away any oils using rubbing alcohol before applying polish. This step matters quite a bit for lavender nail designs, since any bumps or ridges on the natural nail tend to show through pale polish much more noticeably than they would under something darker.
Apply a good quality base coat first, then two to three thin coats of your chosen lavender shade, allowing each layer to dry fully before moving to the next. Once your base color is completely set, that is when you can begin adding any chosen details, whether that is a floral accent, a glitter gradient or a simple metallic line.
Step By Step Guide For Lavender Nail Designs
- Start with clean, dry nails and gently push back the cuticles.
- Apply a thin base coat and allow it to dry completely.
- Paint two to three thin coats of your chosen lavender shade, letting each layer dry before adding the next.
- Add your chosen detail, whether that is florals, glitter or a metallic accent line.
- Seal everything with a glossy or matte topcoat depending on your preferred finish.
- Clean up any excess polish around the cuticles using a small brush dipped in acetone.
Following these steps carefully makes a noticeable difference in how polished and professional your finished lavender nail designs end up looking, even for a first attempt at home.
Tools And Products I Use For Lavender Nail Designs
Over the years I have built up a small collection of tools that make creating lavender nail designs significantly easier, both in my studio and for clients recreating simpler looks at home. A fine detail brush remains essential for anything beyond a solid colored manicure, allowing for clean lines when painting florals, geometric patterns or metallic accents.
Striping tape has become one of my favorite shortcuts for achieving crisp, straight lines on lavender nail designs without needing perfectly steady hands. I also always keep a small selection of white polish, silver chrome powder and fine glitter on hand, since these additions can completely transform a simple lavender base into something that feels much more special and intentional for a particular occasion.
A good dotting tool also comes in handy for adding small accent details, like tiny flower centers or scattered dots, which work beautifully as a finishing touch on otherwise minimalist lavender nail designs.
How To Make Lavender Nail Designs Last Longer
There are a few habits I always recommend to help lavender nail designs last as long as possible, regardless of the specific style or finish chosen. Applying cuticle oil daily helps keep the surrounding skin healthy and prevents the polish from lifting prematurely at the edges, which tends to happen faster with lighter pastel shades if the nail bed underneath is dry or brittle.
Using a gel based topcoat rather than a standard one also makes a noticeable difference in wear time, particularly important for lighter lavender shades where even small chips tend to show up more noticeably against the pale background. Wearing gloves while washing dishes or cleaning also helps protect the polish from hot water and harsh soap, both of which can weaken polish adhesion over time.
Taking short breaks between gel applications allows your natural nails to recover their strength and moisture levels, which ultimately helps any future lavender nail designs look better and last longer once you reapply.
Pairing Lavender With Other Colors
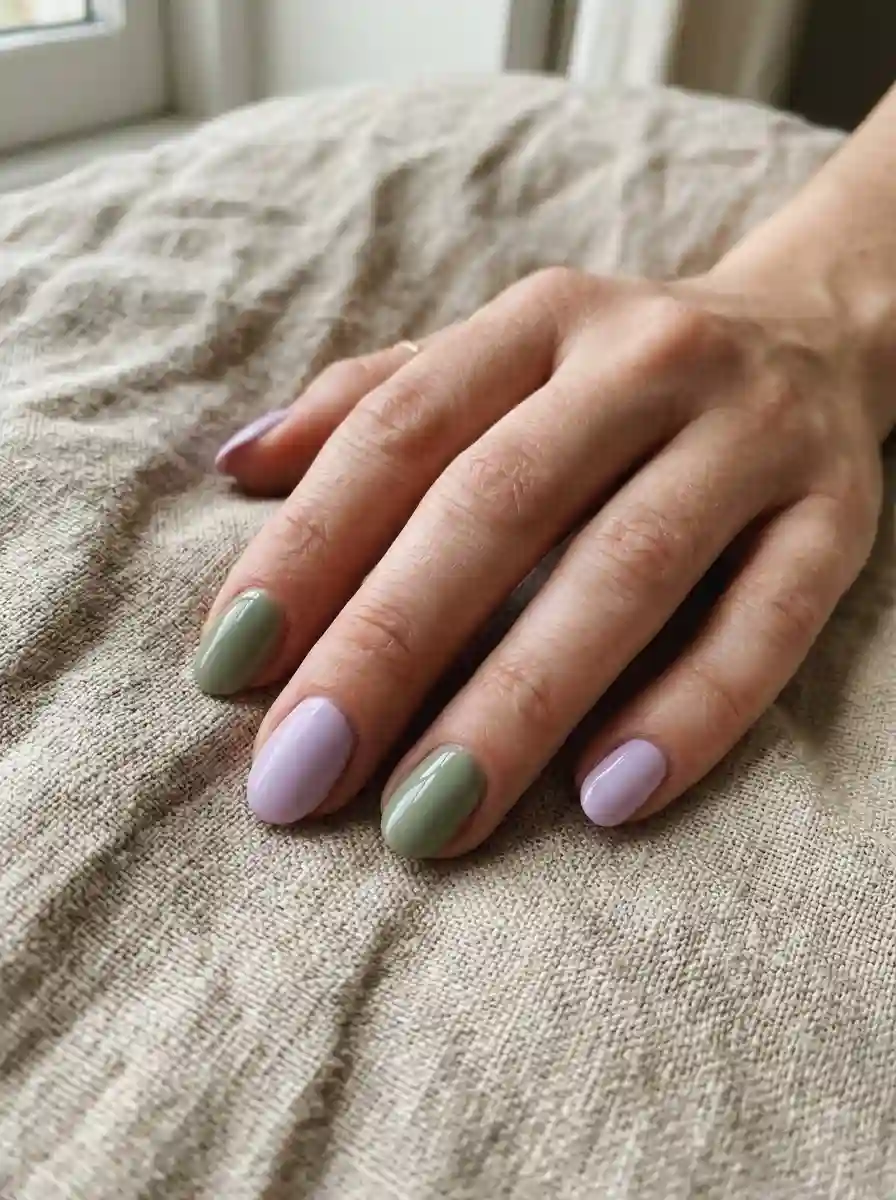
Lavender pairs surprisingly well with a wide range of other colors, which is part of what makes lavender nail designs feel so versatile throughout the year. Lavender and nude together create a soft, balanced, professional look, with lavender serving as a gentle accent against a neutral base.
Lavender and sage green offer a slightly more unexpected pairing that has grown in popularity recently, combining two muted, calming tones for a design that feels fresh and a little bit unique compared to more traditional color combinations. For a bolder contrast, lavender paired with a deep charcoal or black accent nail creates a striking, modern look that still maintains an overall soft and elegant feeling.
Silver and white both work as reliable neutral partners for lavender nail designs as well, enhancing the cool, icy quality of the color without introducing any competing warmth into the overall palette.
Read Also : Gorgeous Gray Nail Ideas That Will Instantly Upgrade Your Manicure Game
Mistakes To Avoid When Trying Lavender Nail Designs
After years of creating lavender nail designs professionally, I have noticed a few common mistakes that tend to come up repeatedly, particularly among clients attempting this look at home for the first time. One frequent issue involves choosing a lavender shade without testing it against your actual skin tone first, which can sometimes result in a color that looks washed out or slightly grey once applied.
Another common mistake involves applying polish too thin in an attempt to avoid streaking, which often results in patchy, uneven coverage that requires additional coats to correct. Skipping a proper base coat is another issue I see often, since pastel shades like lavender can sometimes leave a faint tint on the natural nail if applied without a protective barrier underneath.
Rushing the drying process between layers is another frequent mistake, particularly with more detailed lavender nail designs that involve a base color, additional artwork and a final topcoat, each of which needs proper time to set before moving to the next step.
Lavender Nail Designs For Nail Art Beginners
If you are completely new to nail art, lavender nail designs actually offer a wonderfully approachable starting point. The soft, muted shade feels forgiving for beginners, especially when kept simple with just a solid color application rather than attempting detailed artwork right away.
I usually recommend beginners start with a clean, solid lavender manicure across all nails, then slowly introduce one small detail, like a tiny white dot or a simple accent nail featuring fine glitter. Once that feels comfortable, you can gradually build toward slightly more detailed lavender nail designs, like small florals or soft ombre gradients.
Practicing on a paper nail wheel before attempting your actual nails remains a smart way to build confidence with a detail brush, especially for anyone feeling nervous about trying something new for the first time.
Lavender Nail Designs For Weddings And Special Occasions
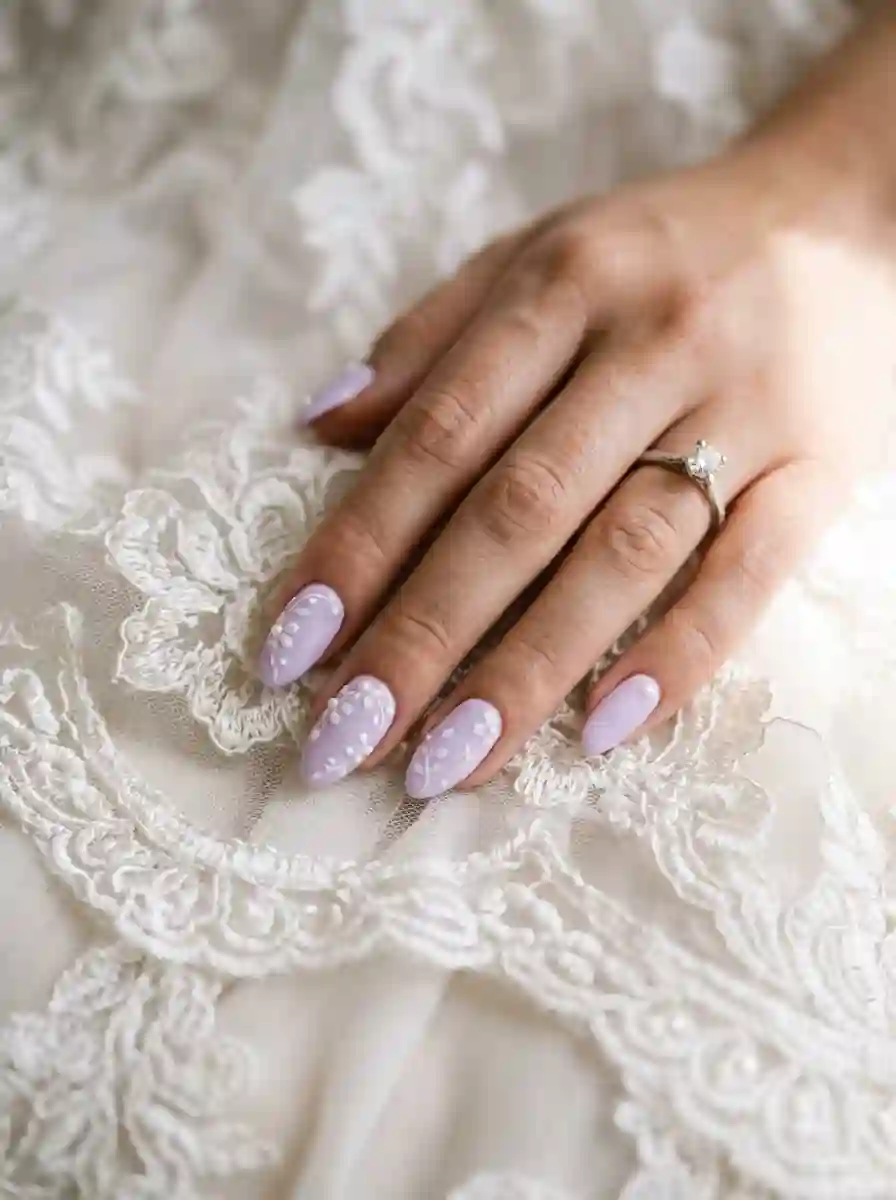
Lavender nail designs have become an increasingly popular choice for weddings, offering a soft, romantic alternative to traditional white or nude bridal manicures. Many brides specifically choose lavender when their wedding color palette includes purple tones, though the shade works beautifully even outside of that specific context, simply because it photographs so elegantly in wedding photography.
For bridal lavender nail designs specifically, I often add small embellishments like tiny pearls, delicate rhinestones or subtle floral detailing to elevate the overall look without straying too far from a classic, timeless aesthetic. These small details photograph beautifully in wedding photos while still feeling appropriate and elegant in person throughout the entire celebration.
Beyond weddings, lavender nail designs also work wonderfully for other special occasions like bridal showers, garden parties or spring and summer formal events where a soft, romantic color palette feels particularly fitting.
Pairing Lavender Nail Designs With Your Outfit
I always encourage clients to think about their lavender nail designs alongside their overall wardrobe, since this particular shade pairs beautifully with nearly any color palette imaginable. White, cream, soft grey and even denim all complement lavender nail designs wonderfully, creating a cohesive, put together look regardless of the occasion.
For a bolder outfit choice, lavender nail designs also work surprisingly well against richer colors like emerald or deep burgundy, creating a lovely, unexpected contrast that still feels soft and intentional. Even a simple outfit of jeans and a basic white top feels instantly more polished and considered with a well executed set of lavender nail designs.
Final Thoughts On Lavender Nail Designs
After creating lavender nail designs for clients across so many different seasons and occasions, I can honestly say this particular color deserves every bit of the attention it has received in recent years. There is something genuinely satisfying about watching a client discover just how versatile and flattering lavender can actually be, far beyond what they initially expected from a simple pastel shade.
Whether you prefer something minimal like a solid matte lavender manicure, or something more detailed like a hand painted floral design paired with delicate silver accents, there is a version of lavender nail designs that fits your personal style and comfort level. My biggest piece of advice, both as someone who creates these designs regularly and someone who genuinely loves this particular color, is to trust that soft does not mean boring. Lavender has more range than most people give it credit for, and once you experiment with it, it quickly becomes one of the most reliable shades in your entire nail polish collection.
Frequently Asked Questions
What skin tones suit lavender nail designs best?
Lavender flatters nearly every skin tone, though lighter skin often pairs well with pale lilac, while deeper skin tones tend to look striking with richer, more saturated lavender shades.
How do I make lavender nail designs last longer?
Using a gel topcoat, applying cuticle oil daily and avoiding harsh hot water while cleaning are the most effective ways to extend the wear time of lavender polish.
Can lavender nail designs work for short nails?
Yes, short nails handle lavender beautifully. Keeping any additional detail like dots or thin lines concentrated near the cuticle helps the design stay proportionate.
What finish looks best for lavender nail designs?
Both glossy and matte finishes work beautifully. Glossy offers a classic, polished look, while matte gives a softer, more romantic and velvety texture.
How many coats of lavender polish do I need?
Most lavender polishes require two to three thin coats for full, even opacity, depending on the specific formula and depth of the shade chosen.
Can I do lavender nail designs on acrylic extensions?
Yes, acrylic extensions provide extra surface area, making them an excellent canvas for more detailed lavender designs like florals or ombre gradients.
What nail shape works best for lavender nail designs?
Almond and coffin shapes showcase detailed designs beautifully, though lavender nail designs look elegant on virtually any nail shape, including short and square nails.
Does lavender polish stain the natural nail?
Lavender is generally less prone to staining compared to much darker colors, though using a base coat is still recommended for added protection.
Is matte or glossy better for lavender nails?
Both look lovely, and the choice really comes down to personal preference and whatever overall mood you want your manicure to convey for the occasion.
3 Comments